The Apple Cider Cheese Ball is a fun and tasty twist on the classic party snack. It’s creamy and cheesy with just the right hint of apple cider sweetness, rolled in crunchy nuts or your favorite toppings. The flavors mix together in a way that makes every bite a little surprise of tangy, creamy, and crunchy textures.
I love making this cheese ball when we have friends over because it’s always a hit and gets people talking. It’s easy to put together, and I find that the apple cider adds a fresh touch that lifts the whole thing without being too sweet. Plus, it looks so cute on the platter, especially when you decorate it with extra chopped nuts or some fresh herbs.
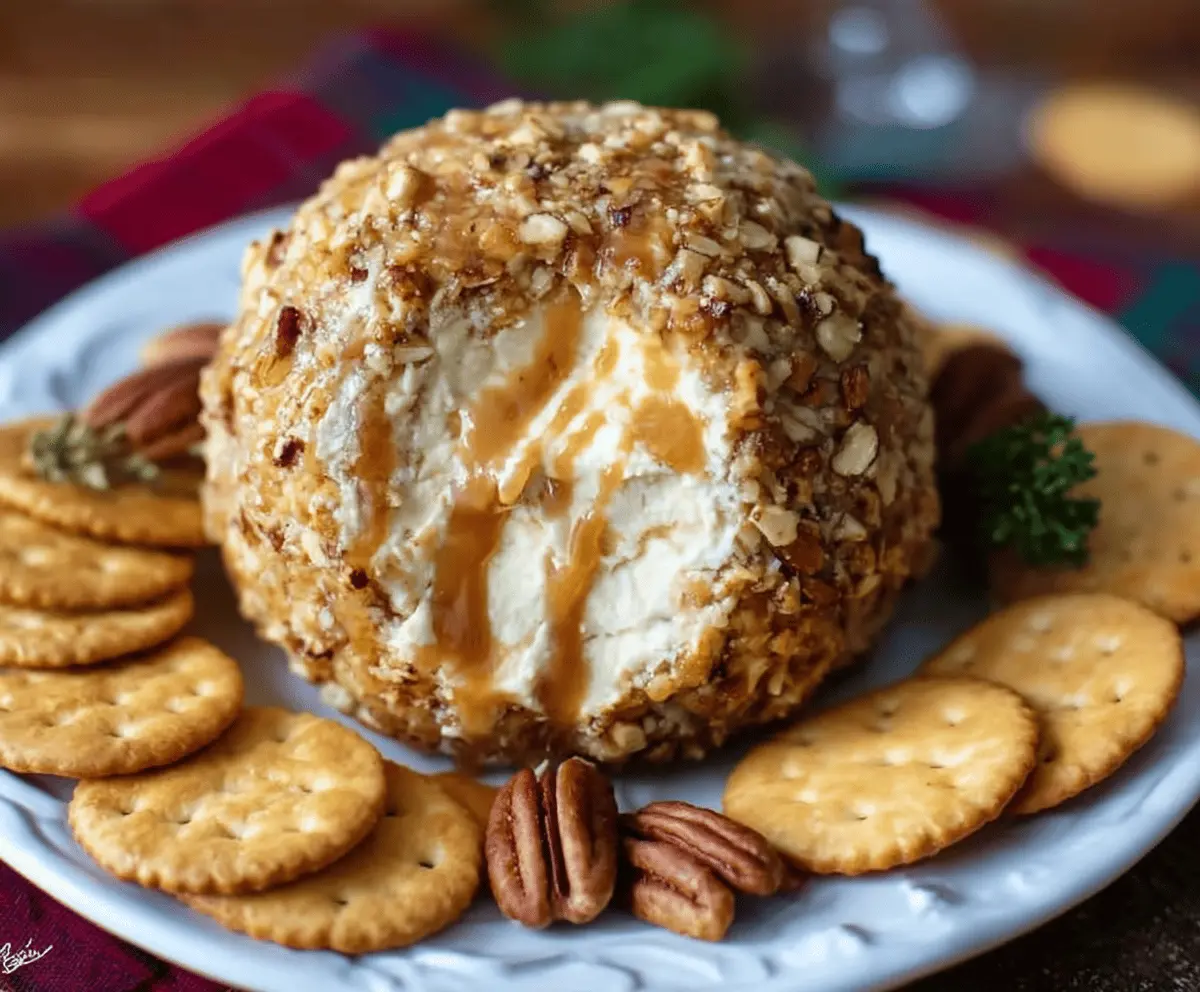
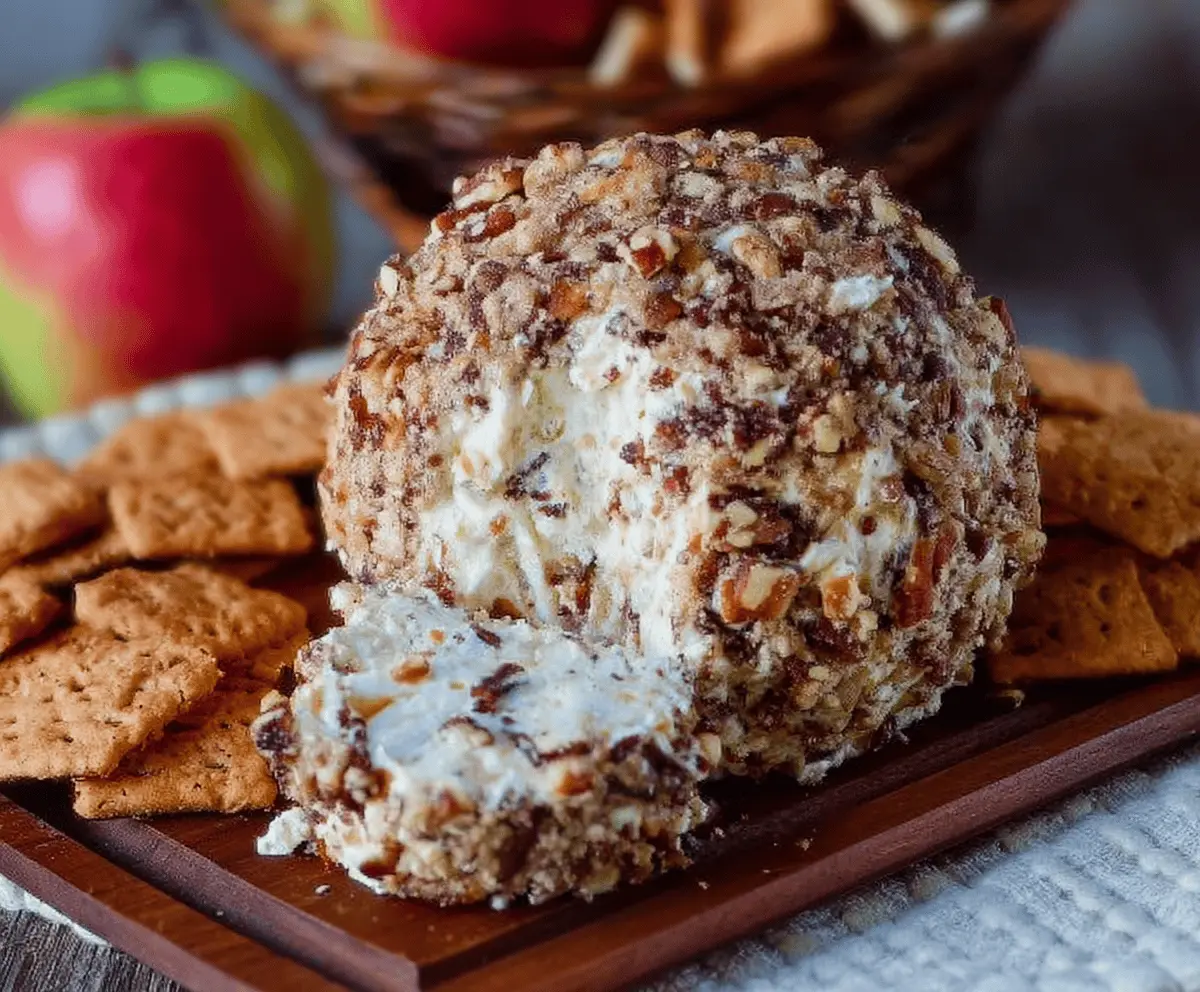
My favorite way to serve it is with a mix of crackers and apple slices for dipping. The crisp apple pairs perfectly with the smooth cheese, making every dip feel special. It’s a simple snack that’s great for any gathering, and it’s always fun to watch everyone enjoy it as the center of the table.
Key Ingredients & Substitutions
Cream Cheese: This gives the cheese ball its creamy base. Soften it well for easy mixing. For a lighter option, use Neufchâtel cheese or a dairy-free cream cheese if you prefer vegan.
Sharp White Cheddar: Adds the main cheesy flavor and some bite. You can swap with extra sharp cheddar or a mix of cheddar and Monterey Jack for a milder taste.
Apple Cider: This adds a subtle tang and sweetness that makes the cheese ball unique. If you don’t have apple cider, try apple juice or a splash of apple vinegar diluted with a little maple syrup.
Apple Pie Spice: Brings warm notes like cinnamon and nutmeg. You can use your own mix of cinnamon and a pinch of allspice or ground cloves to match.
Nuts for Coating: Pecans and walnuts are great for crunch and flavor. If you have allergies or preferences, crushed pretzels or toasted breadcrumbs work well too.
How Do You Make a Smooth, Well-Shaped Cheese Ball?
Getting the cheese ball to hold together and look nice can be tricky. Here’s how I do it:
- Make sure the cream cheese is fully softened to mix smoothly with the shredded cheese.
- Mix the ingredients thoroughly by hand or with a sturdy spoon until evenly combined.
- If the mixture feels too soft, chill it for 30 minutes, then shape again—it firms up nicely once cold.
- Use plastic wrap to help form a tight ball by scooping the mixture onto it and gathering the wrap around, pressing gently.
- Roll the ball evenly in chopped nuts, pressing them gently into the surface for good coverage.
- Refrigerate the formed ball for at least 2 hours or overnight—this helps everything set and flavors blend.
Equipment You’ll Need
- Mixing bowl – big enough to combine all ingredients comfortably without spilling.
- Electric mixer or sturdy spoon – helps blend cream cheese and cheddar smoothly.
- Plastic wrap – great for shaping the cheese ball into a perfect round and easy cleanup.
- Small plate or shallow bowl – for spreading out nuts to coat the cheese ball evenly.
- Serving board or platter – to present your cheese ball with crackers and apple slices nicely.
Flavor Variations & Add-Ins
- Add cooked bacon bits for a smoky, salty contrast that pairs nicely with the sweetness of apple cider.
- Mix in dried cranberries or chopped dried apricots for a fruity touch that adds chewiness and color.
- Use smoked gouda instead of cheddar for a bolder, richer cheese flavor.
- Sprinkle fresh chopped rosemary or thyme on the nuts for an earthy note that complements the apple spices.
Apple Cider Cheese Ball
Ingredients You’ll Need:
- 8 oz cream cheese, softened
- 1 cup shredded sharp white cheddar cheese
- 1 tablespoon apple cider
- ½ teaspoon apple pie spice (or cinnamon and nutmeg mix)
- 1 tablespoon finely chopped fresh chives or green onions
- ¼ cup finely chopped dried apples or fresh grated apple (optional, for texture)
- 1 teaspoon honey or maple syrup (optional, for subtle sweetness)
- 1 cup chopped pecans or walnuts (for coating)
- Crackers or apple slices, for serving
How Much Time Will You Need?
This recipe takes about 10 minutes for preparation and mixing, plus a minimum of 2 hours chilling time to let the flavors meld and the cheese ball firm up. Overnight chilling works even better if you have the time!
Step-by-Step Instructions:
1. Mix the Cheeses and Flavors:
In a large bowl, combine the softened cream cheese and shredded cheddar cheese. Mix them well until smooth and creamy. Then, stir in the apple cider, apple pie spice, chopped chives, and honey or maple syrup if you are using it.
2. Add Apples (Optional):
If you like, fold in the finely chopped dried apples or fresh grated apple to add some texture and a hint of fruity flavor.
3. Shape and Coat the Cheese Ball:
Using your hands or a piece of plastic wrap, shape the mixture into a smooth ball. Then spread the chopped nuts on a plate and roll the cheese ball in them, pressing gently so it’s evenly coated.
4. Chill and Serve:
Wrap the cheese ball in plastic wrap and refrigerate for at least 2 hours until firm. When ready to serve, unwrap the cheese ball and place it on a board surrounded by crackers and apple slices for easy dipping.
Can I Use Frozen Apples for This Cheese Ball?
Yes, but make sure to thaw and drain them well before adding. Excess moisture can make the cheese ball too soft, so pat the apples dry with paper towels for best results.
How Long Can I Store the Cheese Ball?
You can keep the cheese ball wrapped tightly in the fridge for up to 4 days. Just bring it to room temperature for about 15 minutes before serving to enhance the flavors and soften it slightly.
What Can I Use Instead of Nuts for the Coating?
If you have nut allergies or prefer something different, crushed pretzels, toasted breadcrumbs, or even finely chopped crispy bacon can make a tasty and crunchy alternative coating.
Can I Make the Cheese Ball Ahead of Time?
Absolutely! Preparing it a day ahead allows the flavors to meld nicely. Just keep it well wrapped and refrigerated until you’re ready to serve.
