Halloween Graveyard Dirt Cups are a fun and spooky treat that’s perfect for Halloween parties. They usually have layers of chocolate pudding, crushed cookies that look like dirt, and gummy worms or candy tombstones to create a mini graveyard right in your cup. The mix of creamy pudding and crunchy cookie crumbs makes every bite a little adventure.
I love making these with kids because they’re easy to put together and everyone can get creative decorating their own graveyard. It’s always a hit when I surprise the kids with gummy worms peeking out of the “dirt.” Plus, using simple ingredients means you probably already have most of what you need in your pantry, making it a quick and hassle-free dessert.
To make it even more fun, I like to serve the dirt cups with little Halloween picks or spoons shaped like bones or ghosts. It adds a playful touch and gets everyone in the spooky spirit. These cups are great for sharing and always bring smiles, making the Halloween celebration a bit sweeter and a lot more memorable.
Key Ingredients & Substitutions
Oreo cookies: These are great for “dirt” because of their dark chocolate and crunchy texture. If you want a gluten-free option, try gluten-free chocolate sandwich cookies or crushed chocolate graham crackers.
Heavy cream: Whipping heavy cream creates a light and fluffy mousse. If you want a lighter version, you could use whipped coconut cream for a dairy-free alternative.
Cream cheese: This adds richness and slight tang to the mousse. For a dairy-free option, try vegan cream cheese, but keep it softened for easy mixing.
Chocolate chips & milk: Melting these forms a simple chocolate pudding. You can use dark chocolate if you prefer less sweetness or dairy-free milk like almond milk to suit your needs.
Halloween candies & tombstones: These add the fun finishing touch. Feel free to swap gummy worms for fruit snacks or use homemade cookies shaped like tombstones for a personalized touch.
How Can I Get a Smooth, Light Chocolate Mousse for My Dirt Cups?
Making the mousse is key for creamy texture without heaviness. Here’s how:
- Melt chocolate chips gently with milk over medium heat, stirring constantly so it doesn’t burn or seize.
- Let the chocolate mix cool before combining with cream cheese—hot chocolate will melt the cream cheese and ruin the texture.
- Whip the heavy cream until soft peaks form; don’t over-whip or it can become grainy.
- Fold the chocolate mixture into the cream cheese first, then gently fold in the whipped cream to keep air in the mousse.
Take your time with folding to keep the mousse fluffy and light. This will give your dirt cups a creamy, smooth mouthfeel that contrasts perfectly with the crunchy cookie layers.
Equipment You’ll Need
- Food processor or plastic bag and rolling pin – for crushing the Oreos into fine “dirt.” A food processor is faster, but a bag and rolling pin work great too.
- Medium saucepan – to melt chocolate chips smoothly without burning.
- Mixing bowls – for whipping cream, beating cream cheese, and combining ingredients separately.
- Electric mixer or hand whisk – helps whip cream to soft peaks quickly and blend cream cheese smoothly.
- Clear plastic cups or dessert glasses – perfect for showing off the layered graveyard effect.
- Spoons and spatulas – for folding mousse and layering the ingredients evenly.
Flavor Variations & Add-Ins
- Mix in instant coffee powder with chocolate pudding for a mocha twist that adds depth to the flavor.
- Swap cream cheese for mascarpone to get a richer, silkier mousse texture.
- Add crushed peppermint candies into the “dirt” for a cool, minty surprise that’s great for holiday parties.
- Use white chocolate pudding and pastel candies to create a lighter, less chocolatey version for kids who prefer vanilla flavors.
How to Make Halloween Graveyard Dirt Cups
Ingredients You’ll Need:
For the Dirt and Decoration:
- 30 Oreo cookies (or similar chocolate sandwich cookies)
- Halloween-themed candies (e.g., gummy worms, candy pumpkins, candy eyeballs)
- Edible tombstone cookies or decorations (gray cookie or fondant tombstones)
For the Creamy Mousse:
- 2 cups heavy cream
- ¼ cup powdered sugar
- ½ cup cream cheese, softened
- 1 teaspoon vanilla extract
- 1 cup semi-sweet chocolate chips
- ½ cup milk
How Much Time Will You Need?
This recipe takes about 20 minutes to prepare, plus at least 1 hour of chilling time to let the dirt cups set and flavors meld together. The layered effect and decorations make it a fun, hands-on treat.
Step-by-Step Instructions:
1. Prepare the Dirt:
Crush the Oreo cookies in a food processor until they resemble fine crumbs. If you don’t have a processor, place the cookies in a sealed plastic bag and crush them with a rolling pin. Set the crumbs aside for layering.
2. Make the Chocolate Pudding Layer:
In a small saucepan over medium heat, combine the chocolate chips and milk. Stir the mixture frequently until the chocolate melts and forms a smooth pudding-like sauce. Remove from heat and allow to cool completely.
3. Whip the Cream:
Using a chilled mixing bowl, whip the heavy cream along with the powdered sugar until soft peaks form. This will add lightness to your mousse.
4. Combine Cream Cheese and Vanilla:
In a separate bowl, beat the softened cream cheese until smooth and creamy. Add the vanilla extract and mix well.
5. Make the Chocolate Mousse:
Gently fold the cooled chocolate pudding into the cream cheese mixture. Then, carefully fold in the whipped cream until fully combined, forming a light and airy mousse.
6. Assemble the Graveyard Dirt Cups:
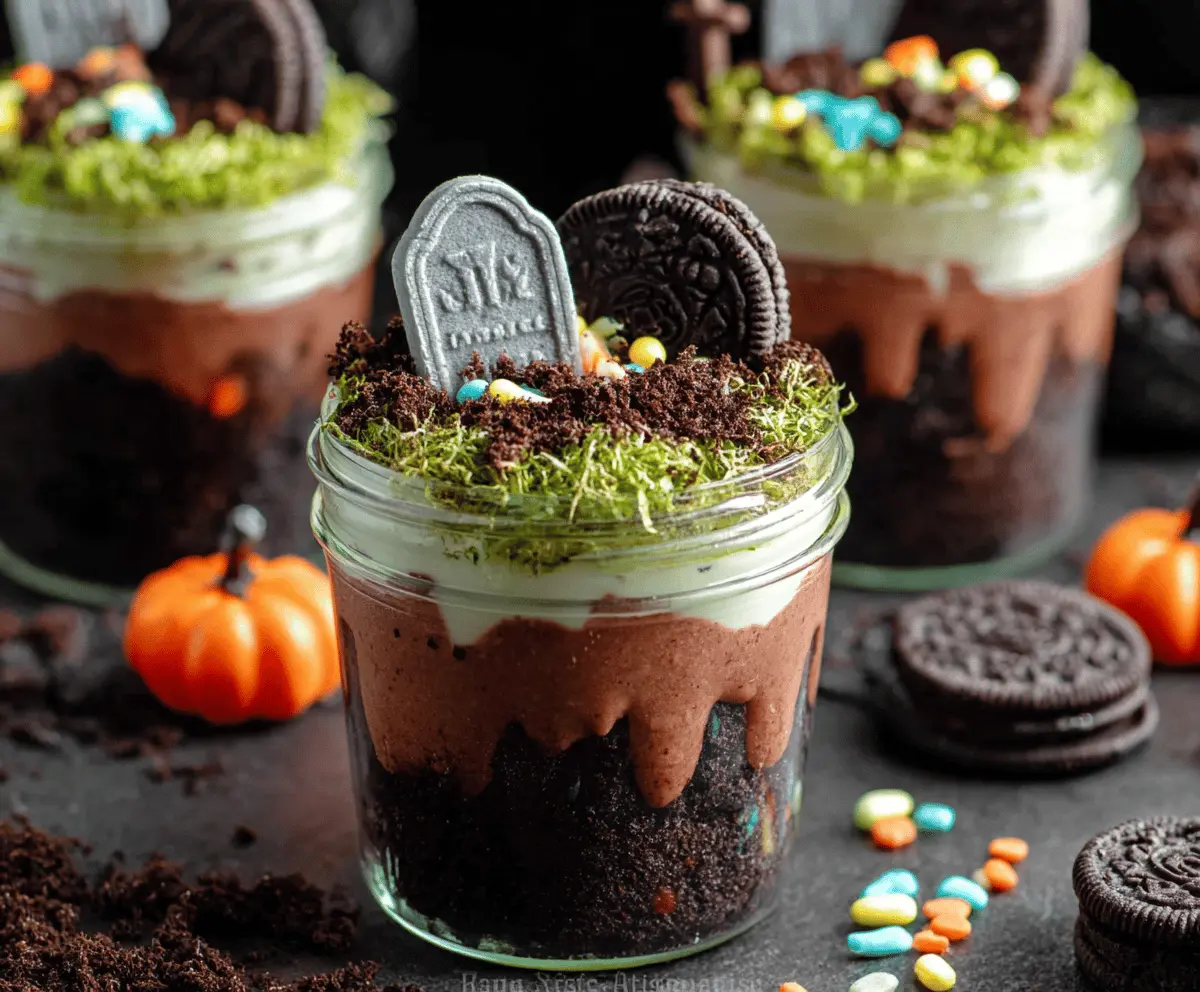
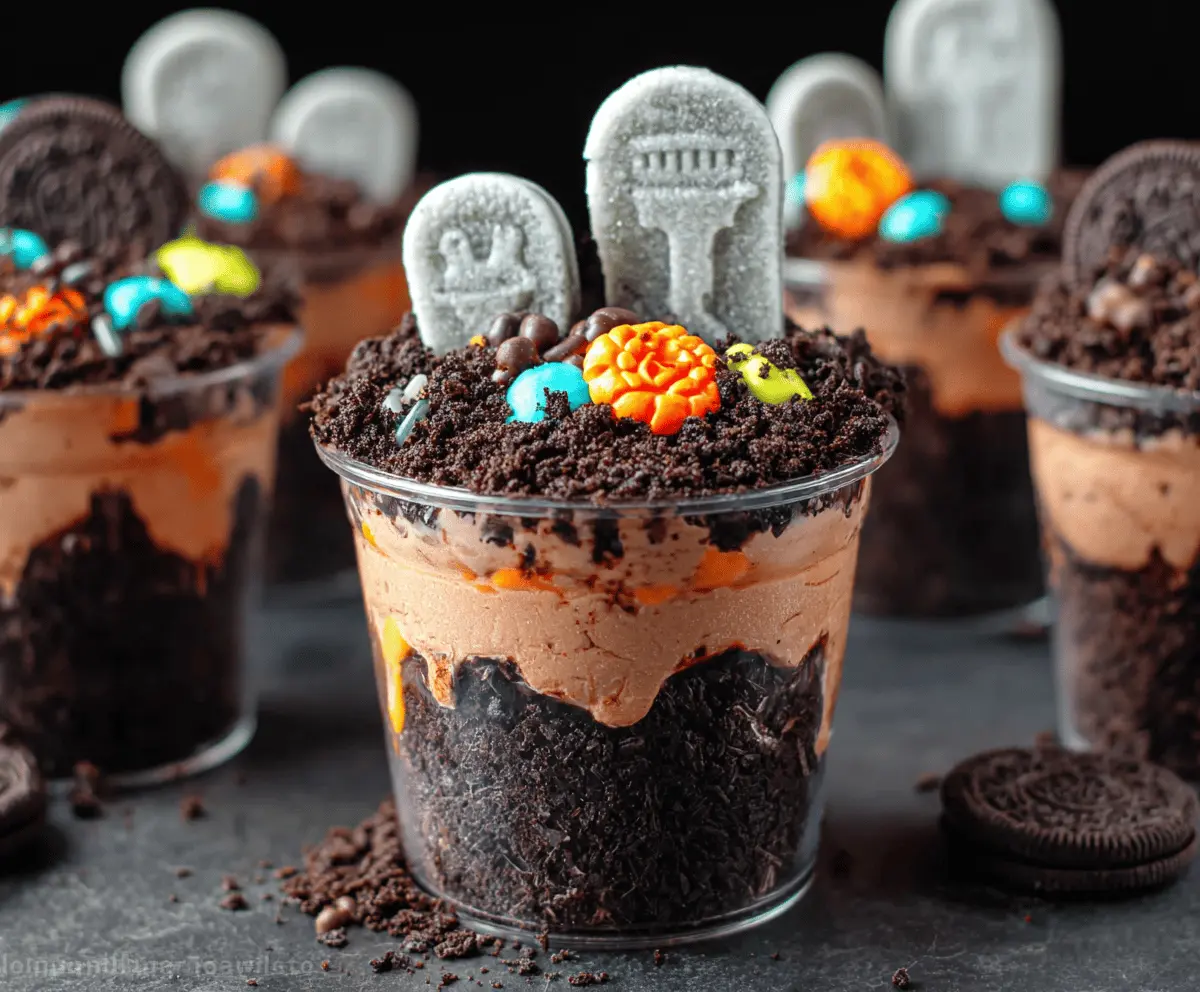
In clear cups, spoon a layer of Oreo crumbs to form the “dirt” at the bottom. Add a generous layer of chocolate mousse over the crumbs. Repeat layering once more, finishing with a thick top layer of Oreo crumbs to resemble graveyard dirt.
7. Decorate the Graveyard:
Insert edible tombstone cookies upright into the top layer to mimic gravestones. Sprinkle Halloween-themed candies, such as gummy worms and candy pumpkins, over the top for a spooky effect.
8. Chill and Serve:
Refrigerate the dirt cups for at least 1 hour before serving to allow them to set. Enjoy your creepy, delicious Halloween treat!
Can I Use Store-Bought Pudding Instead of Making Chocolate Pudding from Scratch?
Yes! You can use prepared chocolate pudding to save time. Just make sure it’s fully chilled before folding into the cream cheese and whipped cream mixture for the best texture.
How Long Can I Store These Dirt Cups?
Store the assembled dirt cups in an airtight container in the refrigerator for up to 2 days. The cookies may soften over time, so they’re best enjoyed within 24 hours for maximum crunch.
Can I Make These Ahead of Time?
Absolutely! Prepare and assemble the cups a few hours before your party, then refrigerate. This allows the flavors to meld and the mousse to set nicely.
What Can I Use If I Don’t Have a Food Processor to Crush the Oreos?
No worries—you can place the cookies in a zip-top bag and carefully crush them with a rolling pin or heavy pan until fine crumbs form. This works just as well for the “dirt” layer.
