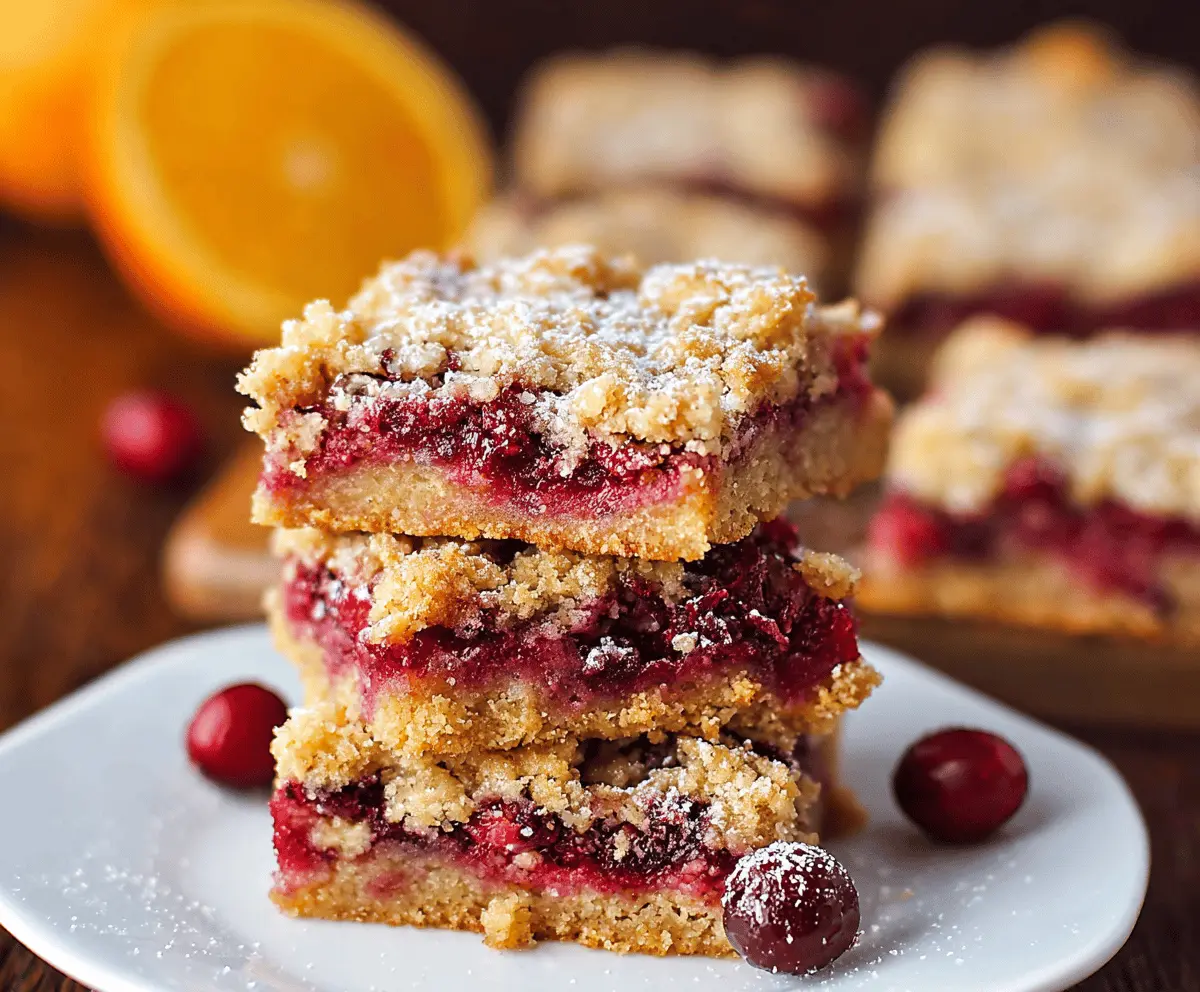
Cranberry-Orange Bars are a perfect mix of sweet and tangy, with a crumbly crust and bright bursts of cranberry and zesty orange in every bite. They have a lovely balance of flavors that feels fresh and festive, making them a great treat any time of year. The combination of tart cranberries and sweet citrus is just right, and the bars have a nice, soft texture that melts in your mouth.
I love making these bars when I want something special that’s not too fussy but still feels like a celebration. The orange zest really lifts the cranberries and gives the bars a cheerful, sunny flavor. I like to pop them in the fridge before cutting so they hold their shape when I slice them up, which also makes them super easy to enjoy as a snack or dessert.
These bars are one of those recipes that always get compliments, whether I bring them to a family gathering or enjoy them with a cup of tea on a quiet afternoon. They remind me of cozy mornings and holiday baking, and they’re just simple enough to make in a snap when you want a little homemade sweetness without a lot of fuss.
Key Ingredients & Substitutions
Cranberries: Fresh cranberries give a bright tartness that balances the sweetness. Frozen works well too — just thaw and drain to avoid extra moisture.
Orange zest and juice: Fresh is best to get that zesty brightness. If you don’t have oranges, lemon zest and juice can be a nice substitute that adds a fresh twist.
Butter: Softened unsalted butter helps create a tender, crumbly crust. You can swap with margarine or coconut oil if you prefer a dairy-free option, though texture may change slightly.
Sugar: The mix of granulated and brown sugar enhances flavor and texture. Brown sugar adds depth, but you can use all granulated sugar if needed.
Flour: All-purpose is the standard for a buttery crust. For a gluten-free version, try a gluten-free baking blend but note the texture will differ.
How Do I Get the Perfect Crumbly Crust and Topping?
The crust and crumb topping are made from the same dough, so it’s key to handle it gently. Here’s how I do it:
- Make sure butter is softened to room temperature for easy mixing but not melted.
- Cream butter and sugars until light and fluffy — this helps trap air for a tender texture.
- Add dry ingredients and mix just until combined; don’t overwork the dough.
- Press two-thirds of the dough firmly and evenly into the pan to form a solid base.
- For the topping, crumble the dough gently with your fingers to get small clumps. Spread loosely over the cranberry layer so it bakes into a crumbly, golden topping.
Remember, chilling the bars before slicing helps keep the layers intact and makes cutting cleaner. This little step makes a big difference!
Equipment You’ll Need
- 9×13-inch baking pan – perfect size for evenly baked bars and easy slicing.
- Medium saucepan – you’ll cook the cranberry filling here to soften and thicken it.
- Mixing bowls – one for the dough and one for dry ingredients to keep things organized.
- Wooden spoon or silicone spatula – great for stirring the filling and mixing the dough gently.
- Zester or fine grater – to get fresh orange zest that really brightens the bars.
- Wire rack – for cooling the bars evenly and quickly after baking.
Flavor Variations & Add-Ins
- Swap orange zest for lemon zest for a sharper citrus flavor that pairs nicely with cranberries.
- Add a handful of chopped nuts (like walnuts or pecans) to the crust or topping for extra crunch.
- Mix in a teaspoon of ground cinnamon or ginger to the cranberry filling for warm, spicy notes.
- Stir in white chocolate chips with the cranberry layer for a sweet, creamy contrast.
Cranberry-Orange Bars
Ingredients You’ll Need:
For the Filling:
- 2 cups fresh cranberries (or frozen, thawed)
- ½ cup granulated sugar
- 1 tablespoon freshly grated orange zest
- 2 tablespoons freshly squeezed orange juice
For the Crust and Topping:
- 1 ¾ cups all-purpose flour, divided
- 1 teaspoon baking powder
- ¼ teaspoon salt
- 1 cup (2 sticks) unsalted butter, softened
- 1 cup packed light brown sugar
- ½ cup granulated sugar
- 1 large egg
- 1 teaspoon vanilla extract
How Much Time Will You Need?
It takes about 15 minutes to prepare and 35-40 minutes to bake. Add extra time for cooling and optional chilling (about 1 hour), so plan around 1.5 hours total from start to finish.
Step-by-Step Instructions:
1. Prepare the Oven and Pan:
Preheat your oven to 350°F (175°C). Lightly grease a 9×13-inch pan or line it with parchment paper with an overhang on the sides for easy removal.
2. Cook the Cranberry Filling:
In a medium saucepan, mix cranberries, ½ cup sugar, orange zest, and orange juice. Cook over medium heat, stirring now and then, until cranberries burst and mixture thickens (about 10 minutes). Remove from heat and allow to cool.
3. Mix Dry Ingredients:
Whisk together 1 ½ cups flour, baking powder, and salt in a bowl.
4. Make the Dough:
In a large bowl, cream butter with brown sugar and remaining ½ cup granulated sugar until fluffy. Beat in the egg and vanilla extract until smooth. Gradually add the dry ingredients, stirring just until combined.
5. Assemble the Bars:
Press about two-thirds of the dough evenly into the bottom of the prepared pan to form the base. Spread the cooled cranberry-orange filling over the crust. Crumble the remaining dough on top to make the crumbly topping.
6. Bake and Cool:
Bake for 35-40 minutes until the top turns golden and the filling bubbles. Let the bars cool fully on a wire rack. For easier slicing and firmer bars, chill them in the fridge before cutting.
7. Serve:
Cut into squares and enjoy your delicious Cranberry-Orange Bars—perfect for a refreshing, sweet-tart treat!
Can I Use Frozen Cranberries Instead of Fresh?
Yes! Just make sure to thaw the frozen cranberries completely and drain any excess liquid before cooking the filling. This helps prevent your bars from becoming too watery.
How Do I Store Leftover Cranberry-Orange Bars?
Store leftover bars in an airtight container in the refrigerator for up to 4 days. You can enjoy them chilled or bring them to room temperature before serving.
Can I Make These Bars Ahead of Time?
Absolutely! You can bake the bars a day or two in advance. Keep them refrigerated and slice just before serving for the best texture.
What’s the Best Way to Cut the Bars Cleanly?
For neat slices, chill the bars in the refrigerator for at least an hour before cutting. Use a sharp knife and wipe it clean between each cut to keep the edges tidy.
