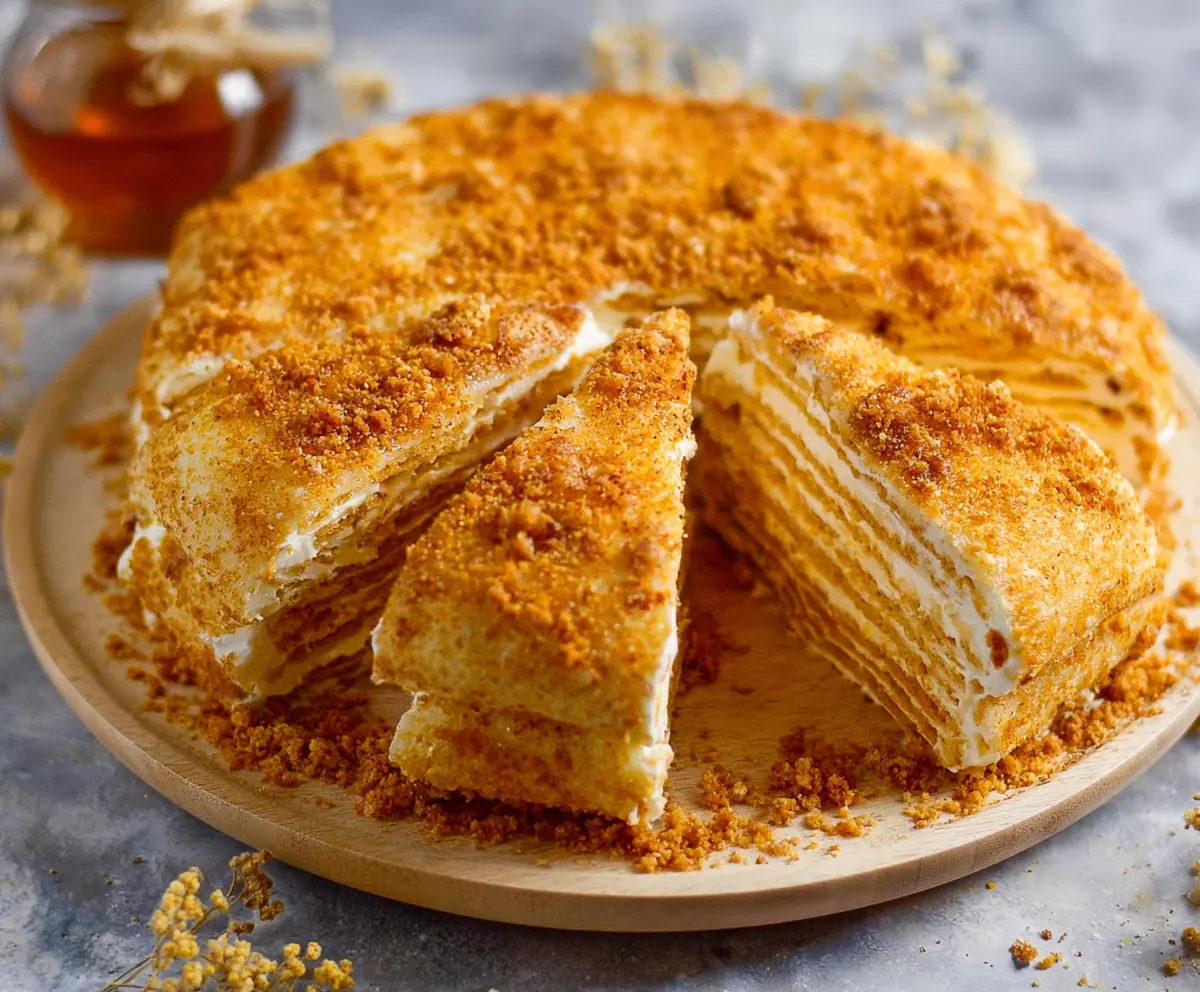
Burnt Honey Medovik is a beautiful twist on the classic Russian honey cake, featuring layers of tender cake soaked with rich, caramelized honey flavor. The burnt honey adds a deep, slightly smoky sweetness that makes this dessert extra special and unforgettable. Each bite is soft and creamy with just the right touch of crunch from the cake’s delicate layers.
I love making Burnt Honey Medovik when I want to impress friends or family because it looks fancy but is actually pretty simple to put together. The caramelized honey gives it a unique taste that’s a little different from regular honey cakes, and I think it adds a wonderful warmth and depth to the dessert.
My favorite way to serve this cake is chilled, with a cup of tea or coffee. It’s the kind of dessert where the flavors get better after sitting overnight, so I usually make it a day ahead and let it rest in the fridge. It’s a comforting treat that always brings a smile, and it’s perfect for celebrating little moments or just a cozy weekend dessert.
Key Ingredients & Substitutions
Honey: The star of this cake! Using good-quality honey makes a big difference in flavor. If you don’t have honey, you can’t truly replicate this cake, but a mild syrup like maple could be a backup in a pinch.
Butter: Unsalted butter adds richness without extra salt. You can swap for margarine if needed, but butter gives the best texture and flavor.
Flour: All-purpose flour is perfect here. I recommend sifting to avoid lumps and get smooth dough. For gluten-free, try a blend designed for baking, but the result may differ.
Sour Cream or Greek Yogurt: This makes the filling creamy and slightly tangy. Full-fat versions work best to get the right thickness. If you want a lighter option, try mixing low-fat yogurt with some cream cheese.
How Do I Get That Perfect Burnt Honey Flavor Without Burning the Honey?
It’s all about patience and attention. Burnt honey adds a rich, caramel note without bitterness, but it’s easy to go too far.
- Use low heat to slowly melt honey, butter, and sugar together.
- Stir continuously to prevent sticking and uneven burning.
- Watch the color closely—aim for a deep amber shade, not dark brown or black.
- If you overcook, the honey tastes bitter, so remove it from the heat as soon as the right color is reached.
Let the mixture cool briefly before adding eggs to avoid scrambling them. This step sets the rich flavor base for your Medovik layers.
Equipment You’ll Need
- Medium saucepan – perfect for melting and caramelizing the honey mixture evenly without burning.
- Whisk – helps blend eggs smoothly into the warm honey base without scrambling.
- Rolling pin – essential for rolling out thin and even cake layers.
- Parchment paper – makes rolling and transferring cake layers easier and prevents sticking.
- Baking sheets – for baking cake layers quickly and evenly.
- Mixing bowls – for combining the cream filling and mixing dough portions separately.
- Spatula or butter knife – great for spreading cream filling evenly between layers.
- Sharp knife or cake ring – to trim and shape the cake layers neatly.
Flavor Variations & Add-Ins
- Add a pinch of ground cinnamon or cardamom to the dough for warm, spicy notes.
- Swap sour cream with mascarpone cheese for a richer, smoother cream filling.
- Mix finely chopped toasted walnuts or hazelnuts into the cream for extra crunch and flavor contrast.
- Drizzle melted dark chocolate over the top layers for a touch of bitterness that balances the sweetness.
How to Make Burnt Honey Medovik?
Ingredients You’ll Need:
For the Burnt Honey Cake Layers:
- 1 cup (240 ml) honey
- 100 g (7 tbsp) unsalted butter
- 1 cup (200 g) granulated sugar
- 3 large eggs
- 3 cups (375 g) all-purpose flour, sifted
- 2 tsp baking soda
For the Cream Filling:
- 3 cups (720 ml) sour cream or full-fat Greek yogurt
- 1 cup (130 g) powdered sugar, sifted
- 1 tsp vanilla extract
For Garnish:
- Crumbled cake scraps (reserved from trimming layers)
- Extra honey for drizzling (optional)
How Much Time Will You Need?
You’ll spend about 30 minutes preparing and baking the layers, then 15 minutes making the cream and assembling the cake. After that, the cake needs to chill in the refrigerator for at least 6 hours or overnight so the flavors can come together and the layers soften perfectly.
Step-by-Step Instructions:
1. Burn the Honey Base:
In a medium saucepan over low heat, combine honey, butter, and granulated sugar. Stir often and patiently cook until the mixture thickens and turns a deep amber color, about 8-10 minutes. Be careful not to let it burn—it should smell caramelized and sweet. Remove from heat and let it cool slightly.
2. Prepare the Cake Batter:
Lightly beat the eggs in a separate bowl. Slowly whisk the eggs into the warm (not hot) honey mixture to prevent cooking the eggs. Add the baking soda and stir well; the mixture will foam and lighten in color. Gradually mix in the sifted flour until a soft, sticky dough forms.
3. Divide and Roll the Dough:
Divide the dough into 8 equal parts. On a floured surface or parchment paper, roll each portion into a thin circle about 8 inches (20 cm) wide. Trim edges with a plate or cake ring for neat rounds. Save the leftovers; these will be crumbled later for garnish.
4. Bake the Layers:
Preheat the oven to 350°F (175°C). Place each dough round on a parchment-lined baking sheet and bake for 3-5 minutes until golden brown. Watch closely to avoid burning. Cool the layers completely. Crumble the leftover scraps finely for decorating the cake.
5. Make the Cream Filling:
In a bowl, whisk together sour cream, powdered sugar, and vanilla extract until smooth and slightly thickened.
6. Assemble the Cake:
Place one cake layer on a plate. Spread a generous layer of cream filling on top. Continue layering cake and cream until all layers are stacked, finishing with a cream layer on top.
7. Decorate and Chill:
Press crumbled cake scraps gently all over the top and sides of the cake. Refrigerate the cake for at least 6 hours or overnight to soften the layers and let the flavors marry.
8. Serve:
Before serving, drizzle with extra honey if you like a little added sweetness and shine. Slice and enjoy with your favorite tea or coffee.
Can I Use Frozen Honey for This Recipe?
It’s best to use room temperature liquid honey. If your honey is crystallized or frozen, gently warm it in a warm water bath until it’s smooth before starting the recipe.
Can I Substitute Greek Yogurt for Sour Cream in the Filling?
Yes! Full-fat Greek yogurt works well as a tangy substitute for sour cream and will give the filling a nice creamy texture.
How Should I Store Leftover Burnt Honey Medovik?
Store the cake covered in the fridge for up to 3-4 days. The layers may soften further, making the cake even more delicious the next day!
Can I Make the Cake Ahead of Time?
Absolutely! Making the cake the day before allows the flavors to meld and the layers to soften perfectly. Just chill it covered overnight in the fridge.
