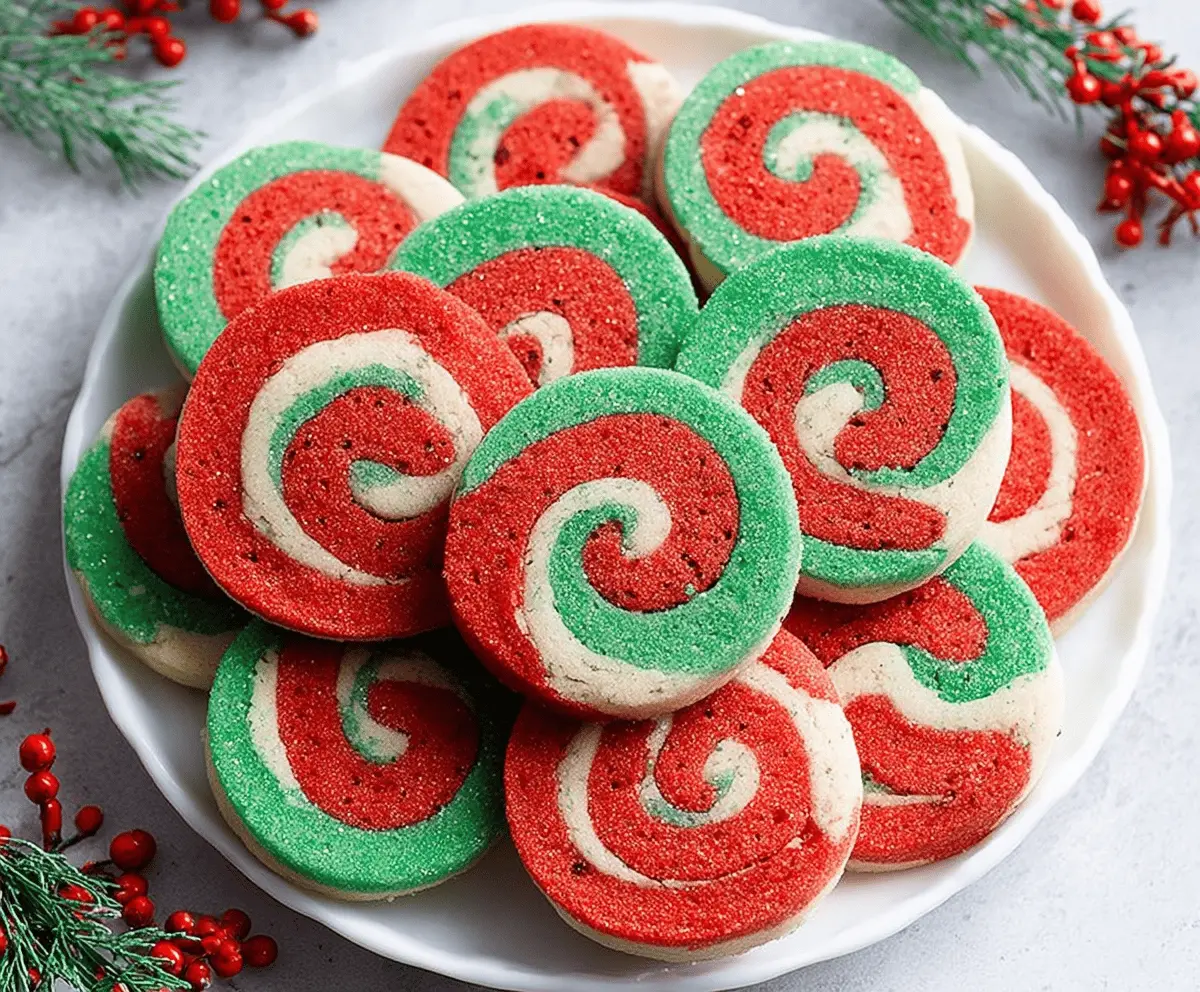
Christmas Pinwheel Cookies are a fun and festive treat perfect for the holiday season. These cookies catch your eye with their swirly red and white patterns that remind you of candy canes. They’re soft, buttery, and just the right sweet, making them a delightful snack for any Christmas celebration.
I love making these cookies with my family because rolling out the dough and watching those pinwheels take shape feels like a little holiday craft project. It’s a simple process but seeing the red and white layers come together is always so satisfying. Plus, the hint of vanilla adds a nice touch that everyone seems to enjoy.
Whenever I bake these, I like to serve them alongside a cup of hot cocoa or warm tea to make the experience extra cozy. They’re perfect for sharing, whether at a holiday party, giving as gifts, or just enjoying while decorating the Christmas tree. These cookies always bring smiles and a little sparkle to the holiday season.
Key Ingredients & Substitutions
Butter: Softened unsalted butter is the base here. I prefer unsalted so I can control the salt level. If you want, you can use margarine or vegan butter for a dairy-free option.
Food Coloring: Gel colors work best since they don’t add moisture to the dough. If you don’t have red or green, try using natural colorings like beet powder for red or matcha powder for green.
Sanding Sugar: Red (and green) sanding sugar adds a festive sparkle and slight crunch. If you don’t have these, regular granulated sugar can work, but the color and texture won’t be the same.
How Do You Roll & Chill the Dough to Get Perfect Pinwheels?
Rolling the dough layers evenly and chilling are key for clean spirals.
- Roll each dough portion to the same size and thickness on plastic wrap to avoid sticking and cleanup.
- Layer carefully and press gently to prevent air pockets, which can make the roll break during slicing.
- Wrap the roll tightly in plastic wrap and chill for at least 2 hours — this firms it up and makes slicing easier without squashing the shape.
- Use a sharp, thin knife for clean slices and cut slowly to keep the pinwheel pattern intact.
Equipment You’ll Need
- Mixing bowls – for combining your dough ingredients smoothly and easily.
- Electric mixer – helps cream butter and sugar quickly for a soft dough.
- Rolling pin – essential to roll out the colored dough evenly.
- Plastic wrap – keeps dough from sticking and helps with rolling and chilling.
- Sharp knife – for slicing the chilled dough into clean pinwheel shapes.
- Baking sheets lined with parchment paper – prevents sticking and eases cleanup.
Flavor Variations & Add-Ins
- Add a teaspoon of peppermint extract instead of vanilla for a cool holiday twist.
- Swap red or green food coloring for cocoa powder in one portion to add chocolate flavor.
- Mix in finely chopped nuts like pecans or walnuts for a crunch in the dough.
- Try using different colored sanding sugars or sprinkles to match other holiday themes.
Christmas Pinwheel Cookies
Ingredients You’ll Need:
For the Dough:
- 1 cup (2 sticks) unsalted butter, softened
- 1 cup granulated sugar
- 1 large egg
- 2 teaspoons vanilla extract
- 2 ½ cups all-purpose flour
- ½ teaspoon baking powder
- ¼ teaspoon salt
For the Color and Decoration:
- Red food coloring
- Green food coloring
- Red sanding sugar
- Optional: Green sanding sugar
How Much Time Will You Need?
This recipe takes about 20 minutes to prepare, plus at least 2 hours of chilling time to let the dough firm up. Baking only takes 10 to 12 minutes per batch, so plan for about 3 hours in total including chilling and cooling.
Step-by-Step Instructions:
1. Prepare the Cookie Dough:
Start by creaming together the softened butter and granulated sugar in a large bowl using an electric mixer until the mixture is light and fluffy. Beat in the egg and vanilla extract until combined. In another bowl, whisk the flour, baking powder, and salt together. Gradually add the dry ingredients to the butter mixture, mixing until a soft dough forms.
2. Color and Roll the Dough:
Divide the dough into three equal parts. Leave one part plain for the white layer. Add red food coloring to the second part and knead until uniformly red. Add green food coloring to the third part and knead until uniformly green. Roll each colored dough portion on plastic wrap into rectangles about 10 by 7 inches.
3. Assemble and Chill the Dough Log:
Sprinkle red sanding sugar on the red dough, and if using, green sanding sugar on the green dough, pressing the sugar lightly into the dough. Carefully stack the dough rectangles by placing the green dough on the white dough, then the red dough on top. Press the layers gently together. Starting at one long edge, roll up the stack into a tight log. Wrap the log in plastic wrap and refrigerate it for at least 2 hours or until firm.
4. Slice and Bake the Cookies:
Preheat your oven to 350°F (175°C) and line baking sheets with parchment paper. Using a sharp knife, slice the chilled dough log into ¼-inch thick rounds. Place the slices on the baking sheets about 1 inch apart. Bake the cookies for 10 to 12 minutes until the edges are set and just slightly golden. Let them cool on the baking sheet for 5 minutes, then transfer to a wire rack to cool completely. Enjoy your festive cookies!
Can I Use Gel Food Coloring Instead of Liquid?
Yes! Gel food coloring works great because it won’t add extra moisture to the dough, helping keep the texture just right. Start with a small amount and add more as needed to get vibrant colors.
How Long Can I Store the Dough Before Baking?
You can refrigerate the rolled dough log wrapped tightly in plastic wrap for up to 3 days. For longer storage, freeze it for up to 1 month. Just thaw overnight in the fridge before slicing and baking.
Can I Make These Cookies Ahead of Time?
Absolutely! You can slice and bake the cookies a day ahead. Store baked cookies in an airtight container at room temperature for up to 5 days, or freeze them for longer freshness.
What’s the Best Way to Get Clean Pinwheel Slices?
Make sure the dough log is well chilled and firm before slicing. Use a very sharp knife and cut slowly with a gentle sawing motion to avoid squashing the dough and keep your pinwheel pattern neat.
