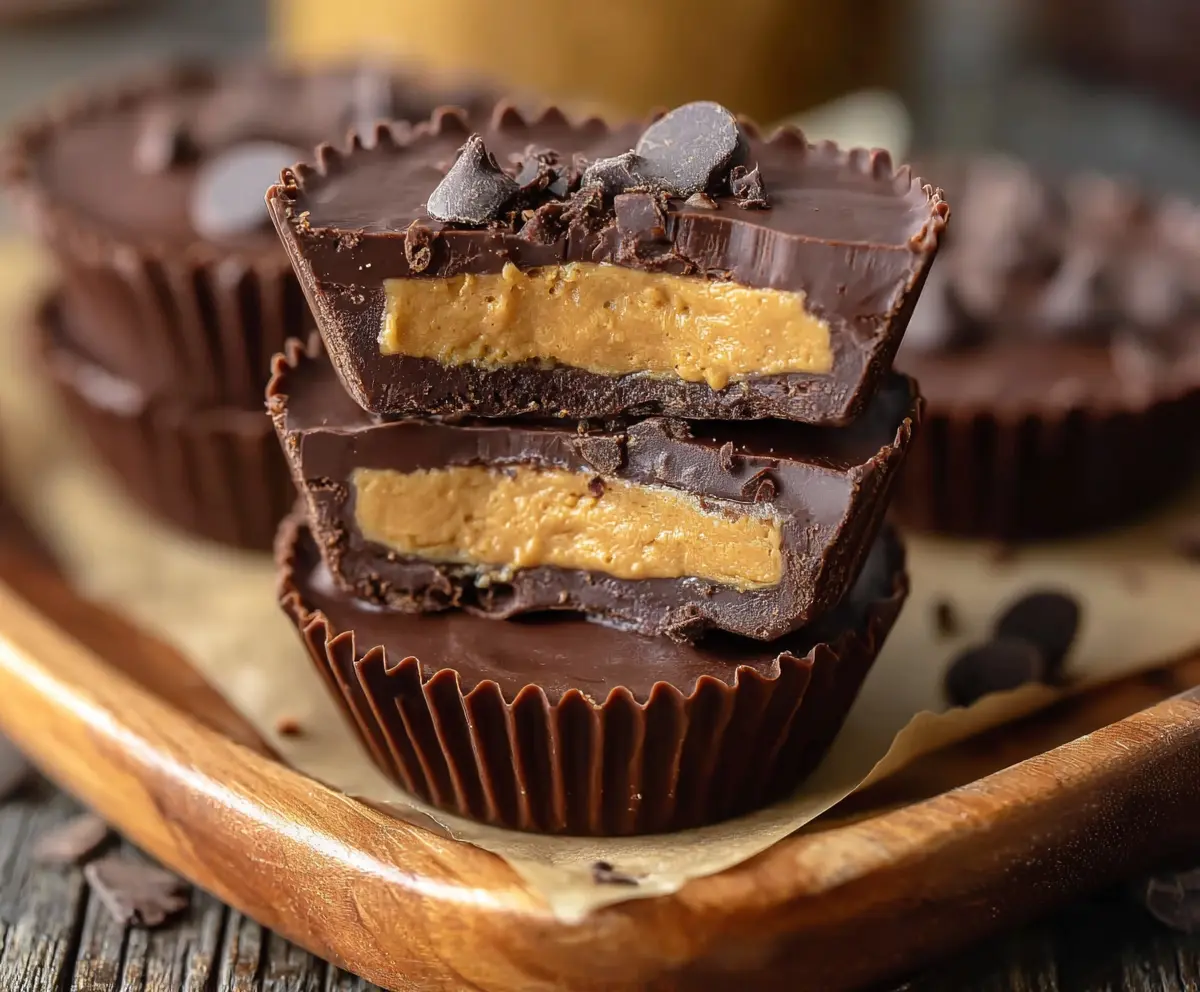
Copycat Reese’s Peanut Butter Cups are the perfect homemade treat for peanut butter and chocolate lovers alike! These cups feature a smooth, creamy peanut butter center wrapped in a thick layer of rich milk chocolate. The combination of salty and sweet flavors with that classic candy cup shape makes them irresistible.
I love making these at home because I can adjust the sweetness and get that perfect peanut butter-to-chocolate ratio just the way I like it. Plus, they’re surprisingly simple to whip up with just a few ingredients. Whenever I make a batch, they disappear quickly – everyone always asks for seconds!
My favorite way to enjoy these is slightly chilled from the fridge so that the chocolate is firm but the peanut butter filling is still soft and creamy. They make a fun gift too, wrapped up in colorful paper for friends or family. These cups bring back fun memories of childhood snacks, but better because I know exactly what’s inside!
Key Ingredients & Substitutions
Chocolate Chips: I use semi-sweet for a balanced sweetness, but milk chocolate works great if you prefer it sweeter. Dark chocolate can be a nice twist too, just remember it’s less sweet.
Peanut Butter: Creamy natural peanut butter is my go-to for authentic flavor. You can swap it for crunchy if you like a bit of texture inside the cups.
Powdered Sugar: This sweetens and thickens the peanut butter filling. You can try honey or maple syrup for a natural sweetener, but reduce any extra liquid to keep the filling firm.
Butter & Salt: These boost the richness and balance the sweetness. Salt is key because it brings out the classic peanut butter cup flavor.
How Can I Get Smooth Chocolate Coating on My Peanut Butter Cups?
To get a nice smooth chocolate shell, melting and tempering your chocolate properly is key. Use these simple steps:
- Microwave in 30-second bursts, stirring well after each to avoid burning.
- Make sure the chocolate is fully melted and smooth before spooning it into molds.
- Spread the chocolate evenly and don’t rush; tilting the mold helps cover sides nicely.
- Chill the chocolate layer before adding peanut butter—this helps prevent mixing and keeps layers distinct.
- After adding the peanut butter, pour the final layer gently and tap the mold to get rid of air bubbles and level the top.
Equipment You’ll Need
- Muffin tin with paper liners or silicone molds – makes shaping and removing the cups easy without mess.
- Microwave-safe bowl – perfect for melting chocolate quickly and evenly.
- Spoon or small offset spatula – great for spreading chocolate inside molds smoothly.
- Mixing bowl – to combine peanut butter filling ingredients without fuss.
- Refrigerator – to chill and set the peanut butter cups properly for the best texture.
Flavor Variations & Add-Ins
- Use crunchy peanut butter – adds a nice nutty texture inside the smooth chocolate shell.
- Swap peanut butter for almond or cashew butter – gives a different nutty flavor while keeping the creamy center.
- Mix in mini chocolate chips or chopped nuts into the peanut butter filling for extra crunch.
- Add a pinch of cinnamon or a splash of vanilla extract to the filling to deepen the flavor complexity.
Copycat Reese’s Peanut Butter Cups
Ingredients You’ll Need:
- 2 cups semi-sweet or milk chocolate chips
- 1 cup creamy peanut butter (preferably natural, no added sugar)
- 1/4 cup powdered sugar
- 2 tablespoons unsalted butter, softened
- 1/4 teaspoon salt
- Optional: 1/2 teaspoon vanilla extract
- Crushed peanut butter cups or crushed graham crackers for topping (optional)
How Much Time Will You Need?
This recipe takes about 20 minutes to prepare, plus at least 1 hour for chilling and setting the peanut butter cups in the refrigerator. It’s a fun, quick process that results in a delicious homemade treat!
Step-by-Step Instructions:
1. Prepare Your Cups:
Line a muffin tin with paper liners or silicone molds to make it easy to remove the cups later.
2. Melt and Layer the First Chocolate:
In a microwave-safe bowl, melt 1 1/2 cups of chocolate chips by heating in 30-second intervals. Stir well after each burst until the chocolate is smooth. Spoon about a tablespoon into each liner, tilting the muffin tin to coat the bottom and sides evenly. Chill in the refrigerator for 10-15 minutes until set.
3. Make the Peanut Butter Filling:
While the chocolate sets, mix peanut butter, powdered sugar, softened butter, salt, and vanilla (if using) in a bowl until smooth and creamy.
4. Add Peanut Butter Layer:
Once the chocolate layer is firm, add about a tablespoon of the peanut butter mixture to each cup. Press down gently to flatten slightly but keep it away from the sides to maintain layers.
5. Finish with Chocolate Topping:
Melt the remaining 1/2 cup chocolate chips using the same method. Pour over the peanut butter layer to cover it fully. Tap the pan gently to level the topping and remove any air bubbles. Optionally, sprinkle crushed peanut butter cups or graham crackers on top for a tasty finish.
6. Chill and Serve:
Refrigerate for at least 1 hour until the cups are firmly set. To serve, remove from liners and let them sit a few minutes at room temperature for the perfect texture and flavor. Enjoy!
Equipment You’ll Need
- Muffin tin with paper liners or silicone molds – for shaping and easy removal.
- Microwave-safe bowl – for melting chocolate quickly and evenly.
- Spoon or small offset spatula – to spread chocolate smoothly inside molds.
- Mixing bowl – to combine peanut butter filling ingredients.
- Refrigerator – to chill and set the peanut butter cups.
Flavor Variations & Add-Ins
- Use crunchy peanut butter instead of creamy for added texture.
- Swap peanut butter with almond or cashew butter for a nutty twist.
- Mix mini chocolate chips or chopped nuts into the peanut butter filling to add crunch.
- Add a pinch of cinnamon or a splash of vanilla extract to enrich the flavor.
Can I Use Natural Peanut Butter with Oil Separation?
Yes! Just stir the peanut butter well before measuring to ensure the oil is evenly mixed in. This helps keep the filling creamy and prevents separation in your cups.
How Should I Store Leftover Peanut Butter Cups?
Store them in an airtight container in the refrigerator for up to 1 week. For best texture, let cups sit at room temperature for a few minutes before enjoying.
Can I Make These Peanut Butter Cups Vegan?
Absolutely! Use dairy-free chocolate chips and a plant-based butter substitute. Make sure your peanut butter is vegan-friendly, and the rest of the recipe stays the same.
Is There a Way to Soften the Peanut Butter Filling?
If the filling feels too firm after chilling, let the cups sit out for 5–10 minutes at room temperature before eating. This softens the peanut butter layer for a creamier bite.
