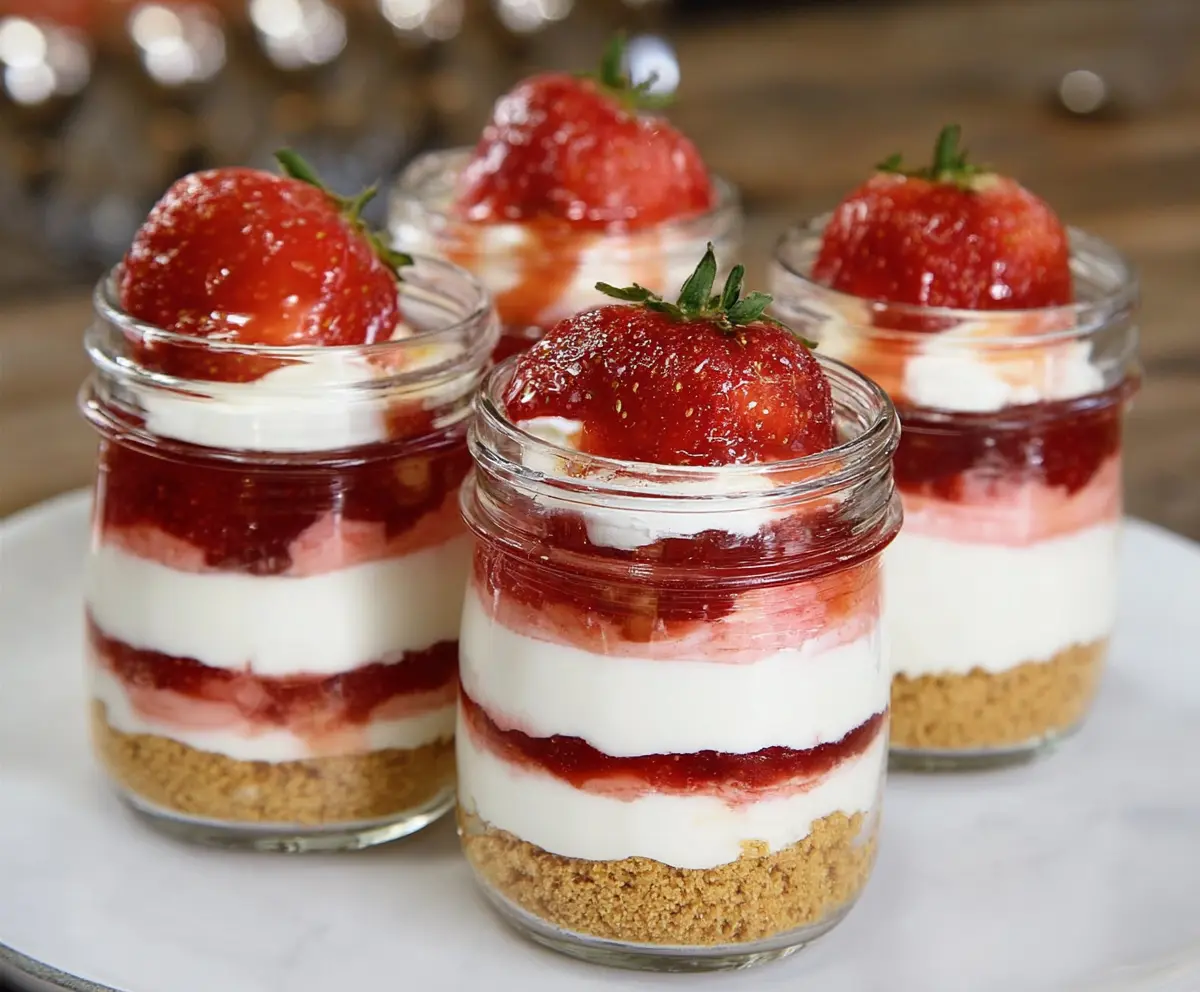
No-Bake Strawberry Cheesecake Jars are a simple and delicious treat that brings together creamy cheesecake filling, sweet strawberries, and a crunchy crust—all without turning on the oven. These little jars are perfect for when you want something fresh and fruity but still rich and satisfying. The combination of smooth cream cheese, fluffy whipped topping, and juicy strawberry slices makes each spoonful a joy.
I love making these jars because they’re so easy to put together, and the presentation is just adorable! I usually like to layer the crust, cheesecake, and strawberries carefully so each jar is a little surprise with every bite. If you’re short on time or want a no-fuss dessert, this recipe is a winner in my book. Plus, the jars keep the dessert fresh and make for convenient single servings.
These cheesecake jars are great for summer picnics, potlucks, or just a sweet treat after dinner. I often make a batch ahead and keep them chilled, so they’re ready whenever a craving hits. And the best part? You don’t have to worry about baking or waiting—just mix, layer, and enjoy the creamy, fruity goodness!
Key Ingredients & Substitutions
Graham cracker crumbs: These give a nice crunchy base. If you can’t find them, crushed digestive biscuits or vanilla wafers work great too. Just make sure to press them well for a firm crust.
Cream cheese: Use full-fat for the best creamy texture. Low-fat versions can be used but may affect richness. Let it soften to room temp to avoid lumps in your filling.
Heavy whipping cream: This adds lightness when whipped. You can substitute with coconut cream for a dairy-free version, but results will be slightly different.
Strawberries: Fresh strawberries are best for that bright flavor and texture. If out of season, frozen ones defrosted or a good quality strawberry jam can work.
How Do You Get a Smooth and Light Cheesecake Filling Without Baking?
The key is combining softened cream cheese with whipped cream carefully:
- Beat the cream cheese with powdered sugar and vanilla until creamy and smooth. Take your time so there are no lumps.
- Whip cold heavy cream until stiff peaks form—it should hold shape and not drip.
- Fold the whipped cream gently into the cream cheese mixture using a spatula. Use slow, sweeping motions to keep it airy.
This folding technique keeps the filling light and fluffy, not dense or heavy. Avoid overmixing or stirring too vigorously to keep that perfect cheesecake texture.
Equipment You’ll Need
- Mixing bowls – for making the crust, cheesecake filling, and strawberry topping separately.
- Electric hand mixer or stand mixer – helps whip the cream to stiff peaks easily and blends the cream cheese smooth.
- Spatula – great for folding whipped cream into the cream cheese gently without deflating it.
- Spoons or small offset spatula – to layer the crust and cheesecake filling neatly in each jar.
- Small glass jars or dessert cups – perfect for individual servings and stylish presentation.
Flavor Variations & Add-Ins
- Swap strawberries for blueberry or raspberry topping to change the flavor but keep it fresh and fruity.
- Add a layer of crushed nuts (like pecans or almonds) on top of the crust for extra crunch and nuttiness.
- Mix a little lemon zest or lime zest into the cheesecake filling for a tangy twist that brightens the flavor.
- Stir in mini chocolate chips or drizzle melted chocolate over the strawberry layer for a hint of chocolate delight.
No-Bake Strawberry Cheesecake Jars
Ingredients You’ll Need:
For the Crust:
- 1 ½ cups graham cracker crumbs
- 6 tablespoons unsalted butter, melted
For the Cheesecake Filling:
- 16 oz (450g) cream cheese, softened
- 1 cup powdered sugar
- 1 teaspoon vanilla extract
- 1 cup heavy whipping cream, cold
For the Strawberry Topping:
- 1 cup strawberry jam or strawberry gelatin
- 1 cup fresh strawberries, diced (plus whole strawberries for garnish)
- Optional: 1 tablespoon lemon juice (to brighten strawberry topping)
How Much Time Will You Need?
This recipe takes about 20 minutes for preparation, plus at least 4 hours (or overnight) chilling time so the cheesecake sets nicely. Most of your time is spent mixing and layering, then waiting for that perfect cool finish!
Step-by-Step Instructions:
1. Make the Crust:
Combine graham cracker crumbs and melted butter in a bowl. Stir until all crumbs are coated and the mixture feels like wet sand. Press about 2 tablespoons of this crust into the bottom of each jar, gently packing it down to form a firm base.
2. Prepare the Cheesecake Filling:
Beat softened cream cheese, powdered sugar, and vanilla extract together until smooth and creamy. In a separate bowl, whip the cold heavy cream until stiff peaks form. Carefully fold the whipped cream into the cream cheese mixture to keep it light and fluffy.
3. Assemble the Jars:
Spoon or pipe the cheesecake filling over the crust in each jar, filling up about two-thirds of the jar. Smooth the tops.
In another bowl, mix the strawberry jam or gelatin with diced fresh strawberries and optional lemon juice. Spoon this strawberry topping over the cheesecake layer in each jar.
Finally, garnish each jar with a whole strawberry on top for a bright, fresh look.
4. Chill and Serve:
Cover the jars and place them in the refrigerator. Let them chill for at least 4 hours or overnight. This resting time lets the cheesecake firm up and flavors meld beautifully. Serve cold and enjoy your fresh, no-bake treat!
Can I Use Frozen Strawberries for the Topping?
Yes, you can, but be sure to thaw them fully and drain any excess liquid to avoid watering down the topping. Fresh strawberries do give the best texture and flavor though!
How Long Can I Store These Cheesecake Jars?
Store them in the refrigerator in airtight containers or covered with plastic wrap for up to 3 days. They’re best enjoyed within this time for freshness and texture.
Can I Substitute the Graham Cracker Crust?
Absolutely! You can use crushed digestive biscuits, vanilla wafers, or even crushed pretzels for a salty twist. Just make sure to press the crumbs firmly into the jar to hold the base together.
Is It Possible to Make These Ahead of Time?
Yes! These jars can be assembled and refrigerated overnight or up to 24 hours before serving, making them perfect for parties or meal prep.
