Parmesan Crusted Pork Chops are a tasty and crispy way to enjoy a classic cut of meat. The pork chops get coated with a crunchy mixture of Parmesan cheese and breadcrumbs, which bakes up golden and full of that cheesy, salty flavor. This simple twist turns regular pork chops into something that feels a little special without much extra fuss.
I love making these chops when I want a meal that’s quick but still feels homemade and impressive. One tip I’ve found helpful is to press the Parmesan crust firmly onto the pork before cooking, so it stays put and gives that perfect crunch. Plus, adding just a little garlic powder or herbs to the crust makes it extra tasty.
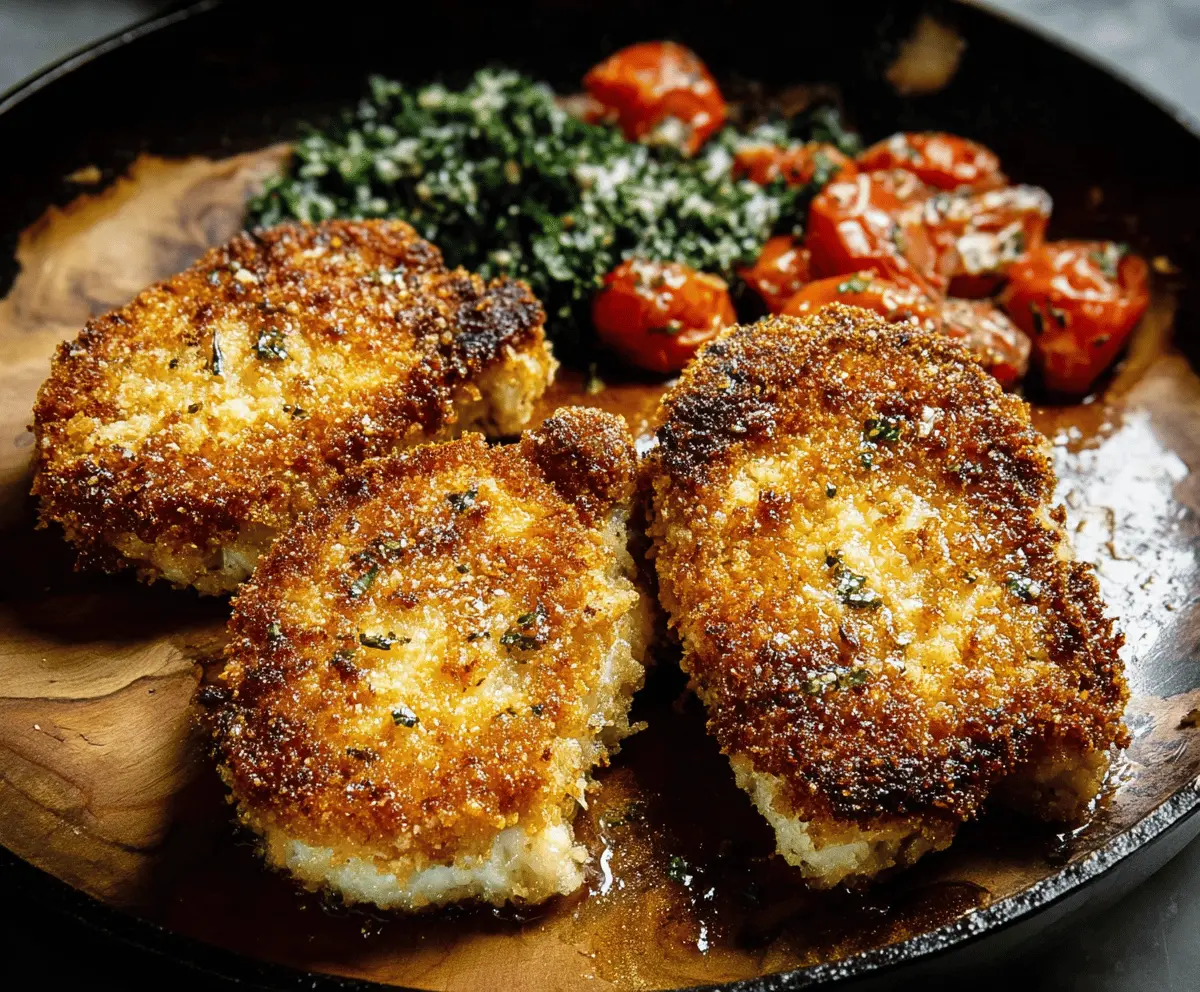
My favorite way to serve these pork chops is alongside some roasted veggies or a fresh green salad. They pair really well with simple sides because the crust packs so much flavor. Whenever I put these on the table, everyone asks for seconds, which always makes me happy because they’re so easy to throw together on a busy weeknight.
Key Ingredients & Substitutions
Pork Chops: Boneless chops about 1-inch thick work best. They cook evenly and stay juicy. If you prefer bone-in, that’s fine too — just increase cooking time a bit.
Parmesan Cheese: Freshly grated Parmesan adds more flavor and melts better than pre-grated. For a milder taste, try Pecorino Romano or Asiago cheese instead.
Panko Breadcrumbs: These give a light, crispy crust. Regular breadcrumbs can work, but the texture won’t be as crunchy. Gluten-free panko works if you need a gluten-free option.
Herbs & Seasonings: Garlic powder and Italian herbs bring extra depth. Fresh herbs like chopped parsley or thyme can be added to the crust for a brighter flavor.
How Can You Get a Crispy, Stuck-on Parmesan Crust?
The secret to a great crust is using a three-step breading method and gently pressing the coating on:
- Flour: Helps the egg stick by creating a dry surface.
- Egg: Acts like glue for the breadcrumbs and cheese.
- Parmesan-Panko Mix: Press firmly onto the pork chops so it clings well.
When frying, make sure the pan and oil are hot before adding the chops. Use medium heat so the crust browns evenly without burning. Don’t move the chops too much once they’re in the pan to keep the crust intact.
Equipment You’ll Need
- Cast iron skillet – it gets very hot and keeps heat evenly for a perfect, crispy crust.
- Shallow dishes – for flour, egg, and breadcrumb mixtures, making the breading easier and less messy.
- Tongs – helping you flip the pork chops gently without breaking the crust.
- Meat thermometer – so you can check the pork is cooked to the safe, juicy temperature of 145°F.
Flavor Variations & Add-Ins
- Try swapping pork chops for boneless chicken breasts for a similar crispy, cheesy coating.
- Add fresh chopped rosemary or thyme into the breadcrumb mix for a fragrant herbal touch.
- Mix in a pinch of smoked paprika or chili powder to the crust for a smoky or spicy kick.
- Stir grated mozzarella or sharp cheddar with the Parmesan for a gooey, melty crust variation.
How to Make Parmesan Crusted Pork Chops?
Ingredients You’ll Need:
For the Pork Chops:
- 4 boneless pork chops (about 1-inch thick)
- Salt and freshly ground black pepper, to taste
For the Coating:
- ½ cup all-purpose flour
- 2 large eggs
- 1 cup panko breadcrumbs
- ½ cup freshly grated Parmesan cheese
- 1 tsp garlic powder
- 1 tsp dried Italian herbs (or a mix of dried oregano, basil, thyme)
For Cooking:
- 3 tbsp olive oil
- 2 tbsp unsalted butter
- Fresh rosemary or thyme sprigs for garnish (optional)
How Much Time Will You Need?
This recipe takes about 10 minutes of prep time plus 8–12 minutes to cook, including optional baking time. You’ll spend a few minutes breading the pork chops, frying them until golden and crispy, and then optionally finishing them in the oven for perfect doneness.
Step-by-Step Instructions:
1. Prepare and Season the Pork Chops:
Pat your pork chops dry with paper towels. Sprinkle salt and freshly ground black pepper evenly on both sides to enhance their flavor.
2. Set Up Your Breading Station:
Place the flour in a shallow bowl. Beat the eggs in a second shallow bowl. In a third bowl, mix the panko breadcrumbs, Parmesan cheese, garlic powder, and dried Italian herbs.
3. Coat the Pork Chops:
Dredge each pork chop in the flour, shaking off any excess. Then dip it into the beaten eggs. Finally, press the pork chop firmly into the Parmesan breadcrumb mixture, coating it well on all sides.
4. Cook the Pork Chops:
Heat olive oil and butter in a heavy skillet over medium heat until the butter is melted and sizzling. Add the pork chops carefully and cook for about 3–4 minutes on each side, until the crust is crispy and golden brown.
5. Finish in the Oven (Optional):
To ensure the pork chops are cooked through, transfer the skillet to a preheated oven at 375°F (190°C). Bake for an additional 5–8 minutes or until the internal temperature reaches 145°F (63°C).
6. Rest and Serve:
Remove the skillet from the oven and let the pork chops rest for 3–5 minutes. Garnish with fresh rosemary or thyme if you like. Serve warm and enjoy with your favorite sides!
Can I Use Frozen Pork Chops for This Recipe?
Yes, but be sure to thaw them completely in the fridge overnight before cooking. Cooking from frozen will lead to uneven cooking and may prevent the crust from crisping properly.
What Can I Substitute for Panko Breadcrumbs?
If you don’t have panko, regular breadcrumbs work fine though the crust won’t be as light and crispy. For a gluten-free option, use gluten-free breadcrumbs or crushed nuts like almonds or pecans.
How Do I Store Leftover Parmesan Crusted Pork Chops?
Store leftovers in an airtight container in the refrigerator for up to 3 days. Reheat gently in a skillet over low heat to help keep the crust crispy or in the oven at 350°F (175°C) until warmed through.
Can I Make These Pork Chops Ahead of Time?
Yes! You can bread the pork chops in advance, cover them tightly, and refrigerate for up to 24 hours before cooking. This can save prep time on busy days.
