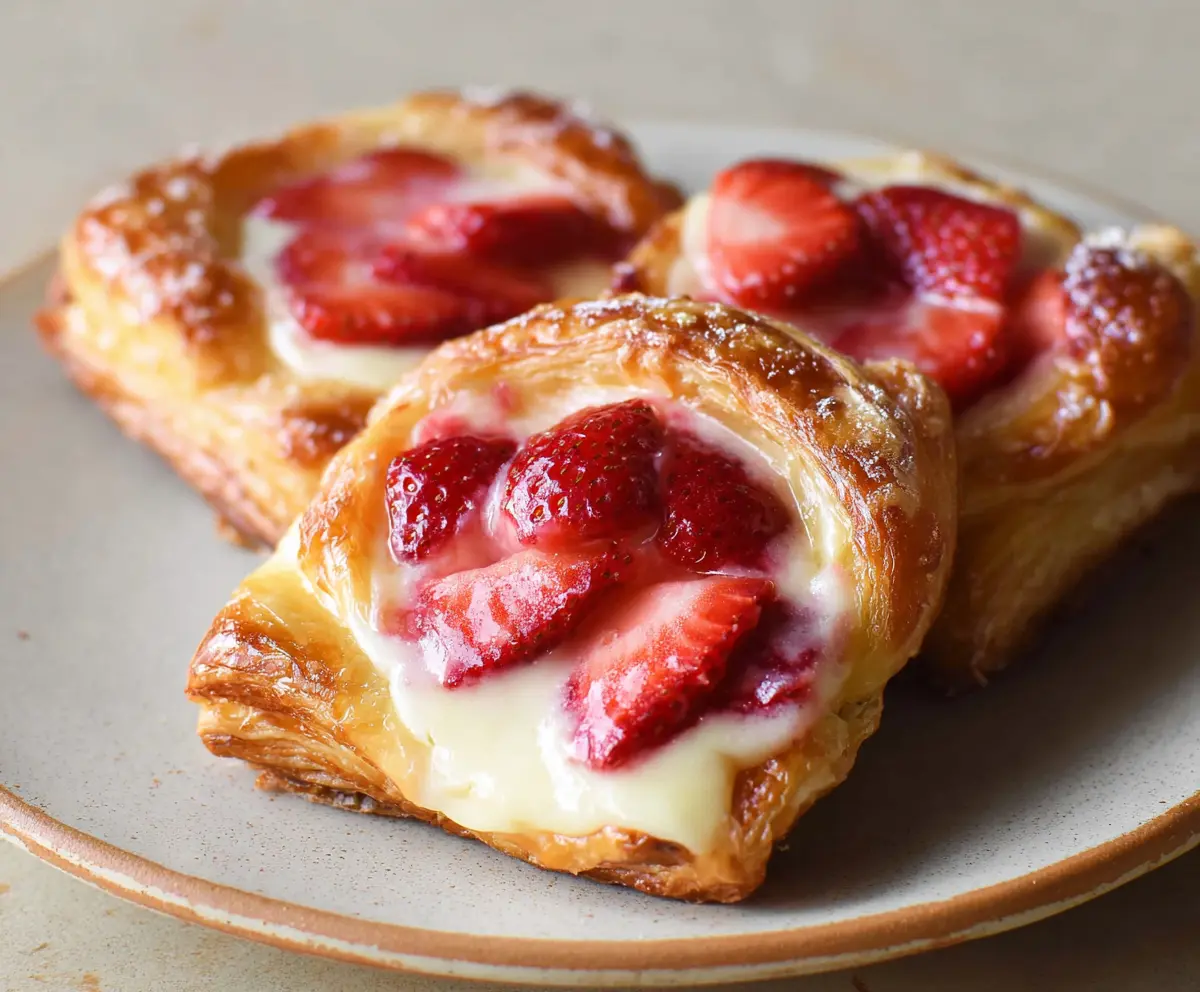
Strawberry Cream Cheese Danishes are a sweet treat that brings together flaky, buttery pastry, smooth cream cheese filling, and fresh strawberry topping. The combination of soft cream cheese and juicy strawberries wrapped in layers of golden pastry makes for a delightful breakfast or snack that feels special without being complicated.
I love making these danishes at home because they don’t take too long but still impress anyone who tries them. One trick I use is to brush the pastry with a little egg wash before baking to get that shiny, crunchy crust that makes each bite extra satisfying. Plus, the cream cheese adds a gentle tang that pairs perfectly with the sweet strawberries on top.
These danishes are great fresh out of the oven when the cream cheese is soft and the strawberries are bursting with flavor. I like to enjoy them with a cup of coffee or tea, making a simple morning feel a bit more like a treat. They also hold up well for a little while, so they’re perfect for sharing at a brunch or packing in a lunchbox for a sweet surprise.
Key Ingredients & Substitutions
Puff Pastry: Puff pastry is the star here, giving the danishes their flaky, buttery layers. You can find frozen sheets in most stores. For a shortcut, store-bought is perfect, but if you want to try homemade, just make sure to keep the dough cold to get those layers.
Cream Cheese: Use softened cream cheese for a smooth filling. If you want a lighter option, try using Neufchâtel cheese, which has less fat but a similar texture and taste.
Strawberries: Fresh strawberries add juiciness and brightness. If strawberries aren’t in season, frozen (thawed and drained) or substitutes like raspberries or blueberries work well too.
Egg Wash: The egg and milk wash helps give the pastry a beautiful golden shine. If you’re avoiding eggs, you can brush with milk or a mix of milk and honey for a gentle glaze.
Glaze: The powdered sugar glaze adds a sweet finish. Swap milk for lemon juice in the glaze for a tart contrast that balances the sweetness.
How Do You Get Puff Pastry Perfectly Flaky and Golden?
Getting puff pastry just right can be tricky. Here’s how I make sure it bakes up light and crispy:
- Keep the puff pastry cold until you’re ready to use it. Warm dough can lose its layers.
- Don’t overfill the centers so the edges have room to puff up.
- Prick the center lightly with a fork to prevent it from puffing too much.
- Brush the pastry edges with egg wash for a glossy, golden crust.
- Watch the oven closely near the end of baking to avoid burning but allow a good golden color.
Following these steps helps create that perfect balance between golden crisp edges and soft, tender cream cheese and berry centers.
Equipment You’ll Need
- Baking sheet – it holds your danishes and helps them bake evenly.
- Parchment paper – keeps the danishes from sticking and makes cleanup easy.
- Mixing bowl – perfect for combining the cream cheese filling smoothly.
- Whisk or fork – helps mix the egg wash and glaze without lumps.
- Pastry brush – lets you apply egg wash evenly for a golden finish.
- Sharp knife or pizza cutter – for cutting the puff pastry neatly.
Flavor Variations & Add-Ins
- Swap strawberries with raspberries or blueberries for a different berry twist that still pairs well with cream cheese.
- Add a sprinkle of cinnamon or lemon zest to the cream cheese filling to bring a fresh, warm note.
- Try mixing chopped nuts like almonds or pecans on top for extra crunch and flavor contrast.
- Use apricot or raspberry jam instead of fresh fruit for a sweeter, stickier filling that’s easy to spread.
Strawberry Cream Cheese Danishes
Ingredients You’ll Need:
- 1 sheet frozen puff pastry, thawed (about 8 oz)
- 4 oz cream cheese, softened
- 2 tablespoons granulated sugar
- ½ teaspoon vanilla extract
- ½ cup fresh strawberries, sliced
- 1 egg, beaten (for egg wash)
- 1 tablespoon milk (for egg wash)
- ½ cup powdered sugar
- 1 tablespoon milk or lemon juice (for glaze)
How Much Time Will You Need?
This recipe takes about 10 minutes to prep and 15-18 minutes to bake, plus a few minutes to cool and add the glaze. So, in around 30 minutes you’ll enjoy fresh, warm danishes.
Step-by-Step Instructions:
1. Preheat and Prepare Puff Pastry:
Preheat your oven to 400°F (200°C) and line a baking sheet with parchment paper. On a lightly floured surface, unfold the thawed puff pastry sheet and cut it into 4 equal squares. Prick the center of each square lightly with a fork to stop it from puffing too much.
2. Make the Cream Cheese Filling:
In a small bowl, mix softened cream cheese, granulated sugar, and vanilla extract until smooth. Spread about 1 to 1 ½ tablespoons of this mixture into the center of each pastry square, leaving space around the edges.
3. Add Strawberries and Shape the Danishes:
Arrange the sliced strawberries evenly over the cream cheese on each square. Fold the edges slightly inward to form a border around the filling. Whisk the egg and milk to make an egg wash, then brush it on the edges of the pastry for a golden finish.
4. Bake and Glaze:
Bake the danishes for 15-18 minutes until the pastry turns golden brown and crisp. While baking, whisk powdered sugar with milk or lemon juice to make a smooth glaze. Let the danishes cool slightly, then drizzle the glaze on top before serving.
Can I Use Frozen Puff Pastry Without Thawing?
It’s best to thaw the puff pastry fully before using. Try thawing it overnight in the fridge or for about 30 minutes at room temperature. Working with thawed dough helps it unfold easily and bake evenly.
Can I Substitute Other Fruits for Strawberries?
Absolutely! Blueberries, raspberries, or sliced peaches all make delicious alternatives. Just make sure the fruit isn’t too watery to avoid soggy pastry.
How Should I Store Leftover Danishes?
Store any leftovers in an airtight container at room temperature for up to 1 day, or in the fridge for 2-3 days. Reheat gently in the oven to help keep the pastry flaky.
Is There a Dairy-Free Option for the Cream Cheese Filling?
Yes! You can substitute dairy-free cream cheese alternatives made from almond, coconut, or cashew milk to keep this recipe vegan-friendly.
