
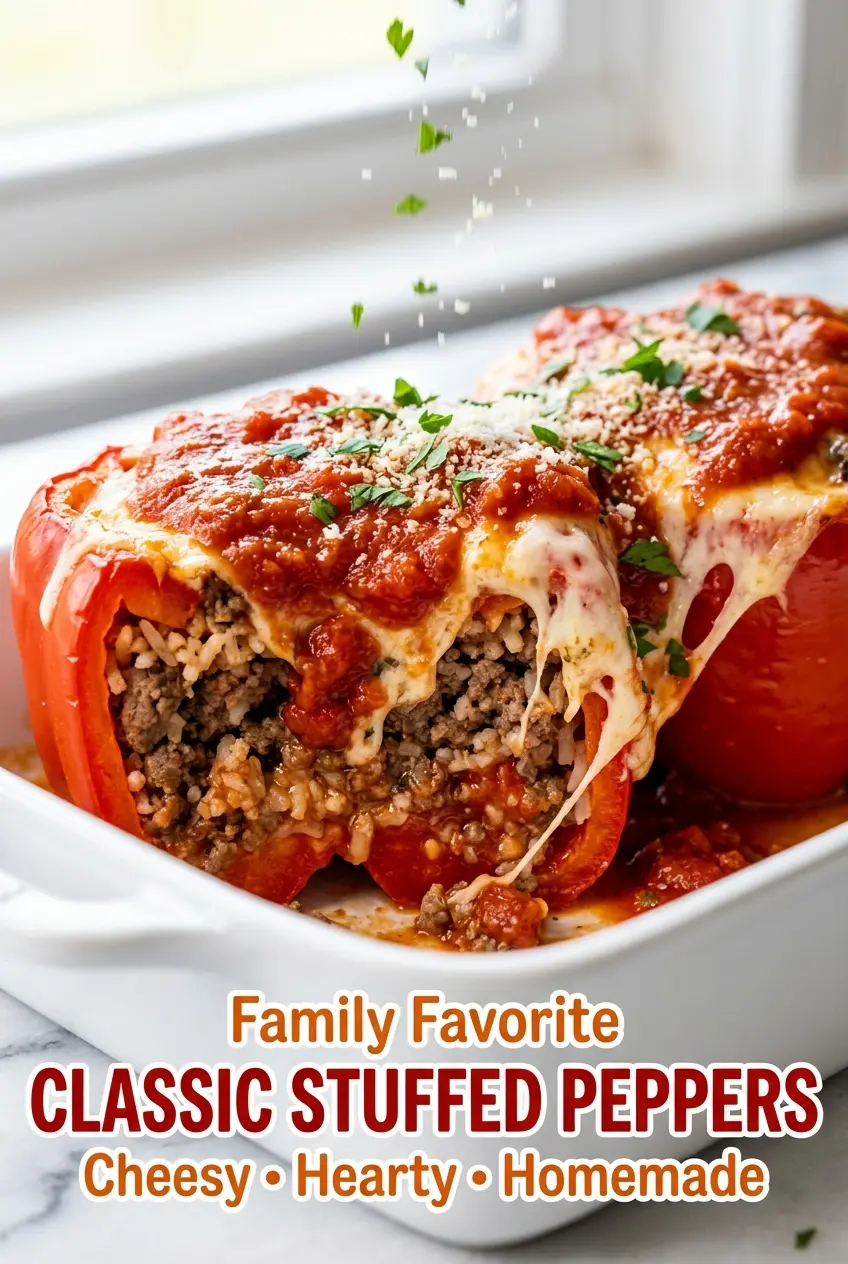
Tender bell peppers filled with a savory beef and rice mixture have a way of disappearing fast, especially when the tops are blanketed with melted mozzarella and the sauce bakes down into the bottom of the dish. Classic stuffed peppers sound simple, but the best ones hit three things at once: the peppers turn soft without collapsing, the filling stays juicy, and the cheese finishes everything with that salty, stretchy layer people go back for first.
This version leans on a few small details that matter. Browning the beef with onion first builds a deeper base, then the tomato sauce and tomato paste give the filling enough moisture to stay tender inside the peppers instead of drying out in the oven. The rice goes in cooked, which keeps the texture light and prevents the filling from turning dense or gummy. A little Worcestershire sauce and smoked paprika do quiet work here too, adding depth without making the dish taste heavy.
Below you’ll find the timing that keeps the peppers from getting mushy, the ingredient swaps that still hold the filling together, and the reheating method that brings leftovers back without drying them out.
The peppers were tender but still held their shape, and the filling stayed juicy all the way through. I used red and yellow peppers and the sweet flavor with the mozzarella on top was perfect.
Love how the mozzarella melts over the savory beef and rice filling? Save these classic stuffed peppers for an easy make-ahead dinner.

The Real Trick to Stuffed Peppers That Don’t Turn Watery
The biggest mistake with stuffed peppers is expecting the pepper itself to do all the cooking in one shot. If the filling is dry or underseasoned, the finished dish tastes flat; if the peppers are overbaked, they collapse and leak liquid into the pan. The balance comes from two places: enough moisture in the filling to stay succulent, and enough oven time for the peppers to soften without giving up their shape.
Cooking the beef and onion before stuffing the peppers does more than build flavor. It also drives off excess moisture so the filling tastes concentrated instead of soupy. Then the tomato sauce gets split between the filling and the baking dish, which keeps the peppers from drying out while also creating a little pan sauce underneath. That sauce is part of the meal, not leftover liquid.
- Bell peppers — Choose peppers with flat bottoms or trim the base slightly so they stand upright. Red, yellow, and orange peppers bring a little sweetness, while green peppers taste a bit more bitter and old-fashioned in the best way.
- Lean ground beef — Lean works well because the tomato sauce adds moisture back in. If you use a fattier blend, drain off the excess after browning or the filling can turn greasy.
- Cooked white rice — Cold leftover rice or freshly cooked rice both work. The key is that it should already be cooked before it goes into the filling, or it will steal moisture from everything else and stay underdone.
- Tomato sauce and tomato paste — The sauce keeps the filling loose enough to stay tender, while the paste adds body and a deeper tomato taste. If you only have sauce, the filling will still work, but it won’t taste as rich.
- Mozzarella and Parmesan — Mozzarella gives the melt; Parmesan sharpens the filling so it doesn’t taste bland under all that rice. Pre-shredded mozzarella is fine, but freshly grated Parmesan gives a better finish.
Building the Filling So It Stays Juicy in the Oven
Softening the Peppers First
Set the peppers upright in the baking dish after brushing them with olive oil. That thin coat helps the skins soften and keeps the edges from drying out before the filling is hot. If a pepper won’t stand up, shave a thin slice from the bottom instead of cutting a bigger opening at the top, or the filling will spill out as it bakes.
Cooking Down the Beef and Onion
Cook the beef and onion together until the beef is browned and the onion looks translucent and sweet. You want the pan to be mostly free of pink meat and any liquid to have cooked off, because excess moisture at this stage makes the filling loose later. Stir in the garlic for just a minute so it smells fragrant but doesn’t burn and turn bitter.
Bringing the Filling Together
Add the rice, tomato sauce, tomato paste, seasonings, and herbs, then simmer briefly so everything tastes married instead of separate. The mixture should look spoonable, not dry and crumbly, and it should hold together when you scoop it into the peppers. If it seems stiff, add a splash more tomato sauce; if it seems wet, let it simmer another minute or two before stuffing.
Baking Until Tender and Bubbly
Cover the dish with foil for the first part of baking so the peppers steam and soften. Uncovering for the last stretch lets the mozzarella melt into a golden top and gives the filling a little concentration. The peppers are ready when a fork slips in with some resistance but doesn’t need force, and the cheese is bubbling at the edges.
Three Easy Ways to Adjust These Stuffed Peppers
Make Them Dairy-Free
Skip the mozzarella and Parmesan, then finish the peppers with a spoonful of extra tomato sauce instead. The filling still holds together well because the rice and beef do the structural work, but the top won’t have that melty finish. If you want a dairy-free upgrade, add a sprinkle of nutritional yeast for a little savory edge.
Swap in Ground Turkey or Chicken
Use the same amount of ground turkey or chicken in place of the beef. Because those meats are leaner, the filling benefits from an extra tablespoon or two of tomato sauce and a little more olive oil in the pan so it doesn’t taste dry. The flavor ends up lighter, but the texture still works well for meal prep.
Make It Gluten-Free
This recipe is naturally close to gluten-free, but check your Worcestershire sauce and tomato sauce labels to be certain. The rice keeps the filling hearty without any breadcrumbs, so you don’t need another binder. That’s one reason the peppers stay tender instead of heavy.
Use Brown Rice Instead
Brown rice works, but it should be fully cooked before it goes into the filling because it won’t finish in the oven. The texture is a little firmer and nuttier, which is nice if you want a heartier version. If the mixture feels dry after swapping, add a bit more tomato sauce so it stays cohesive.
Storage and Reheating
- Refrigerator: Store leftovers in an airtight container for up to 4 days. The peppers soften a little more each day, but the flavor stays good.
- Freezer: These freeze well after baking. Wrap individual peppers tightly and freeze for up to 2 months, then thaw in the refrigerator before reheating so the filling heats evenly.
- Reheating: Warm covered in a 350°F oven until hot in the center, about 20 to 25 minutes. The mistake to avoid is blasting them in the microwave for too long, which makes the peppers rubbery and the cheese oily.
Questions I Get Asked About This Recipe
Classic Stuffed Peppers
Ingredients
Equipment
Method
- Preheat the oven to 375°F. Slice the tops off the bell peppers and remove the seeds and membranes.
- Lightly brush the peppers with olive oil and place them upright in a 9×13-inch baking dish.
- Heat a large skillet over medium heat and cook the ground beef and onion for 6–8 minutes until browned and no pink remains.
- Stir in the garlic and cook for 1 minute until fragrant.
- Add the cooked rice, 1 cup tomato sauce, tomato paste, Italian seasoning, Worcestershire sauce, smoked paprika, oregano, salt, and black pepper.
- Simmer for 3–4 minutes, then remove from the heat.
- Stir in 1 cup mozzarella, Parmesan cheese, and parsley until evenly combined.
- Fill each bell pepper generously with the beef and rice mixture.
- Spoon the remaining tomato sauce over the tops and around the peppers in the baking dish.
- Cover the baking dish with foil and bake for 35 minutes.
- Remove the foil, sprinkle the remaining 1/2 cup mozzarella over the peppers, and bake for another 10–15 minutes until the cheese is melted, bubbly, and lightly golden.
- Check doneness by piercing the peppers with a fork until tender.
- Let the peppers rest for 5 minutes.
- Garnish with fresh parsley and extra Parmesan before serving.
