
When the lid comes off the Dutch oven, the turkey skin is still pale, and that’s exactly when the roasting changes gears. The covered time lets the breast cook gently over a bed of vegetables; the uncovered finish gives the skin time to brown. Dutch Oven Turkey Breast is a straightforward way to roast a bone-in breast without needing a separate roasting pan, and the broth and vegetables are already in the pot beneath it.
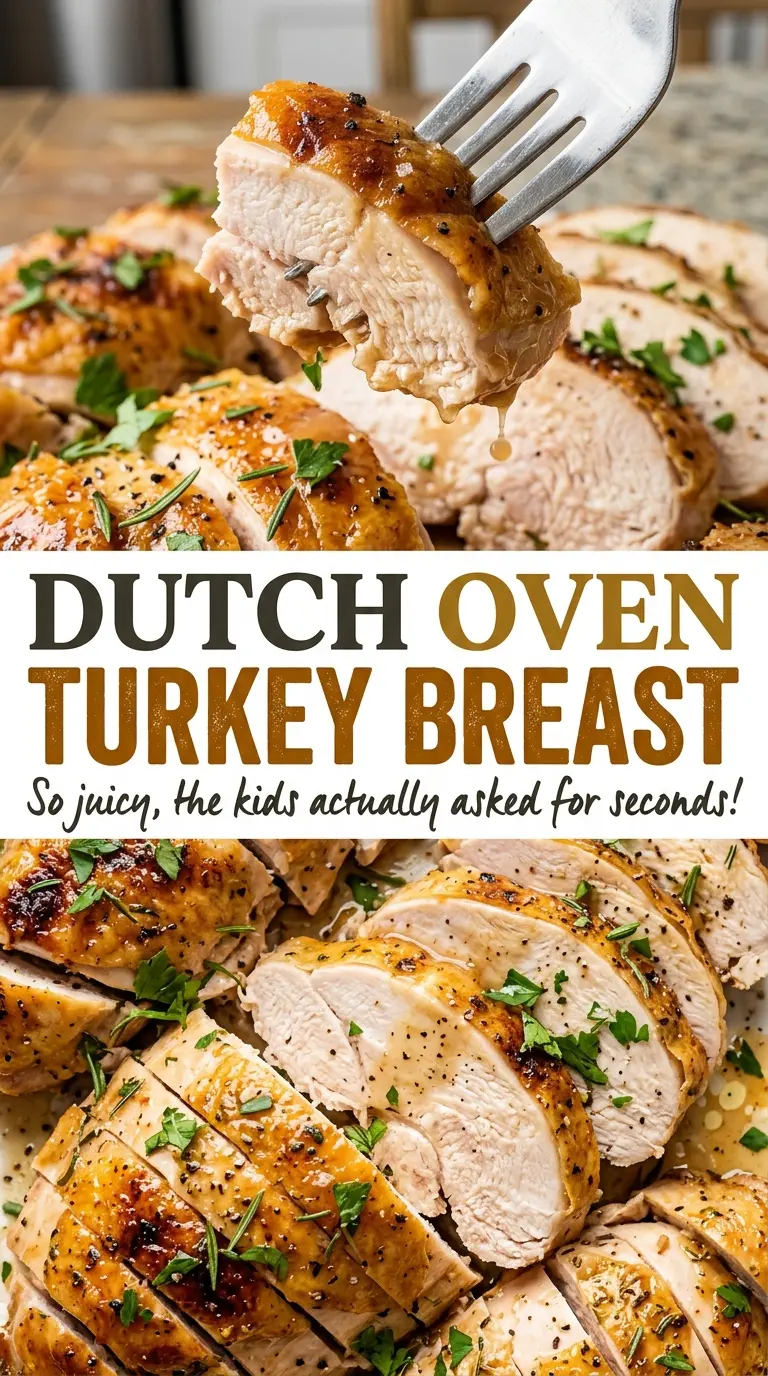
I spread softened herb butter under the skin as well as over it, so the rosemary, thyme, and garlic season the meat and the outside together. Keep the breast skin-side up, and use a thermometer in the thickest part rather than judging doneness by color alone. After a short rest, the meat is easier to carve into clean slices, with browned skin on top and savory pan juices underneath.

Kitchen Note
Give the turkey the full 20-minute rest before carving. I’ve found that rushing straight to the knife makes the slices harder to handle, while a loose foil tent keeps the breast warm as it settles.
Save Dutch Oven Turkey Breast for a holiday table or Sunday supper—the browned herb-butter skin makes a handsome centerpiece without tying up the stovetop.
Why This Turkey Roasts Covered Before the Skin Gets a Chance to Brown
A Dutch oven with its lid on is doing a different job from an open roasting pan. During the first stretch, the covered pot holds in heat and moisture while the breast cooks above the vegetables and broth. The skin won’t turn golden in that closed, damp environment, so a pale top when you lift the lid isn’t a sign that something has gone wrong.
Uncovering the pot for the finishing roast changes the conditions. The surface is exposed to the oven’s dry heat, which is what lets the skin brown while the breast finishes cooking. Don’t leave the lid off from the beginning just to chase color sooner; that removes the covered stage this method is built around. Think of the two parts as separate jobs: the covered roast cooks the breast, and the uncovered roast brings color to the skin while you check for doneness.
The vegetables make a bed for the turkey, and the broth gives the pot liquid beneath it. That setup keeps the breast skin-side up rather than sitting directly in the broth. It’s a useful distinction: the pot is covered for the first part, but the turkey isn’t being submerged or braised.
Why Bone-In Turkey, Softened Butter, and Fresh Herbs Matter Here
- Bone-in, skin-on turkey breast — The skin is what browns during the uncovered roast, and the bone-in cut is the size and shape this timing is designed for. Choose a breast that’s fully thawed; a frozen or partly frozen center won’t roast on the same schedule.
- Softened unsalted butter — Soft butter blends smoothly with the chopped herbs and garlic, then spreads beneath the skin instead of staying in a hard lump. There’s no need for an expensive butter here; unsalted butter gives you control over the seasoning already coming from the kosher salt.
- Fresh rosemary and thyme — Their chopped leaves mix into the butter and perfume the turkey as it roasts. Fresh herbs are worth using for this mixture because their leaves are easy to distribute through softened butter; woody rosemary stems should stay out of the mix.
- Onion, carrots, celery, and low-sodium chicken broth — The cut vegetables support the breast in the Dutch oven, while the broth provides liquid beneath them. Low-sodium broth keeps the overall seasoning from becoming harder to control, especially since the turkey is seasoned separately.
- Garlic — Finely chopping it helps it disperse through the butter rather than leaving large, concentrated pieces under the skin. Use fresh cloves for the cleanest texture in this simple herb mixture.
How to Roast the Breast in Two Stages Without Guessing
Dry the Turkey and Season the Surface
Heat the oven to 350°F. Remove the giblets and neck from the cavity, then pat the turkey thoroughly dry with paper towels; wet skin won’t brown as readily later. Season the breast all over with kosher salt and black pepper. Take a moment to check the cavity before moving on so nothing is left inside.
Work the Herb Butter Under the Skin
Stir the softened butter with the chopped rosemary, thyme leaves, and finely chopped garlic until the mixture looks evenly speckled. Gently loosen the skin with your fingers, taking care not to tear it, and spread some butter underneath. Smooth the rest over the outside of the breast so the surface has an even coating rather than a few thick patches.
Set the Turkey on the Vegetable Bed
Arrange the quartered onion, carrot pieces, and celery pieces in a 7-quart Dutch oven, then pour in the low-sodium chicken broth. Set the turkey breast skin-side up on top of the vegetables and cover the pot. Keep the lid seated for the first roast; opening the pot repeatedly releases the heat and moisture the covered stage is meant to hold.
Uncover for Browning and Check the Thickest Part
Roast covered for 1 hour, then uncover and roast for 30 to 75 minutes more. Look for browned skin, but use an instant-read thermometer to decide when the breast is done: insert it into the thickest part without touching bone, and cook until it reads 165°F. If it hasn’t reached that temperature, continue roasting in 10- to 15-minute increments and check again; the size and shape of turkey breasts can affect the finishing time.
Rest Before Carving
Transfer the breast to a cutting board and loosely tent it with foil. Let it rest for 20 minutes before carving so it’s easier to handle and the slices stay together. Use a sharp carving knife, and work along the breastbone to remove each side before slicing the meat for serving.
Simple Changes That Keep the Dutch Oven Method Intact
Make the Herb Butter Dairy-Free
Replace the unsalted butter with an equal amount of softened dairy-free butter, then mix in the rosemary, thyme, and garlic the same way. Choose a stick-style dairy-free butter that softens to a spreadable texture; a pourable oil won’t cling under the skin as well. The turkey will lose some of butter’s familiar richness, but the herb coating still works.
Keep the Garlic Out
For a gentler, herb-forward butter, leave out the garlic and use the rosemary and thyme with the butter as usual. The turkey will still get the same fragrant coating, with less savory bite. No other part of the roasting method needs to change.
Storage and Reheating
- Refrigerator: Store carved turkey in a covered container for 3 to 4 days. The skin will soften in the refrigerator, even if it was browned when freshly roasted.
- Freezer: Freeze sliced or larger portions in an airtight freezer-safe container for up to 3 months for best quality. Thaw in the refrigerator before reheating.
- Reheating: Warm only the portion you plan to serve in a covered dish, with a little reserved broth from the Dutch oven to help keep the slices moist. Repeatedly heating the whole breast can dry the meat out.
Questions That Come Up Before the Turkey Goes in the Oven
Dutch Oven Turkey Breast
Ingredients
Equipment
Method
- Heat the oven to 350°F.
- Remove any giblets and neck from the turkey cavity, then pat the turkey dry with paper towels.
- Season the turkey all over with the salt and pepper.
- Stir together the butter, rosemary, thyme, and garlic.
- Spread the butter mixture under the turkey skin and over the outside of the breast.
- Arrange the onion, carrots, and celery in a 7-quart Dutch oven.
- Pour in the broth.
- Set the turkey breast skin-side up on the vegetables and cover the pot.
- Roast for 1 hour.
- Uncover and roast for 30 to 75 minutes more, until the skin is browned and a thermometer inserted into the thickest part of the breast without touching bone reads 165°F.
- If needed, continue roasting in 10- to 15-minute increments until it reaches temperature.
- Transfer the turkey to a cutting board.
- Loosely tent it with foil and let it rest for 20 minutes before carving.
