
The pork gives a sharp hiss when it hits the skillet, and the browned edges make it look almost ready before the center is cooked through. That’s the moment I remind myself that tenderloin is lean: a quick sear builds color, but the thermometer—not the outside—tells me when to stop roasting. Honey Garlic Pork Tenderloin gets its glossy finish from a sauce made right in the same skillet.
The sauce balances honey with soy sauce and apple cider vinegar, so it lands savory and sweet without tasting sugary. I whisk the cornstarch with water before it goes into the pan; that small bit of prep helps the sauce turn smooth instead of lumpy. While the pork rests, the sauce has time to thicken and pick up the flavor left in the skillet.
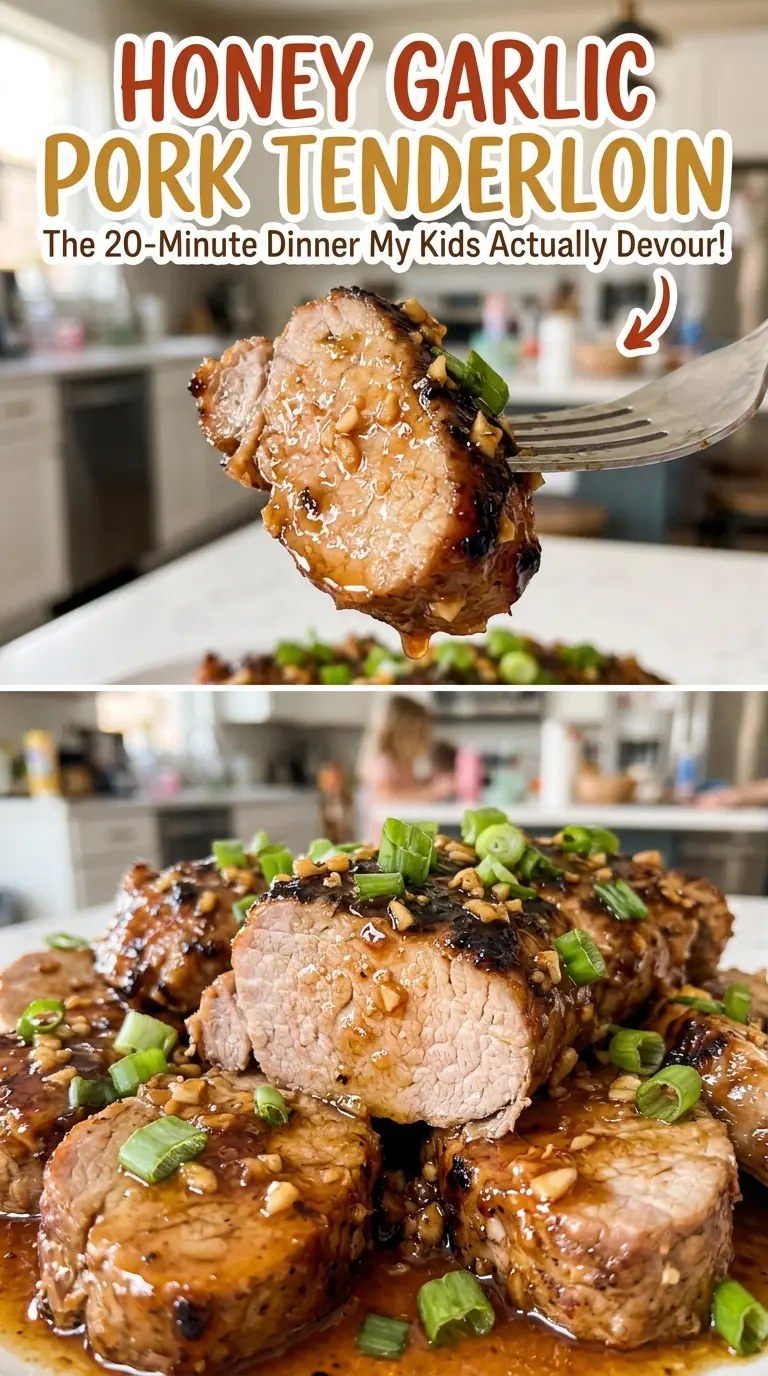
Give the slices a brief rest before cutting, then spoon the shiny garlic sauce over the top. The pork stays tender, and every slice gets a little of that sweet-savory glaze.

Kitchen Note
After pouring off the excess fat, I leave about a tablespoon in the skillet. It carries the pork’s browned flavor into the sauce, while medium-low heat gives the garlic just enough time to soften without scorching.
Save this Honey Garlic Pork Tenderloin for a weeknight dinner with tender slices and a glossy honey-soy sauce.
Why the Thickest Part, Not the Clock, Sets the Finish
A tenderloin isn’t a perfectly even cylinder. One end is often narrower than the other, so the thin end can cook faster while the thick center still needs time. That’s why a time range is useful for planning, but it can’t tell you exactly when this particular piece is ready.
Use an instant-read thermometer in the thickest part and let that reading guide you. If you rely on browned color alone, the outside may look done while the middle is still short of its target. If you leave the pork in the oven just to reach the longest possible cook time, the lean meat can overshoot and turn dry. I check the center rather than waiting for the narrow end to look a certain way.
The sear and the oven do different jobs here: the skillet browns the surface, and the oven cooks the center more evenly. After roasting, a short rest gives the juices a moment to settle before you slice. That keeps the cutting board from collecting the moisture you want in the pork.
What Honey, Soy, and Vinegar Each Bring to the Glaze
- Pork tenderloin — Choose tenderloin, not pork loin; they’re different cuts and don’t share the same cooking timing. Removing the silver skin matters because that tough membrane doesn’t soften as the pork cooks.
- Honey — It gives the sauce its rounded sweetness and helps create a glaze once the starch thickens the liquid. A good everyday honey works well here; a strongly flavored honey will make its character more noticeable.
- Low-sodium soy sauce — This brings salt and deep savory flavor without making the finished sauce overly salty. Regular soy sauce is saltier, so it isn’t a straight flavor match for this balance; the gluten-free tamari option below is the closest swap.
- Apple cider vinegar and chicken broth — Broth gives the sauce savory depth, while vinegar cuts through the honey’s sweetness. Keep both in the mix: leaving out the vinegar makes the glaze taste flatter and sweeter.
- Fresh garlic — Minced garlic releases its flavor quickly in the warm skillet. Keep the pieces small and fairly even so they soften during their brief cook instead of leaving large, sharp bites.
- Cornstarch — Whisking it with water first makes a smooth slurry that thickens the sauce evenly. Don’t sprinkle dry cornstarch into the skillet; it tends to form stubborn clumps.
- Neutral oil, kosher salt, and black pepper — Neutral oil handles the skillet sear without competing with the sauce. Season the pork on all sides so the meat itself is well seasoned, not just the glaze.
How the Skillet Takes the Pork from Sear to Honey-Garlic Sauce
Brown the Tenderloin All Over
Heat the oven to 400°F. Pat the pork dry, season all sides with the kosher salt and black pepper, then heat the oil in a 12-inch oven-safe skillet over medium-high heat. Sear for about 2 minutes per side, turning until the tenderloin is browned all over. If it sticks at first, give it a little time to release rather than forcing it across the pan.
Roast to Temperature, Then Rest
Move the skillet to the oven and roast the pork for 12 to 18 minutes. Check the thickest part with an instant-read thermometer and take the tenderloin out when it reads 145°F. Transfer it to a cutting board and tent it loosely with foil. Let it rest for at least 3 minutes while you make the sauce.
Build the Sauce in the Same Pan
Carefully pour off the excess fat, leaving about 1 tablespoon in the skillet, then set the skillet over medium-low heat. Add the minced garlic and stir for 30 seconds; it should smell fragrant, not toasted or dark. Stir in the honey, low-sodium soy sauce, chicken broth, and apple cider vinegar. Bring the mixture to a simmer, scraping the bottom as you stir so the sauce picks up the browned bits.
Thicken, Slice, and Serve
Whisk the cornstarch and water together in a small bowl until smooth. Stir the slurry into the simmering sauce and cook for 1 to 2 minutes, until the sauce looks glossy and thickened. If it still looks loose, give it the full simmering time rather than adding dry starch directly. Slice the pork across the grain and serve it with the sauce.
Two Swaps That Keep the Glaze Balanced
Use Gluten-Free Tamari for a Gluten-Free Sauce
Replace the low-sodium soy sauce with the same measure of gluten-free tamari. It keeps the sauce savory and gives it a slightly deeper, rounder taste; choose a lower-sodium version if you want to stay close to the original salt balance.
Trade the Honey for Maple Syrup
Use the same measure of pure maple syrup in place of the honey. The sauce will taste less floral and more woodsy, but the cornstarch slurry still gives it a glossy, spoonable texture.
Storage and Reheating
- Refrigerator: Refrigerate leftovers within 2 hours and keep them in an airtight container for 3 to 4 days. The sauce thickens as it chills, and the pork firms up.
- Freezer: Freeze the sliced pork with its sauce in a sealed freezer-safe container for up to 2 to 3 months. Thaw it in the refrigerator before reheating for more even warming.
- Reheating: Warm covered in the microwave in short intervals or gently in a covered skillet, stirring the sauce and turning the slices so they heat evenly. Reheat leftovers to 165°F; prolonged high heat can dry out the lean pork.
Questions That Come Up When Cooking Pork Tenderloin
Honey Garlic Pork Tenderloin
Ingredients
Equipment
Method
- Preheat the oven to 400°F.
- Pat the pork dry and season it on all sides with the salt and pepper.
- Heat the oil in a 12-inch oven-safe skillet over medium-high heat.
- Sear the pork for about 2 minutes per side, turning until browned all over.
- Transfer the skillet to the oven and roast for 12 to 18 minutes, until an instant-read thermometer inserted into the thickest part reads 145°F.
- Transfer the pork to a cutting board, tent loosely with foil, and rest for at least 3 minutes while you make the sauce.
- Carefully pour off excess fat from the skillet, leaving about 1 tablespoon, and set the skillet over medium-low heat.
- Add the garlic and cook for 30 seconds, stirring.
- Stir in the honey, soy sauce, chicken broth, and vinegar, and bring the sauce to a simmer.
- Whisk the cornstarch and water together in a small bowl.
- Stir the mixture into the skillet and simmer for 1 to 2 minutes, until glossy and thickened.
- Slice the pork across the grain and serve with the sauce.
