
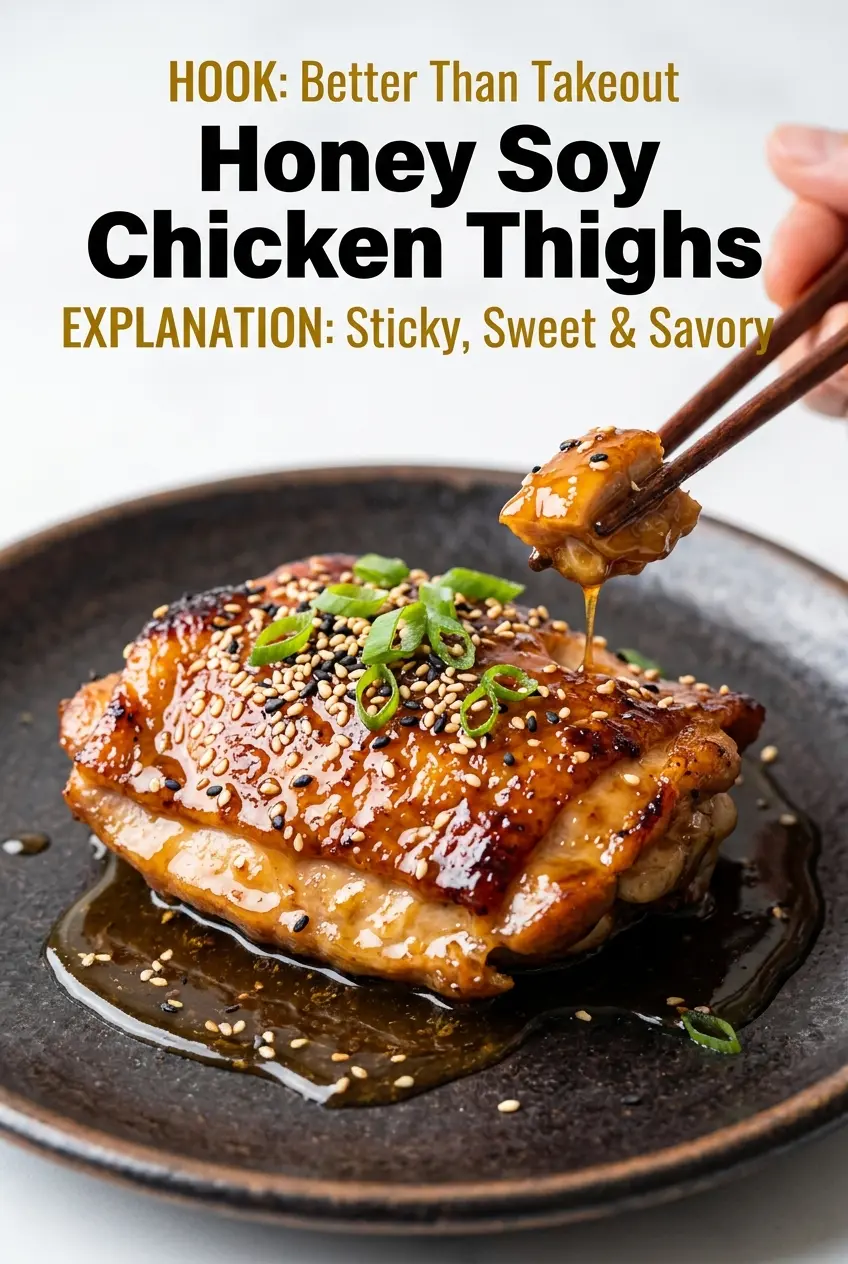
Sticky, glossy honey soy chicken thighs hit that sweet spot between takeout comfort and the kind of dinner you can pull off without thinking too hard. The skin gets deeply golden in the pan, then the glaze reduces into a lacquer that clings to every bite instead of pooling at the bottom of the skillet. What you get is savory, sweet, garlicky chicken with crisp edges and a sauce that tastes like it took much longer than it did.
The trick here is starting with bone-in, skin-on thighs and drying them well before they hit the pan. That dry skin is what gives you the crackly sear, and that sear leaves browned bits behind that season the sauce as it simmers. Honey brings the shine, soy sauce brings the salt and depth, rice vinegar keeps the glaze from turning flat, and a little sesame oil at the end rounds everything out without making it greasy.
Below, I’ve included the small things that matter: how much fat to leave in the pan, when to thicken the sauce, and what to do if the glaze gets too tight. There’s also a useful storage note, because these thighs reheat better than most glazed chicken dishes if you handle the sauce the right way.
The skin stayed crisp even after the glaze went on, and the sauce thickened up exactly how you described. My husband asked if I could put this on the weekly rotation.
Save these sticky honey soy chicken thighs for the nights when you want crisp skin, a glossy glaze, and one skillet to do all the work.
The Secret to Crispy Skin in a Sticky Glaze
The biggest mistake with glazed chicken thighs is rushing the sear or crowding the pan. If the skin goes into a wet skillet or sits in steam, it softens before it ever has a chance to brown. Patting the thighs dry and searing them skin-side down first gives you the rendered fat and deep color that the sauce can’t fake later.
Just as important, don’t drown the pan in liquid before the chicken has built some color. The glaze needs those browned bits from the skillet, and it needs a little reduction time to move from thin and salty to glossy and clingy. If the sauce looks pale and watery, it hasn’t cooked long enough. If it turns too thick too fast, the heat was too high.
What Each Ingredient Is Actually Doing in This Dish

- Bone-in, skin-on chicken thighs — These stay juicy through the simmer and give you the best sear. Boneless thighs work in a pinch, but you lose some of the richness and the skin won’t give you the same crisp finish.
- Honey — This is what builds the sticky sheen and gentle sweetness. If you swap it for brown sugar, the sauce will taste more caramel-like and less rounded, and it won’t glaze quite as smoothly.
- Low-sodium soy sauce — It gives salt, color, and that savory backbone. Regular soy sauce works, but the dish can get too salty fast, especially once the glaze reduces.
- Rice vinegar — This keeps the sauce from tasting heavy. White vinegar works in smaller amounts, but rice vinegar is softer and fits the glaze better.
- Garlic and ginger — They’re not background notes here; they carry the whole sauce. Fresh is worth using because dried versions won’t melt into the glaze the same way.
- Cornstarch slurry — This gives the sauce its final lacquered texture. Add it only after the chicken is cooked through, or it can thicken too early and turn pasty before the glaze is ready.
- Toasted sesame oil — A small amount adds depth at the end. Too much makes the sauce taste heavy, so measure it carefully.
Building the Glaze Without Losing the Crispy Skin
Dry the Chicken and Sear the Skin Hard
Pat the thighs dry until the skin feels tacky, then season them right before they go into the pan. Lay them in skin-side down and let them sit undisturbed until the skin is deeply golden and the fat has rendered out; moving them too early tears the skin and stops the browning. Flip them once the first side releases cleanly and pick up some color on the second side, too.
Whisk the Glaze Before the Chicken Finishes
Mix the honey, soy sauce, rice vinegar, garlic, ginger, and sesame oil while the chicken sears so the pan doesn’t sit waiting once the color is there. When you pour it in, lower the heat right away. Honey scorches fast, and if the pan is raging hot, the garlic can turn bitter before the chicken is done.
Simmer Until the Chicken Is Cooked Through
After the glaze goes in, keep the pan at a gentle simmer and cover it so the thighs cook through without drying out. You’re looking for steady bubbles, not a hard boil. If the sauce reduces too quickly before the chicken hits 165°F, add a splash of water to keep the glaze moving and protect the texture.
Finish With the Slurry and Shine
Move the chicken out before adding the cornstarch slurry, then stir it into the simmering sauce until it turns glossy and coats the back of a spoon. Put the chicken back in and spoon the glaze over the top so every piece gets lacquered. That last step is what makes the dish look and taste finished instead of just sauced.
How to Adapt These Honey Soy Chicken Thighs
Gluten-Free Version
Use tamari or a certified gluten-free soy sauce in place of standard soy sauce. The flavor stays close, and the glaze still reduces the same way, so you don’t lose the sticky finish.
Boneless Thighs Instead of Bone-In
Boneless thighs cook faster and are easier to eat, but they won’t give you the same juiciness or pan flavor. Pull them from the sauce a few minutes earlier and watch the simmer closely so they don’t overcook.
Lower-Sugar Glaze
Cut the honey back a little and add another splash of rice vinegar to keep the sauce balanced. The glaze will be less sticky and slightly thinner, but the savory ginger-garlic flavor stays front and center.
Storage and Reheating
- Refrigerator: Store for up to 4 days in an airtight container. The skin softens, but the flavor deepens as it sits in the glaze.
- Freezer: Freezes well for up to 2 months. Freeze the chicken with plenty of sauce so it doesn’t dry out on thawing.
- Reheating: Warm gently in a covered skillet over low heat with a splash of water to loosen the glaze. High heat can tighten the sauce and make the chicken go rubbery before the center is hot.
Answers to the Questions Worth Asking
Honey Soy Chicken Thighs
Ingredients
Equipment
Method
- Pat the chicken thighs dry, then season all sides with salt and black pepper. Heat vegetable oil in a large skillet over medium-high heat until shimmering.
- Place thighs skin-side down in the hot skillet and sear for 6-7 minutes, until the skin is deeply golden and crisp. Flip and sear the other side for 3-4 minutes more.
- While the chicken sears, whisk together honey, low-sodium soy sauce, rice vinegar, minced garlic, grated ginger, and toasted sesame oil in a bowl. Stir until the mixture looks smooth and glossy.
- Remove excess fat from the skillet, leaving about 1 tbsp. Pour the honey soy mixture over the chicken, reduce heat to medium-low, cover, and simmer for 15-18 minutes until the chicken reaches 165°F internally.
- Remove the chicken to a plate. Stir the cornstarch slurry into the simmering sauce and cook for 1-2 minutes, stirring, until it thickens into a glossy glaze that coats the back of a spoon.
- Return the chicken to the skillet and spoon the thickened glaze over each piece until well coated and glistening. Let the glaze cling for about 1 minute so it coats evenly.
- Top the chicken with sliced green onions and toasted sesame seeds. Serve warm over rice.
