
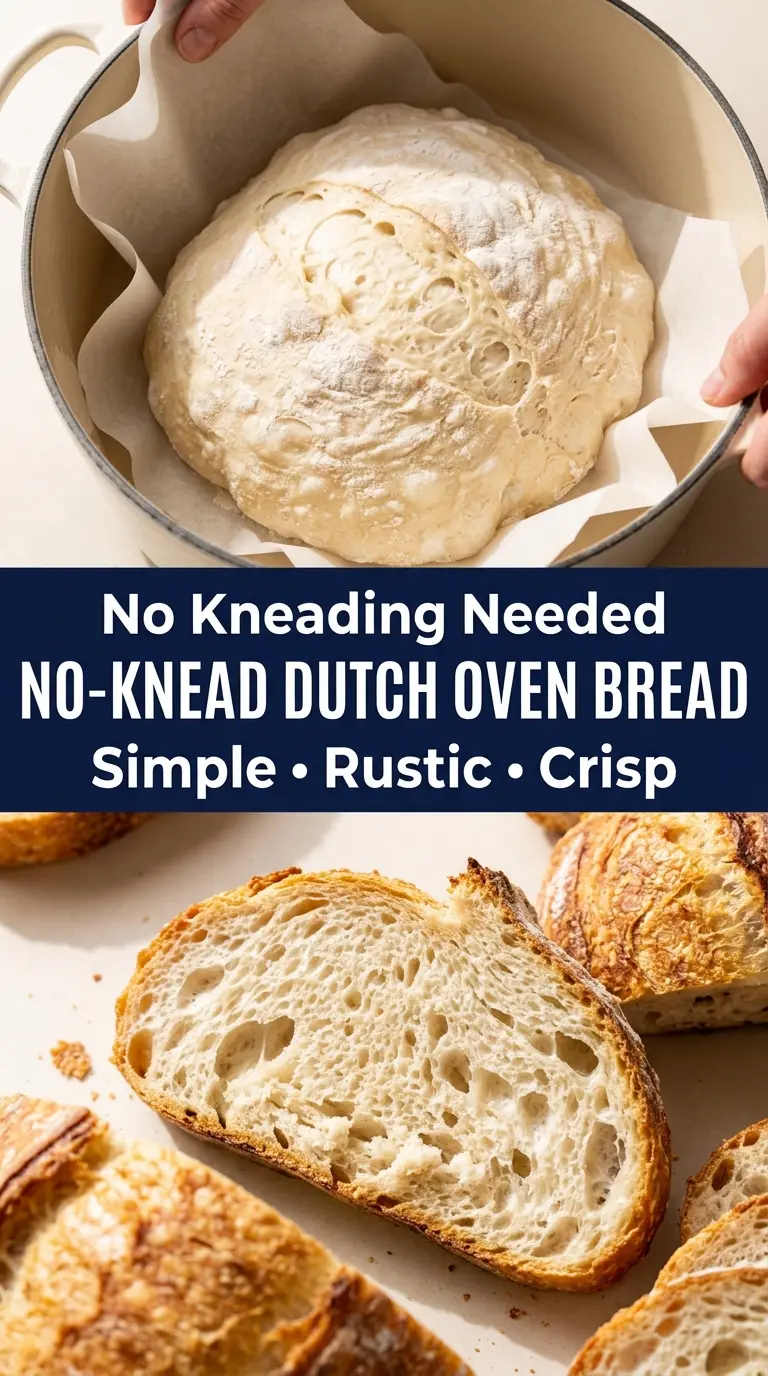
Crackling crust, a soft open crumb, and that bakery-style aroma that fills the kitchen — this no-knead Dutch oven bread earns its place fast. The loaf comes out with a deeply browned shell that shatters when you cut into it, while the inside stays light, chewy, and full of those irregular holes that make a good artisan bread feel special. The best part is that the dough does almost all the work on its own. A long rise builds flavor and structure without any kneading, and the hot Dutch oven traps steam so the crust sets late instead of hardening too soon.
What makes this version dependable is the balance of time, hydration, and heat. The dough is sticky on purpose, which can feel wrong if you’re used to traditional bread dough, but that extra moisture is what gives the crumb its stretch and those open pockets. The honey gives the yeast a small head start and rounds out the flavor without making the loaf sweet. Once the Dutch oven is fully preheated, the bread bakes in its own little steam chamber, which is what creates that tall rise and glossy, crackly crust.
Below, I’ve included the small details that matter most: how to handle a slack dough without overworking it, what to look for before it goes into the oven, and a few easy swaps if you want to adjust the flavor or make it fit what you’ve got on hand.
The crust came out deeply golden and crackly, and the crumb had those big airy holes I always want in homemade bread. I was nervous about the sticky dough, but it rose beautifully overnight and sliced cleanly after cooling.
No-knead Dutch oven bread with that crackly crust? Save this one for the next time you want artisan-style bread without the fuss.
The Part Most Bread Recipes Get Wrong: Steam Management
The biggest mistake with crusty homemade bread is baking it in an oven that’s hot but dry. Without steam in the first stretch of baking, the outer surface sets too early, and the loaf can’t rise the way it should. The Dutch oven fixes that by trapping moisture released from the dough itself, which keeps the crust flexible long enough for the bread to spring upward before it hardens.
This is why the preheat matters so much. If the pot isn’t fully hot, the loaf will spread more than it rises, and the bottom can bake before the center has finished opening up. The lid stays on for the first part of the bake to hold in steam, then comes off so the crust can dry out and turn that deep amber color. That two-stage bake is what gives you the contrast between a crisp shell and a soft interior.
What the Flour, Yeast, and Honey Are Doing Here
- All-purpose flour — This gives you a bread with a tender chew and enough structure to hold an open crumb. Bread flour will add a little more strength and chew if you want a firmer loaf, but all-purpose works well and keeps the recipe approachable.
- Instant yeast — The small amount of yeast is what makes the long fermentation possible without overproofing. If all you have is active dry yeast, use the same amount and dissolve it in the warm water a few minutes longer before mixing.
- Honey — This helps the yeast get moving and adds a gentle depth to the finished loaf. You can leave it out, but the bread will taste a touch flatter and the crust won’t brown quite as evenly.
- Warm water — Around 105°F is ideal because it wakes up the yeast without pushing it into a stressed, sluggish rise. Water that feels hot to the touch can slow fermentation or kill the yeast, which is why temperature matters more here than in many quick breads.
- Olive oil — This is optional, but a small amount gives the dough a softer feel and a slightly richer flavor. Skip it for a leaner, more classic artisan loaf.
From Sticky Dough to a Real Loaf
Mixing Without Overthinking It
Stir the flour, salt, and yeast together first, then add the honey-water mixture and mix until no dry patches remain. The dough should look ragged, wet, and a little ugly at this stage. That’s correct. If you keep stirring until it looks smooth, you’ll end up building more gluten than this recipe needs, and the bread can turn tighter than you want.
The Long Rise That Builds Flavor
Cover the bowl tightly and let the dough sit at room temperature until it has doubled and the surface is dotted with bubbles. The timing depends on the warmth of your kitchen, so watch the dough more than the clock. A cold room slows everything down; a very warm room can push it past its best point and leave it slack. You want a dough that has clearly expanded, feels airy, and still has some strength when you lift it.
Shaping Gently So You Keep the Air
Turn the dough onto a floured surface and fold the edges inward just enough to give it shape. Don’t punch it down or knead it hard. The gas trapped inside is what gives the loaf its open texture, and rough handling knocks that out. When the dough is shaped into a loose round and placed seam-side down on parchment, it should hold itself together without feeling tight.
Baking Hot and Uncovered at the End
Preheat the Dutch oven in the oven before the dough goes in. That initial blast of heat gives the loaf immediate oven spring. Bake covered first, then remove the lid for the final stretch so the crust can dry and darken. If the loaf looks pale when the lid comes off, give it the full uncovered time; underbaking at this stage leaves you with a soft crust instead of the crisp finish that makes this bread worth making.
How to Change This Loaf Without Ruining the Crust
Whole Wheat for a Heartier Loaf
Swap up to half the all-purpose flour with whole wheat flour for a nuttier, denser bread. The loaf will absorb more water and bake up a little tighter, so expect less of an open crumb and a slightly more rustic chew. If you push the whole wheat higher than half, the bread starts to lose the light texture that makes this method work so well.
Dairy-Free by Default
This bread is naturally dairy-free as written, which makes it one of the easiest artisan-style loaves to serve alongside soups, stews, or a dinner spread. If you want a slightly richer crumb, add the optional olive oil, but the bread doesn’t need any milk or butter to bake up with a crisp shell and soft interior.
Seeded Top or Herb Finish
Brush the shaped loaf lightly with water and scatter sesame seeds, poppy seeds, or chopped rosemary over the top before baking. The crust gets a little extra texture, and the herbs or seeds toast as the bread bakes. Keep the topping light so it doesn’t interfere with scoring or burn in the hot Dutch oven.
Storage and Reheating
- Refrigerator: Keep the cooled loaf wrapped at room temperature for up to 2 days; refrigerating bread tends to dry the crumb faster.
- Freezer: This bread freezes well. Slice it first, wrap it tightly, and freeze for up to 3 months so you can pull off individual pieces without thawing the whole loaf.
- Reheating: Warm slices in a toaster or a 350°F oven until the crust re-crisps. Microwaving softens the crust and turns the crumb rubbery, which is the fastest way to lose what makes this bread good.
Answers to the Questions Worth Asking
No-Knead Dutch Oven Bread
Ingredients
Equipment
Method
- Combine the flour, salt, and instant yeast in a large mixing bowl.
- Stir the honey into the warm water until dissolved.
- Pour the water into the dry ingredients and stir with a wooden spoon until a sticky, shaggy dough forms.
- Cover the bowl tightly and let the dough rise at room temperature for 12–18 hours, until doubled and covered with bubbles.
- Turn the dough onto a lightly floured surface and gently fold the edges toward the center several times without kneading.
- Shape the dough loosely into a round loaf and place it seam-side down on parchment paper.
- Cover and let the dough rest for 30–45 minutes.
- Preheat the oven to 450°F with a 5–6 quart Dutch oven and lid inside for at least 30 minutes.
- Score the top of the dough with one deep slash.
- Carefully lower the dough and parchment into the hot Dutch oven, then cover and bake for 30 minutes.
- Remove the lid and bake for another 12–15 minutes until the crust is deeply golden and crisp.
- Transfer the bread to a wire rack and cool for at least 45 minutes before slicing.
