
The semisweet layer can look ready for its white chocolate long before it actually is. Pour too soon and the two colors can run together; wait until the base is cold and the white layer has less to grab onto. I let the surface set at room temperature while the chocolate underneath still feels a little soft, which gives these peppermint bark layers a clean line without making them separate when I break them.
This version keeps the chocolate in distinct layers, with crushed candy canes adding a crisp peppermint finish. The small pause between spreading the chocolates is what gives the bark its neat two-tone look. Once it’s firm, you can break it into pieces with a clean snap and a bright white top scattered with candy cane crunch.

Kitchen Note
I stop the microwave when stirring brings the chocolate together into a smooth, glossy pool. It doesn’t need extra time just because a few pieces still look solid when the bowl comes out; the warm chocolate will finish melting as you stir.
Save this peppermint bark for a crisp candy cane topping and two clean layers of chocolate.
Why the Two Chocolate Layers Need a Soft Set Between Them
Peppermint bark looks simple, but its layers need to meet at just the right point. If the semisweet chocolate is still completely fluid, the white chocolate can sink into it and blur the line between dark and white. Letting the base stand at room temperature gives its surface time to set enough to support the next layer.
There’s a difference between a surface that has set and a base that has gone cold and firm. A slightly soft layer gives the white chocolate a better chance to settle against it, so the pieces stay together when you break the finished bark. After 15 to 20 minutes, look for a surface that no longer looks wet or glossy, while the chocolate itself still has a little give.
If the base feels cold and hard, don’t try to force the top layer across it. Spread the white chocolate gently rather than pressing down; pressure can disturb the bottom layer even when it has set. A patient rest at room temperature helps keep the finished pieces sharply layered instead of marbled or separated.
What the Two Chocolates and Candy Canes Each Bring
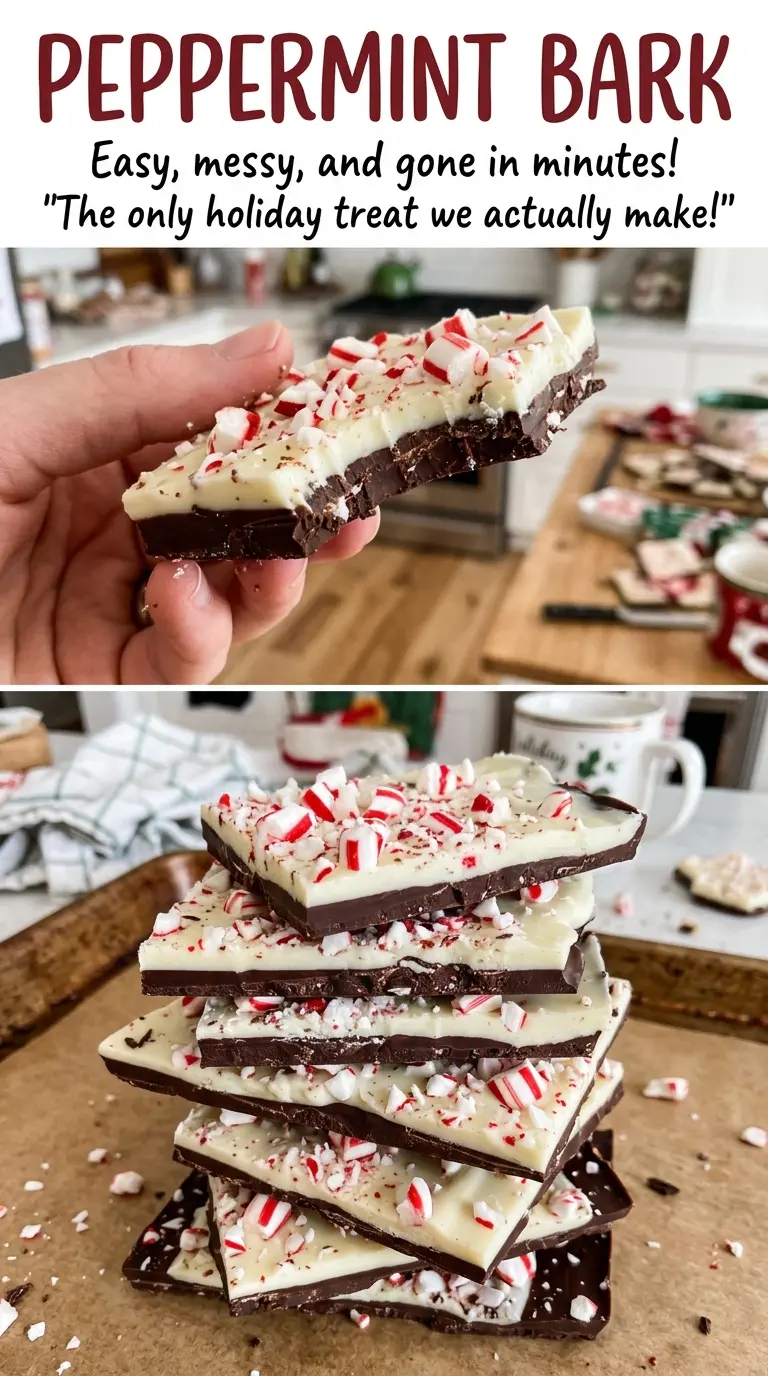
- Semisweet chocolate — This makes the lower layer, balancing the sweetness of the white chocolate and candy canes. Choose a bar you like eating on its own; because it’s one of the two main flavors, a waxy or bland chocolate will stand out. Finely chopping it helps the pieces melt at a steady pace. Bittersweet chocolate is the closest swap if you want a darker, less-sweet base; use the same weight.
- White chocolate — Real white chocolate gives the bark its creamy top layer and a smooth contrast to the semisweet base. Quality matters here because white chocolate can scorch more readily than dark chocolate, and a smooth melt is what lets you spread it without dragging the bottom layer. Choose a bar that can be finely chopped; white baking chips may hold their shape and can be harder to spread in an even layer.
- Crushed candy canes — These give the top its peppermint flavor and crisp texture. Crush them into small pieces rather than a fine powder so each bite has a little crunch and the topping stays visible. The candy canes don’t need to be a particular brand, but keep the pieces fairly even so they scatter across the chocolate instead of collecting in a few heavy patches.
How to Get Clean Layers Without Overworking the Chocolate
Line the Pan Before You Melt Anything
Line a 9×13-inch baking pan with parchment paper before you start melting the chocolate. Let the parchment reach up the sides so you can lift the firm bark out of the pan later. A flat sheet makes spreading easier, while folds or bunches can leave ridges in the bottom layer. Have the crushed candy canes ready before the white chocolate is melted, since that top layer is easiest to finish while it’s still fluid.
Melt the Semisweet Chocolate Gently
Put the finely chopped semisweet chocolate in a microwave-safe bowl and heat it at 50% power in 30-second intervals, stirring after each one. It should take about 1 1/2 to 2 minutes to become smooth. Stir well between intervals; the bowl may look full of pieces even when the chocolate is already soft enough to melt together. If you keep heating it until every piece disappears without stirring, the chocolate can scorch around the edges.
Let the Base Set at Room Temperature
Spread the melted semisweet chocolate evenly in the prepared pan. Let it stand at room temperature for 15 to 20 minutes, until the surface has set but the chocolate isn’t cold. A matte-looking surface is a helpful visual cue; the layer shouldn’t ripple when you move the pan gently. Don’t rush this rest by refrigerating the base, because a very cold layer can make the top harder to spread smoothly.
Finish the White Layer and Chill Until Firm
Use a clean microwave-safe bowl for the white chocolate, and heat it at 50% power in 20-second intervals, stirring after each one, for about 1 to 2 minutes total. Spread it gently over the semisweet layer, then sprinkle the crushed candy canes evenly across the top. Refrigerate the pan for 20 to 30 minutes, until the bark is firm. Lift it out by the parchment and break it into pieces.
Three Ways to Adjust the Chocolate and Crunch
Choose a Darker Chocolate Base
Swap the semisweet chocolate for the same weight of bittersweet chocolate. The lower layer will taste less sweet and more cocoa-forward, which gives the white chocolate and candy cane topping a sharper contrast.
Make the Peppermint Crunch Finer or Bolder
Keep the candy cane pieces small for an even crunch in each bite, or leave them a little larger for a more noticeable snap. A finer crush spreads more evenly across the white chocolate, while bigger pieces give the top a chunkier texture.
Make a Dairy-Free Version
Replace both chocolates with dairy-free semisweet and dairy-free white chocolate bars, using the same weight of each. The finished bark will still have its two-tone look, though dairy-free white chocolate can melt to a thicker consistency and may take a gentler touch to spread. Keep the candy canes if their ingredient label suits your needs.
Storage and Serving
- Refrigerator: Store the bark in an airtight container for up to 2 weeks. It will be firmer straight from the fridge.
- Freezer: Freeze it in an airtight container with parchment between layers for up to 2 months. Let the closed container come to room temperature before opening to limit condensation on the chocolate.
- Serving: Serve chilled for a firm snap, or let the bark lose some of its chill before serving. Avoid leaving it somewhere warm, where the chocolate can soften.
The Peppermint Bark Questions That Come Up Most
Peppermint Bark
Ingredients
Equipment
Method
- Line a 9x13-inch baking pan with parchment paper.
- Put the semisweet chocolate in a microwave-safe bowl and microwave at 50% power in 30-second intervals, stirring after each, until smooth, about 1 1/2 to 2 minutes.
- Spread the semisweet chocolate evenly in the prepared pan.
- Let stand at room temperature for 15 to 20 minutes, until the surface is set but the chocolate is not cold.
- Put the white chocolate in a clean microwave-safe bowl and microwave at 50% power in 20-second intervals, stirring after each, until smooth, about 1 to 2 minutes.
- Spread the white chocolate gently over the semisweet chocolate.
- Sprinkle evenly with the crushed candy canes.
- Refrigerate for 20 to 30 minutes, until firm.
- Lift the bark from the pan and break it into pieces.
