
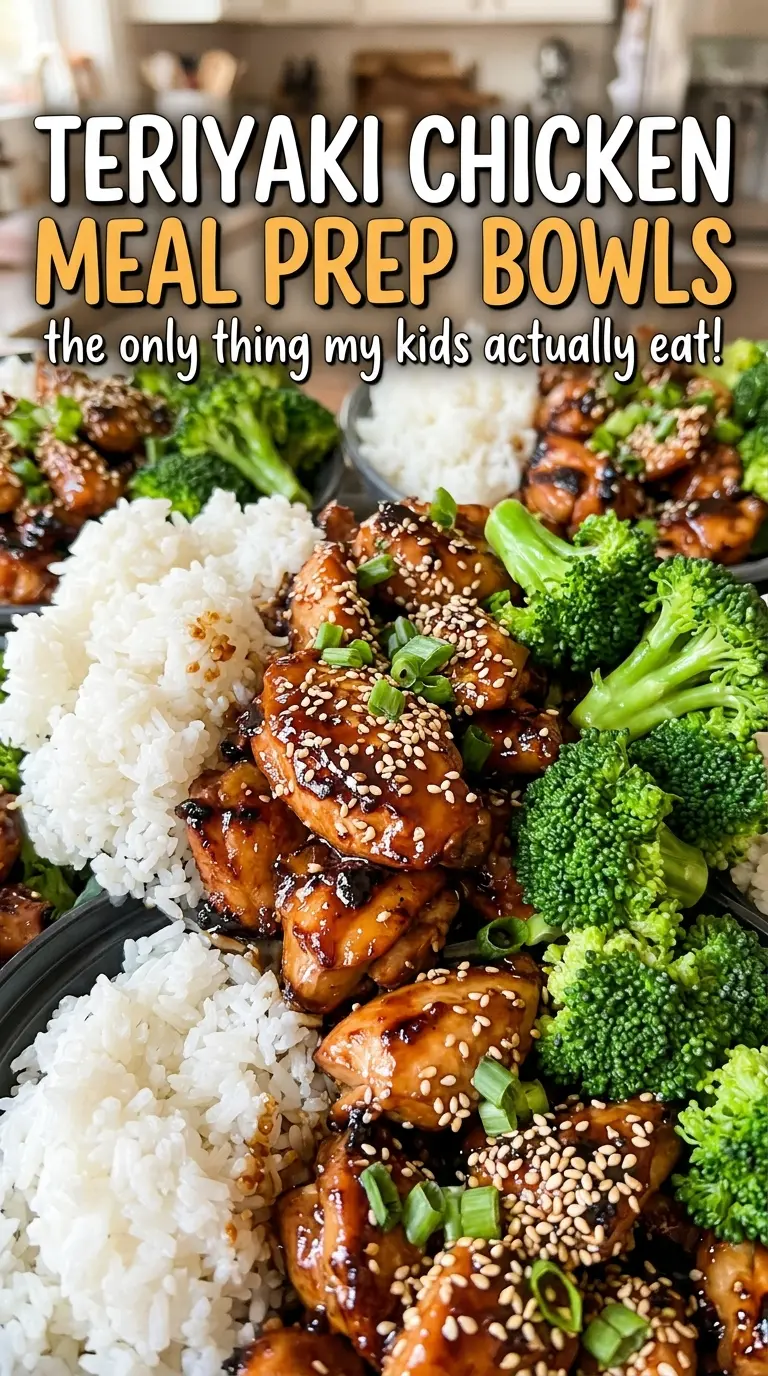
The chicken starts sizzling in the skillet, and the soy sauce, mirin, garlic, and ginger turn the kitchen fragrant before the sauce even goes in. I like that these Teriyaki Chicken Meal Prep Bowls build a full lunch from simple stovetop components, without asking the chicken to sit in a marinade or the vegetables to roast in a separate pan.
The order matters: rice gets time to steam under its lid, the broccoli and carrots cook just until crisp-tender, and the chicken cooks in two batches before the sauce thickens around it. I keep the sauce sweet but balanced with honey and brown sugar, and the glossy finish clings to the chicken instead of pooling at the bottom of the container. By the time everything is divided among four bowls, you have tender chicken, fluffy rice, and vegetables that still have a little bite.

Kitchen Note
Keep the rice covered for its full 10-minute rest after it comes off the heat. That quiet finish lets the grains settle and steam through, so they fluff instead of turning sticky when you portion the bowls.
Save these Teriyaki Chicken Meal Prep Bowls for a week of lunches with glossy chicken, fluffy rice, and crisp-tender vegetables.
Why the Teriyaki Sauce Needs a Cornstarch Slurry
The soy, mirin, honey, brown sugar, garlic, and ginger make a flavorful sauce, but they won’t cling to the chicken on their own. Cornstarch is what turns that liquid into a glossy coating. Whisking it straight into the full bowl of sauce can leave stubborn little lumps, so I pull out a small amount first and whisk the starch into that portion until it’s smooth.
Once the chicken is coated with the remaining sauce and it reaches a gentle simmer, whisk the slurry again before stirring it in. Cornstarch settles as it sits, and a quick re-whisk spreads it evenly through the pan. The sauce thickens quickly, so keep it at a gentle simmer and stop when it looks glossy and coats the chicken. A hard boil or a long reduction isn’t needed; it can make the sauce thicker than you want for meal prep.
That balance is useful in a packed bowl: the sauce stays with the chicken instead of running straight into the rice, while there’s still enough to flavor each bite. The small bowl for the slurry is worth dirtying.
Why Low-Sodium Soy Sauce Gives the Sweeteners Room to Work
- Long-grain white rice — Its separate, fluffy grains make a sturdy base under saucy chicken. An inexpensive bag works well here; rinsing away surface starch and draining thoroughly matter more than buying a premium brand. Jasmine rice is a workable swap if you like a more aromatic, slightly softer bowl.
- Low-sodium soy sauce and mirin — Soy sauce brings the savory backbone, while mirin adds gentle sweetness and depth. Low-sodium soy sauce leaves room for the honey and brown sugar without making the whole bowl taste overly salty. Choose a regular grocery-store mirin; a specialty bottle isn’t necessary. For a gluten-free version, use certified gluten-free tamari for the soy sauce and verified gluten-free mirin.
- Honey and brown sugar — They sweeten the sauce in different ways: honey blends smoothly, while brown sugar brings a mellow molasses note. Keep both for the intended balance; changing one for the other makes the sauce taste and thicken differently.
- Fresh garlic and ginger — These aromatics give the sauce its lively, savory edge. Freshly grated ginger has a brighter flavor than dried ginger, and freshly minced garlic blends into the sauce more evenly than large pieces.
- Chicken thighs — Boneless, skinless thighs stay juicy through the skillet cook and reheating. They’re usually an affordable choice, and cutting them into even 1-inch pieces helps them cook at a similar pace. Chicken breast works too, though it’s leaner and less forgiving if left in the pan too long.
- Broccoli and carrots — Broccoli florets and thinly sliced carrots cook together in the covered skillet, with the carrots’ thin cut helping them soften in the same window. Fresh vegetables are inexpensive and give you better control over the crisp-tender finish than vegetables that release extra water.
- Cornstarch and neutral oil — Cornstarch thickens the sauce without adding a separate flavor, and a neutral oil lets the chicken cook without competing with the teriyaki. A basic vegetable or canola oil is fine; save specialty oils for dishes where their flavor is meant to stand out.
The Order That Keeps the Rice Fluffy and the Vegetables Crisp-Tender
Rinse and Steam the Rice
Rinse the rice in a fine-mesh sieve until the water runs mostly clear, then drain it well. Combine it with the water and kosher salt in a 2-quart saucepan and bring it to a boil over high heat. Cover, lower the heat, and simmer for 15–18 minutes, until the water is absorbed. Remove the pan from the heat, leave it covered for 10 minutes, then fluff the rice with a fork.
Cook the Vegetables Until They Still Have Bite
Put the broccoli florets, thinly sliced carrots, and chicken broth in a 12-inch skillet. Cover and cook over medium heat for 5–7 minutes. The vegetables should be crisp-tender, not soft or collapsing; start checking at the early end of the cooking window if your florets are small. Transfer them to a bowl so the skillet is ready for the chicken.
Whisk the Sauce and Make the Slurry
In a small bowl, whisk together the soy sauce, mirin, honey, brown sugar, minced garlic, and grated ginger. Transfer 2 tablespoons of that mixture to a separate small bowl and whisk in the cornstarch until smooth. A smooth slurry now prevents dry pockets of starch from showing up in the finished sauce. Keep the remaining sauce separate for the skillet.
Cook the Chicken in Two Batches
Heat the neutral oil in the skillet over medium-high heat. Add the chicken in two batches, stirring occasionally, and cook each batch for 5–7 minutes. Cut pieces to a consistent 1-inch size so the smaller pieces don’t finish long before the larger ones. Check the thickest pieces and cook until they reach 165°F.
Thicken the Sauce and Fill the Containers
Pour the remaining soy sauce mixture over the cooked chicken and bring it to a gentle simmer. Whisk the cornstarch mixture again, stir it into the skillet, and cook for 1–2 minutes, until the sauce is glossy and thickened. Divide the rice, vegetables, and teriyaki chicken among four meal-prep containers. Refrigerate the filled containers within 2 hours.
Three Changes That Fit These Teriyaki Chicken Bowls
Make the Sauce Gluten-Free
Replace the low-sodium soy sauce with the same amount of certified gluten-free tamari, and use verified gluten-free mirin. The sauce keeps its savory-sweet character, though tamari may taste a little deeper and less sharp.
Use Chicken Breast for a Leaner Bowl
Replace the thighs with boneless, skinless chicken breast cut into 1-inch pieces. Keep the two-batch approach and judge doneness by the thickest pieces reaching 165°F, since breast meat can dry out faster than thighs.
Scale It Down for Two Lunches
Use half of every listed ingredient and divide the finished food between two containers. Keep the same sequence and visual cues; the smaller amount of chicken may fit in one batch, but don’t crowd it if the pieces are touching across the pan.
Storage and Reheating
- Refrigerator: Keep the bowls refrigerated and use them within 3 to 4 days. The vegetables soften a little after chilling, but the rice and chicken hold up well.
- Freezer: Freeze portions in airtight, freezer-safe containers for up to 2 to 3 months for best quality. The rice and chicken freeze well; broccoli may soften more after thawing.
- Reheating: Microwave a portion until steaming hot throughout, stirring the rice and chicken partway through. Avoid one long heating cycle, which can dry out the chicken before the center is hot.
Questions That Come Up With Teriyaki Chicken Meal Prep Bowls
Teriyaki Chicken Meal Prep Bowls
Ingredients
Equipment
Method
- Rinse the rice in a fine-mesh sieve until the water runs mostly clear, then drain well.
- Combine the rice, water, and salt in a 2-quart saucepan and bring to a boil over high heat.
- Cover, reduce the heat to low, and simmer for 15–18 minutes, until the water is absorbed.
- Remove the rice from the heat and let stand covered for 10 minutes, then fluff with a fork.
- Combine the broccoli, carrots, and chicken broth in a 12-inch skillet; cover and cook over medium heat for 5–7 minutes, until the vegetables are crisp-tender.
- Transfer the vegetables to a bowl.
- Whisk the soy sauce, mirin, honey, brown sugar, garlic, and ginger in a small bowl.
- Transfer 2 tablespoons of the mixture to a separate small bowl and whisk in the cornstarch until smooth.
- Heat the oil in the skillet over medium-high heat.
- Cook the chicken in two batches for 5–7 minutes per batch, stirring occasionally, until the thickest pieces reach 165°F.
- Pour the remaining soy sauce mixture over the chicken and bring to a gentle simmer.
- Whisk the cornstarch mixture again, stir it into the skillet, and cook for 1–2 minutes, until the sauce is glossy and thickened.
- Divide the rice, vegetables, and teriyaki chicken among 4 meal-prep containers.
- Refrigerate within 2 hours.
