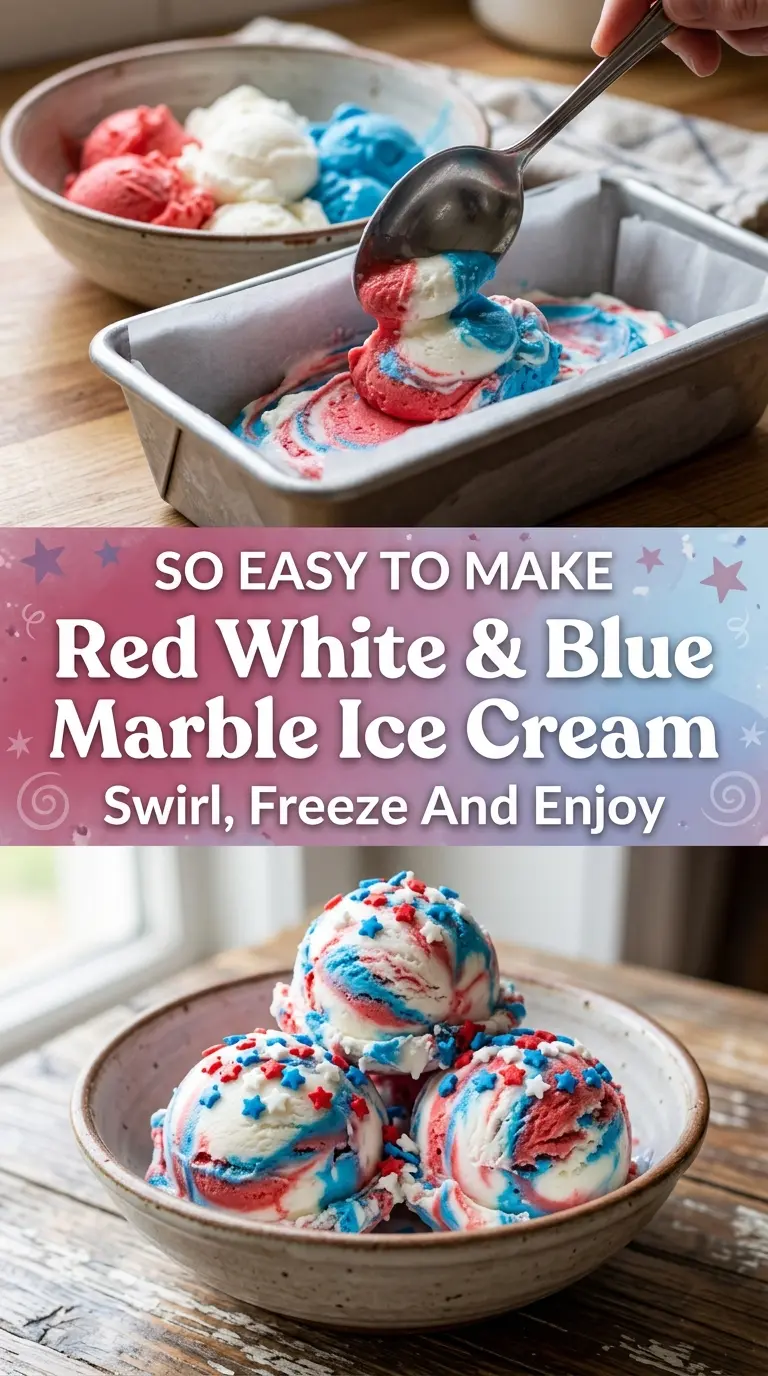
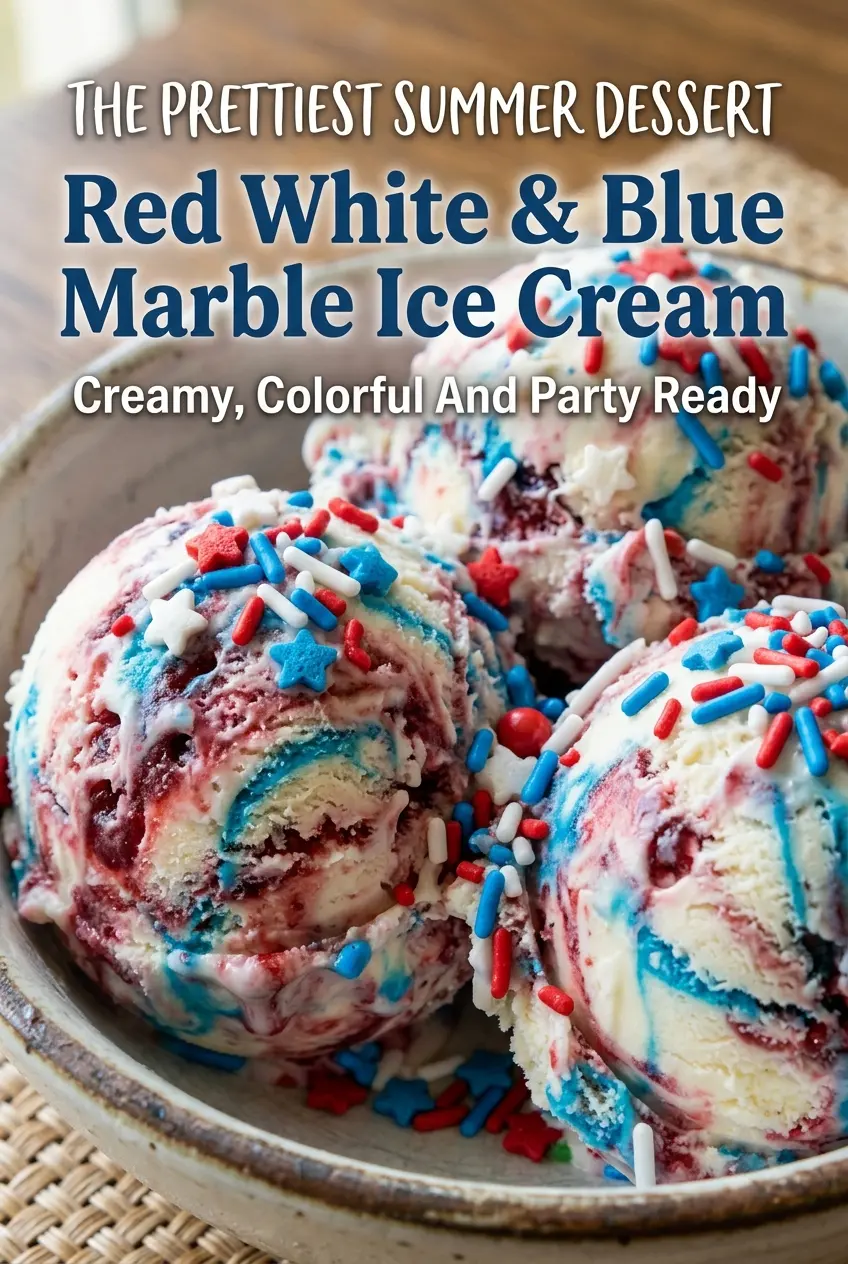
Red, white, and blue marble ice cream lands with the kind of cold, creamy scoop that disappears fast at a cookout. The texture stays soft enough to scoop cleanly, with vivid ribbons of color running through a vanilla base that tastes rich instead of icy. It looks festive on the table, but the real payoff is how smooth it stays after freezing.
The trick is keeping the base light before it goes into the freezer. Whipping the cream to stiff peaks gives the ice cream body without needing an ice cream machine, and folding it into the sweetened condensed milk keeps the mixture silky. Gel food coloring matters here because liquid coloring can water things down and mute the swirl. If you want the marble effect to stay distinct, the goal is restraint: layer the colors, then drag a knife through just enough to create streaks, not a full blend.
Below, you’ll find the exact point where the mixture should stop being mixed, plus a few ways to change up the finish without losing that dramatic red, white, and blue look.
The cream whipped up beautifully and the swirls stayed bold after freezing. I used gel coloring like you suggested and it came out picture perfect, not muddy at all.
Save this red, white, and blue marble ice cream for the next summer party when you want a no-churn dessert with bold swirls and a creamy scoop.
The Secret to Keeping the Swirls Bright Instead of Blending Into Pink
The biggest mistake with marble ice cream is overmixing at the end. Once the colors are layered into the pan, one or two gentle passes with a knife are enough. If you keep swirling, the red and blue bleed into the vanilla base and you lose the striped effect that makes this dessert stand out.
The other place people go wrong is with the coloring itself. Gel color gives you saturated red and blue without thinning the mixture, which keeps the freeze texture smooth. Liquid food coloring can work in a pinch, but you’ll need more of it, and that extra moisture can make the final scoop softer and a little icier around the edges.
- Whipping cream — This is what gives the ice cream its body. Whip to stiff peaks; if it stays floppy, the base won’t hold enough air and the finished ice cream will freeze dense.
- Sweetened condensed milk — It sweetens and softens at the same time, which is why no-churn ice cream stays scoopable. There isn’t a true substitute here that behaves the same way.
- Vanilla extract — It keeps the base from tasting one-note. Use real vanilla if you can, since the recipe is built around a simple cream flavor.
- Gel food coloring — This is the ingredient that creates the marble effect without loosening the mixture. Start with a small amount; you can always deepen the color, but you can’t pull it back once it’s too dark.
- White chocolate chips — Optional, but they add little frozen bites of sweetness. Fold them in sparingly so they don’t sink into a heavy layer at the bottom.
Building the Base and Layering the Color
Whipping the Cream to the Right Texture
Whip the cream until it holds stiff peaks that stand up when you lift the whisk. The cream should look thick and plush, not loose or foamy. If you stop too early, the ice cream freezes flatter and harder. If you overwhip and the cream starts turning grainy, the base gets less smooth.
Folding Without Deflating
Stir the sweetened condensed milk and vanilla together first, then fold in the whipped cream with a wide spatula. Use a low, sweeping motion and stop as soon as the mixture looks uniform. The goal is to keep the air in the cream, because that air is what gives the ice cream its soft texture straight from the freezer.
Creating the Marble Effect
Divide the base into three portions, leaving one plain and tinting the others red and blue with gel coloring. Spoon the colors into the loaf pan in alternating patches, then drag a knife through the mixture once or twice in long, shallow curves. If you keep going until the colors look blended, the finished ice cream loses its dramatic pattern and turns pastel.
Freezing Until Firm
Cover the pan tightly and freeze for at least 6 hours, though overnight gives the cleanest slices and scoops. The center should feel firm all the way through, not slushy in the middle. If you try to serve it too early, the swirls collapse when you scoop and the garnish sinks instead of sitting on top.
How to Change the Finish Without Losing the Patriotic Look
Make it dairy-free with coconut cream
Swap the heavy cream for chilled coconut cream and use a dairy-free sweetened condensed milk. The texture will be a little more plush and the flavor picks up a light coconut note, which works well with vanilla and sprinkles. Keep the gel coloring the same, since the marbling method doesn’t change.
Use berries instead of food coloring
If you want a more natural version, swirl in a thick strawberry puree for red and a blueberry reduction for blue. Cook both down first so they’re concentrated; thin berry sauce can ice up and muddy the base. The result tastes fruitier and a little less bold visually, but the flavor is fresh and clean.
Skip the white chocolate if you want a cleaner scoop
Leave out the chips for a smoother, more classic no-churn texture. They add sweetness and a little crunch, but they also create firm bits that can interrupt the clean marble look when you scoop. This version is best if you want the colors to stay front and center.
Storage and Reheating
- Refrigerator: Not recommended. This ice cream needs the freezer to hold its structure, and it will melt quickly in the fridge.
- Freezer: Keeps well for up to 2 weeks when covered tightly. Press parchment or plastic wrap directly on the surface to protect the swirls from ice crystals.
- Reheating: Let it sit at room temperature for 5 to 10 minutes before scooping. If it’s rock hard, the issue is usually a freezer that ran too cold or a pan that wasn’t covered well.
Questions I Get Asked About This Recipe
Red White & Blue Marble Ice Cream
Ingredients
Equipment
Method
- Whip the heavy whipping cream until stiff peaks form. Use a stand mixer and stop once the cream holds a peak that doesn’t slump.
- Combine the sweetened condensed milk and vanilla extract in a separate bowl until smooth. Stir just enough to fully blend the vanilla.
- Fold the whipped cream into the condensed milk mixture until smooth. Fold gently to keep the air in the cream.
- Divide the mixture into three portions. Keep the white portion separate from the colored portions.
- Color one portion red and one portion blue using gel food coloring. Add color gradually until the ribbons look vibrant.
- Alternate spoonfuls of each color into a loaf pan. Spoon in layers so the colors meet before they freeze.
- Gently swirl with a knife to create a marble effect without overmixing. Make a few light passes so streaks remain distinct.
- Sprinkle white chocolate chips between layers if desired. Tuck them in lightly so they distribute across the marbling.
- Cover and freeze for at least 6 hours or overnight. Freeze until firm enough to scoop cleanly.
- Scoop and garnish with patriotic sprinkles before serving. Add sprinkles right before serving for the best look.
