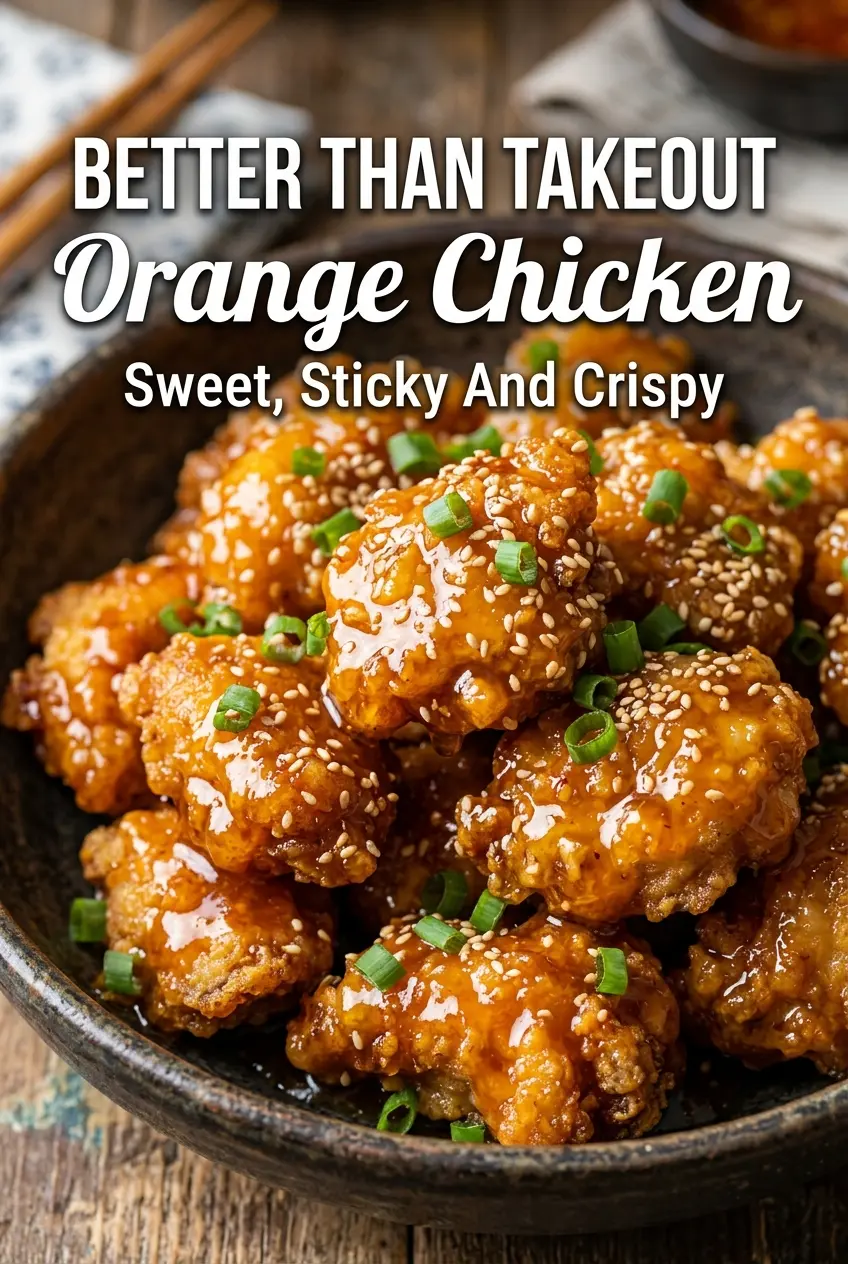
Crispy orange chicken earns its keep when the coating stays shatter-crisp long enough to hit the table and the sauce clings in a glossy layer instead of turning the whole thing soggy. That’s what makes this version worth making at home: you get the sweet-tangy orange sauce you expect, but the chicken still has real texture under it. The thighs stay juicy, the coating fries up with more crunch than a straight flour dredge, and the sauce gets cooked separately so it can thicken before it meets the chicken.
The trick is in the two-part coating. Cornstarch brings the crispness, flour gives the crust a little structure, and the beaten egg helps everything stick in a way that plain dry dredging won’t. The orange sauce also needs a quick simmer before the slurry goes in; if you dump cornstarch into a cold pan or rush the thickening, you end up with a sauce that tastes raw and never quite turns glossy.
Below, I’ll walk you through the frying cue that keeps the chicken from drying out, the sauce consistency you’re aiming for, and a couple of practical swaps if you want to adjust the heat or skip the deep fry.
The sauce got thick and sticky without turning candy-sweet, and the chicken stayed crunchy even after tossing. I used thighs like the recipe said and they were juicy all the way through.
Keep this orange chicken handy for the nights when you want sticky takeout-style sauce and a crisp coating that actually holds up.
The Crisp Coating That Keeps This Orange Chicken from Going Soggy
Most orange chicken goes soft because the sauce hits the chicken before the crust has any chance to hold up. The fix is to fry the pieces until they’re a deep golden color and the surface feels dry and firm, not pale and delicate. That crust needs to stand on its own for a minute or two while you finish the sauce.
Using both cornstarch and flour matters here. Cornstarch gives you that light, brittle crunch people want from takeout-style chicken, while the flour keeps the coating from tasting dusty or cracking off in big sheets. If you only use flour, the crust feels heavier. If you only use cornstarch, it can fry up a little fragile and uneven.
The other thing people miss is batch size. If the pan gets crowded, the oil temperature drops and the coating drinks up oil instead of crisping. Give the pieces room, and let them drain on a paper towel-lined plate before tossing them with the sauce.
What Each Ingredient Is Actually Doing in This Dish
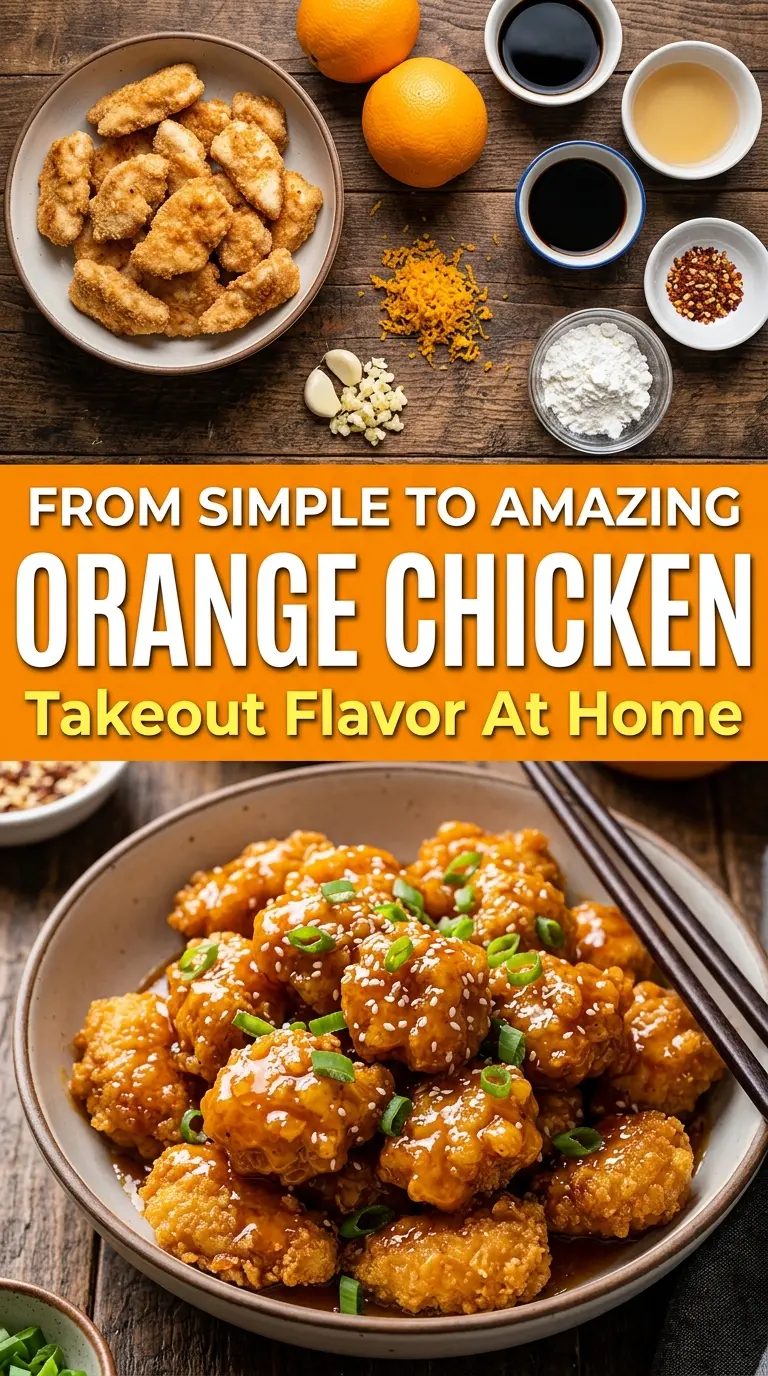
- Chicken thighs — Thighs stay juicier than breasts and hold up better once they’re tossed in sauce. Breast meat works in a pinch, but it dries faster and gives you less margin if you fry a little too long.
- Cornstarch and flour — This combination gives the coating structure and crunch. If you want the crispest finish, don’t swap in all flour; the texture won’t be as light.
- Orange juice and zest — Juice brings the sweet citrus base, while zest carries the stronger orange flavor that keeps the sauce from tasting flat. Fresh zest matters more than premium juice here.
- Soy sauce — It adds salt and depth so the sauce doesn’t taste like orange syrup. Use low-sodium if that’s what you keep on hand, but don’t skip it.
- Rice vinegar — This sharpens the sauce and keeps the sweetness in check. If you need a substitute, use apple cider vinegar in the same amount.
- Cornstarch slurry — This is what turns the sauce glossy and clingy. Stir it into a simmering sauce, not a boiling one, or it can seize unevenly and turn lumpy.
Frying, Simmering, and Tossing Everything at the Right Moment
Season and Coat the Chicken
Start by seasoning the chicken pieces before they go anywhere near the egg. The salt has to hit the meat early or the coating ends up tasting separate from the chicken itself. Dip each piece in the beaten eggs, then press it into the cornstarch-flour mixture so the surface looks fully dusted and a little shaggy. If you see bare spots, the crust will fry patchy and the sauce won’t cling evenly.
Fry in Small Batches
Heat the oil to 350°F and keep it there as best you can. When the chicken goes in, it should sizzle right away without the oil smoking. Fry until the pieces are deep golden and feel crisp when you lift one out with a spider or slotted spoon, usually 4 to 5 minutes. If the color is right but the crust still feels soft, the oil was too cool.
Build the Orange Sauce
Combine the orange juice, zest, soy sauce, brown sugar, vinegar, garlic, and ginger in a saucepan and bring it to a gentle simmer. You want the sugar fully dissolved and the garlic fragrant, not browned. Stir the cornstarch slurry again right before adding it, then pour it in while whisking or stirring constantly. The sauce will go from thin to glossy in a minute or two. Pull it off the heat as soon as it coats the back of a spoon.
Toss and Serve Fast
Add the fried chicken to the sauce and toss just until every piece is coated. Don’t let it sit in the pan after that, because the crust keeps absorbing sauce while it waits. Top with green onions and sesame seeds and serve immediately while the outside is still crisp and the sauce is sticky and warm.
Three Ways to Make This Orange Chicken Fit Your Kitchen
Gluten-Free Orange Chicken
Swap the all-purpose flour for a gluten-free all-purpose blend and use tamari instead of soy sauce. The coating will still crisp up nicely because the cornstarch is doing most of the crunch work, but the crust may be a touch more delicate than the original.
Baked or Air-Fried Version
Toss the coated chicken with a little oil and bake or air-fry until deeply golden. You won’t get the same shattering crust as deep frying, but you’ll still get a sturdy coating that stands up to the sauce better than a plain baked version.
Less Sweet, More Tangy
Cut the brown sugar back by a few tablespoons and add a little extra rice vinegar or a splash more orange zest. That shifts the sauce away from candy-sweet and closer to the bright, sticky balance you get from a good restaurant-style version.
Storage and Reheating
- Refrigerator: Store leftovers for up to 3 days. The coating softens once sauced, but the flavor stays strong.
- Freezer: Freeze the fried chicken and sauce separately for the best result. The sauced chicken doesn’t freeze well because the coating loses its crunch.
- Reheating: Reheat the chicken in a 375°F oven or air fryer until hot and crisp, then warm the sauce separately and toss together right before serving. Microwaving turns the coating soft fast.
Answers to the Questions Worth Asking
Better Than Takeout Orange Chicken
Ingredients
Equipment
Method
- Season the chicken pieces with salt and black pepper. Make sure every bite is evenly coated before dipping.
- Dip the seasoned chicken into the beaten eggs. Let excess egg drip off for a lighter coating.
- Coat the chicken with a mixture of cornstarch and all-purpose flour. Press gently so the dry coating adheres well.
- Heat vegetable oil to 350°F (175°C). Keep the temperature steady before you start frying.
- Fry the chicken in batches for 4–5 minutes until golden and crispy. Use a shallow crowding of pieces so the coating stays crisp.
- Transfer the fried chicken to a paper towel-lined plate. Let it rest briefly so excess oil drains away.
- In a saucepan, combine orange juice, orange zest, soy sauce, brown sugar, rice vinegar, garlic, and grated ginger. Stir to dissolve the sugar before heating.
- Bring the sauce to a gentle simmer. Cook just until it looks slightly bubbling and fragrant.
- Mix cornstarch and water in a small bowl to make a slurry. Stir until smooth with no dry lumps.
- Stir the slurry into the sauce and cook until thickened. The sauce should become glossy enough to cling to the chicken.
- Toss the crispy chicken with the orange sauce until evenly coated. Coat quickly so the crust stays crisp.
- Garnish with green onions and sesame seeds before serving. Sprinkle right on top for fresh color and crunch.
