
Roasted butternut squash gives these enchiladas a soft, caramelized sweetness that plays beautifully against smoky black beans and a sharp red enchilada sauce. The filling stays hearty without feeling heavy, and once the cheese melts into the sauce, you get that saucy, cozy pan of enchiladas that disappears fast at the table.
What makes this version work is the balance. The squash gets roasted first so it doesn’t turn watery in the baking dish, and the beans are seasoned in the skillet before everything is rolled up, which means the filling tastes complete instead of like separate ingredients tucked into a tortilla. A little cilantro at the end keeps the whole pan tasting fresh, not flat.
Below, I’ll walk through the trick that keeps the squash from steaming, the ingredient choices that matter most, and a few smart swaps if you need to work with what’s already in your kitchen.
The squash stayed tender but not mushy, and the enchiladas held together instead of sliding apart. I loved that the filling had enough spice on its own, so every bite tasted balanced even before the sauce and cheese on top.
These butternut squash and black bean enchiladas bake up saucy, smoky, and sturdy enough to slice cleanly.
The Reason the Squash Stays Sweet Instead of Watery
The mistake people make with vegetable enchiladas is treating the filling like a stew. That works against you here. Butternut squash holds a lot of moisture, and if it goes into the tortillas raw, it softens too much in the oven and can turn the whole pan loose and soggy. Roasting first changes everything. The edges caramelize, the cubes dry out just enough, and the squash keeps its shape after baking.
The other piece that matters is seasoning in layers. The squash gets its own spice coating, then the beans and corn get cooked with onion, garlic, and more cumin and chili powder. That gives you depth in every bite instead of one flat filling that tastes like vegetables and sauce.
What Each Ingredient Is Actually Doing in These Enchiladas
Butternut squash is the backbone here. It brings body, sweetness, and that soft, creamy texture that makes this filling feel substantial. You can use pre-cut squash to save time, but cut it into even cubes so it roasts at the same speed.
Black beans add heft and keep the enchiladas satisfying. Canned beans work perfectly; just rinse them well so the filling doesn’t taste starchy or muddy. Corn adds little pops of sweetness, and frozen corn is excellent here because it holds its shape and doesn’t need thawing first.
Red enchilada sauce matters more than people think. Use one you actually like, because it coats every bite. If your sauce tastes thin or sharp straight from the can, let the baked enchiladas rest for 10 minutes after they come out of the oven. That gives the sauce a chance to settle and thicken slightly around the tortillas. Monterey Jack melts smoothly, while a Mexican blend gives you a little more browning on top. Flour tortillas are softer and easier to roll; corn tortillas give you a deeper, more traditional flavor but need a quick warm-up so they don’t crack.
Roasting, Filling, and Baking Without a Watery Pan
Roasting the Squash Until the Edges Brown
Spread the squash in a single layer so the cubes roast instead of steam. If the pan is crowded, you’ll get soft squash with no caramelized edges, and that robs the filling of flavor. Pull it when the cubes are tender and you can see a little browning on the corners. A fork should slide in easily, but the squash shouldn’t collapse when you stir it.
Building the Bean Filling in the Skillet
Cook the onion until it turns translucent and loses its raw bite, then add the garlic for just long enough to smell fragrant. After that, stir in the beans, corn, cumin, chili powder, and smoked paprika. The pan should smell smoky and warm, not raw or dusty. Fold in the roasted squash at the end so it stays intact instead of breaking down into mash.
Rolling and Saucing the Pan
Warm the tortillas if they feel stiff, especially corn tortillas, or they’ll split while you roll. Spoon in the filling, add a small handful of cheese, and roll them tightly so the seam sits underneath in the baking dish. A thin layer of sauce on the bottom keeps the tortillas from sticking, and the rest goes over the top so every tortilla softens and absorbs flavor without drying out.
Baking Until the Sauce Bub-bles
Bake until the sauce is actively bubbling around the edges and the cheese has melted into glossy patches with a little color. If the top looks done but the middle is still cool, the pan needs a few more minutes. Let the enchiladas rest before serving; that pause helps them firm up enough to slice and serve without falling apart.
How to Adapt These Enchiladas for Different Kitchens and Diets
Make Them Gluten-Free with Corn Tortillas
Corn tortillas keep this recipe naturally gluten-free and give the enchiladas a deeper, more rustic flavor. Warm them in a dry skillet or wrap them in a damp towel and microwave briefly so they don’t crack when you roll them. They’re a little more delicate than flour tortillas, but the texture is worth it.
Dairy-Free Without Losing the Creamy Finish
Use a good melting dairy-free shredded cheese and don’t overload the pan. Too much vegan cheese can turn oily in the oven, so a moderate layer gives better results. The enchiladas will still taste rich because the roasted squash carries a lot of the creaminess on its own.
Add More Heat Without Throwing Off the Balance
Stir a pinch of cayenne or chopped chipotle in adobo into the bean mixture if you want a hotter filling. Keep the enchilada sauce mild enough that the whole dish doesn’t tip into bitterness. Heat works best here when it supports the squash’s sweetness instead of covering it up.
Storage and Reheating
- Refrigerator: Store covered for up to 4 days. The tortillas soften more as they sit, but the flavor gets even better by the next day.
- Freezer: These freeze well. Assemble and bake, then cool completely, wrap tightly, and freeze for up to 2 months. The texture is softer after thawing, but still very workable.
- Reheating: Reheat covered in a 350°F oven until hot in the center, about 20 to 25 minutes for a full pan or 1 to 2 minutes in the microwave for a single serving. Microwave uncovered and the tortillas can dry out around the edges before the middle heats through.
Answers to the Questions Worth Asking
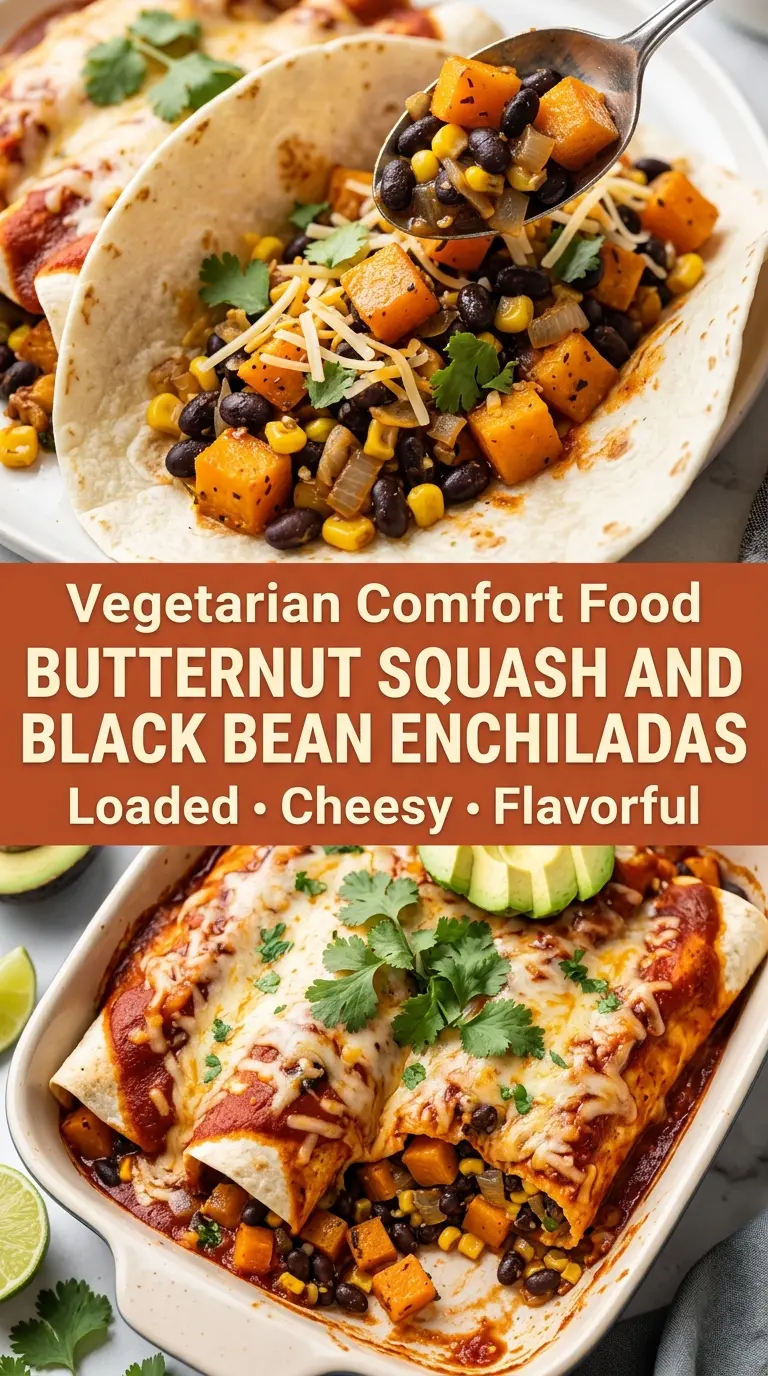
Butternut Squash and Black Bean Enchiladas
Ingredients
Equipment
Method
- Preheat the oven to 425°F and line a large baking sheet with parchment paper.
- Toss the butternut squash with 1 tablespoon olive oil, salt, ½ teaspoon ground cumin, and ½ teaspoon chili powder.
- Roast for 20–25 minutes, stirring halfway through, until tender and lightly caramelized around the edges.
- Heat the remaining tablespoon olive oil in a cast iron skillet over medium heat.
- Add the yellow onion and cook for 4–5 minutes until softened.
- Add the garlic and cook for 30 seconds.
- Stir in the black beans, corn, remaining ground cumin, remaining chili powder, and smoked paprika.
- Fold in the roasted butternut squash and fresh cilantro, then remove from the heat.
- Reduce the oven temperature to 375°F.
- Spread ½ cup red enchilada sauce across the bottom of a 9×13-inch baking dish.
- Fill each tortilla with about ½ cup of the squash and black bean mixture and a small handful of cheese, then roll tightly.
- Arrange the enchiladas seam-side down in the baking dish and pour the remaining red enchilada sauce over the tortillas.
- Sprinkle the remaining shredded Monterey Jack or Mexican-blend cheese evenly over the top.
- Bake for 20–25 minutes until the sauce bubbles and the cheese is melted with lightly golden spots.
- Finish with fresh cilantro and diced avocado.
- Serve with lime wedges on the side.
