Flaky cheddar pastry, juicy tomatoes, and a savory, bubbling top make this tart the kind of dish that disappears fast at lunch and somehow tastes even better the next day. The crust brings a sharp, almost biscuit-like richness, while the tomatoes soften just enough in the oven to stay vibrant instead of turning mushy. Every slice holds together cleanly, but the center still gives you that lush, creamy bite from the cheese filling.
The trick is treating the tomatoes like the main source of moisture they are. Slicing them and blotting them well keeps the crust from going soggy before it has a chance to bake through. The cheddar goes in twice here: once in the crust for flavor and once in the filling for structure, so you get a tart that tastes deeply savory instead of leaning on mayonnaise alone.
Below, you’ll find the exact signs to watch for as the tart bakes, plus a few ways to adapt it if your tomatoes are extra juicy or you want to work with what’s already in the fridge.
The tomatoes stayed bright and the crust was crisp all the way through, even after sitting for a bit. I followed the tip to blot the slices dry and the tart cut into neat wedges instead of sliding apart.
Save this heirloom tomato tart with cheddar crust for the next time you want crisp pastry, creamy cheddar filling, and tomatoes that stay front and center.
The Mistake That Makes Tomato Tarts Soggy Before They Hit the Table
The filling in this tart is rich, but the real enemy is moisture. Heirloom tomatoes can look dry on the cutting board and still dump a surprising amount of juice once they hit heat, which is how a crisp shell turns soft underneath. Prebaking the crust gives the cheddar in the dough a chance to set and start browning before the filling goes in.
Mayonnaise helps here, too, but not because it makes the tart heavy. It acts like a creamy binder that holds the cheddar and herbs in place while the tomatoes roast on top. If you skip the dry crust step or pile on wet slices, the tart still tastes good, but it won’t slice the way it should.
What Each Ingredient Is Actually Doing in This Tart
- All-purpose flour — Gives the crust enough structure to hold the filling without turning tough. A pastry flour swap works, but the tart shell will be a little more delicate and harder to lift in clean wedges.
- Sharp cheddar cheese — This does the heavy lifting for flavor. Use a block and shred it yourself if you can, because pre-shredded cheese is coated and melts less smoothly.
- Cold unsalted butter — The cold butter creates the flaky layers in the crust. If it softens before baking, the shell bakes up denser and loses that clean break at the edge.
- Heirloom tomatoes — Their flavor is the point of the tart, so choose ripe tomatoes with deep color and a little give. If yours are extra juicy, slice them thicker and blot both sides well before assembling.
- Mayonnaise — It gives the filling body and helps everything brown on top. Use a good-quality mayo if you can; the flavor comes through more than you’d expect.
- Fresh basil and chives — Basil brings sweetness and chives add a mild onion note that keeps the tart from tasting flat. Dried herbs won’t give the same fresh finish here.
- Garlic — Just enough to round out the cheese without turning the tart sharp or aggressive. Mince it finely so it disperses evenly in the filling.
Building the Crust and Topping So They Bake at the Same Pace
Mixing the cheddar dough
Pulse the flour, salt, butter, and cheddar until the mixture looks sandy with a few pea-sized bits of butter still showing. Those little butter pieces are what give you flake, so don’t process it into a paste. Add the ice water gradually, stopping as soon as the dough holds together when pressed. If the dough feels sticky, it’s too wet and will shrink more in the oven.
Blind baking the shell
Roll the dough into the tart pan, prick the bottom, and bake it just until the edges set and the surface loses its raw look. You’re not looking for full color yet. You’re giving the crust a head start so it can stay crisp under the filling. If the shell puffs, press it down gently with the back of a spoon while it’s still hot.
Layering the filling
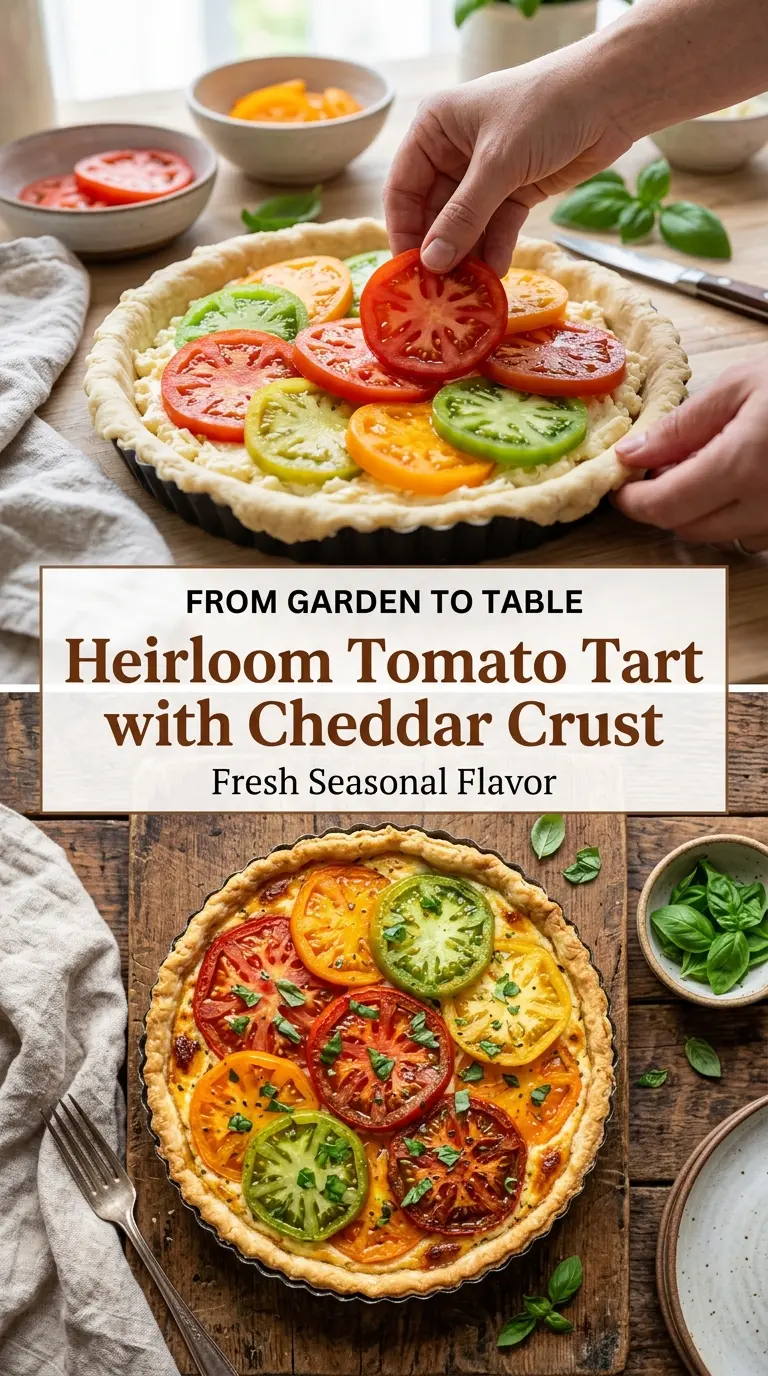
Spread the cheddar-mayo mixture in an even layer so the tomatoes sit on a stable base instead of sliding around. Arrange the tomato slices in overlapping rows and keep the thickest pieces toward the outer edge, where they’ll get a little more heat. A loose, messy pile traps steam, so build it in a tidy layer.
Finishing the bake
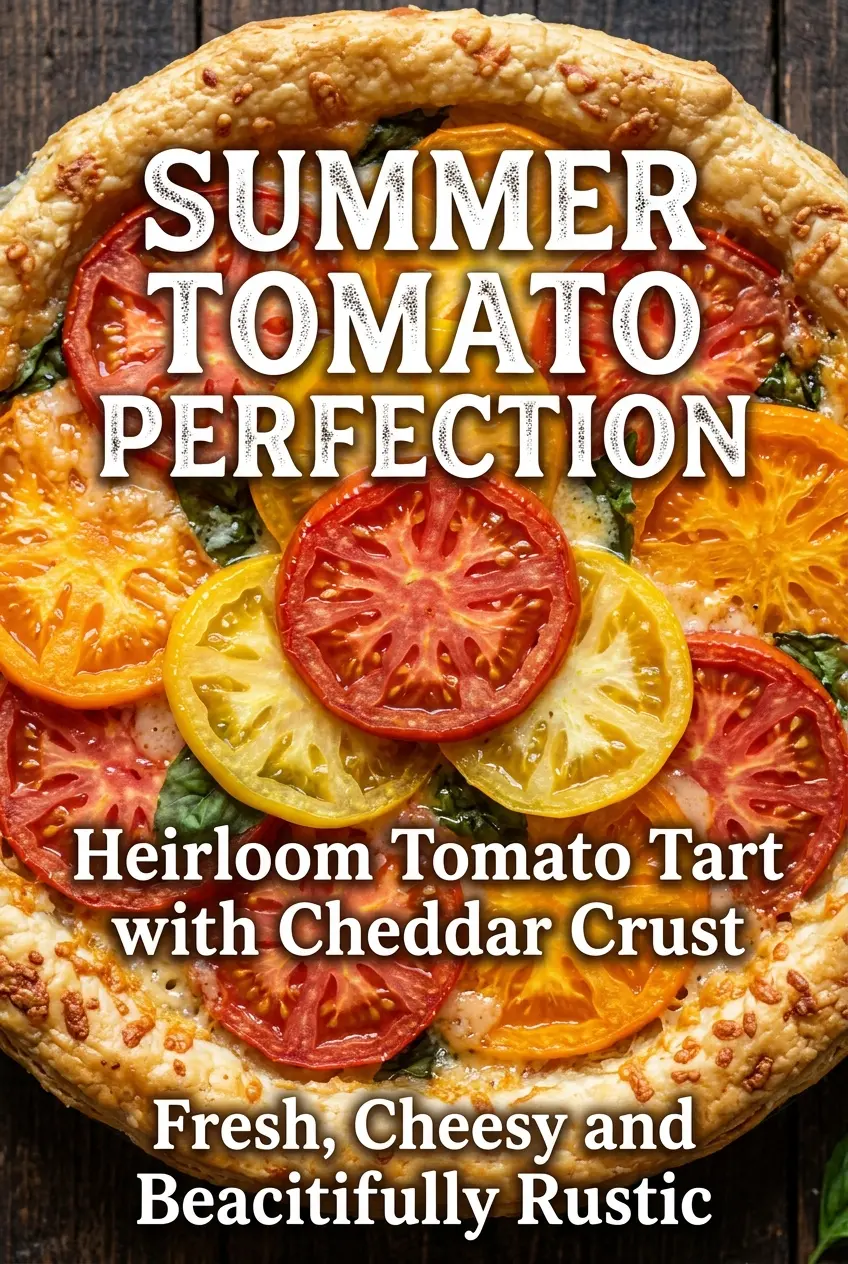
Bake until the top is bubbling and the crust is a deep golden color at the rim. The center should look set, not wet, and the tomato edges should be slightly wrinkled. If the top browns before the crust is done, tent it loosely with foil and give the shell a few more minutes. Letting it rest before slicing matters; that short wait keeps the cheese filling from running everywhere.
How to Adapt This Tart When Your Tomatoes, Time, or Diet Need a Different Plan
Gluten-Free Crust Swap
Use a 1:1 gluten-free flour blend that includes xanthan gum, and keep the dough cold all the way through rolling. The tart will still bake up crisp, but gluten-free dough is more fragile, so line the pan carefully and patch any cracks with scraps before the blind bake.
No Mayonnaise Version
Swap the mayonnaise for full-fat sour cream or thick Greek yogurt if that’s what you have. The filling will taste a little tangier and less rich, but it still holds the cheese together and gives the top a creamy set.
Extra Juicy Tomatoes
Salt the slices lightly, let them sit for 10 minutes, then blot them again before assembling. That pulls out surface moisture so the tart bakes up cleaner and the bottom crust doesn’t soften before the center sets.
Make-Ahead Lunch Tart
Blind bake the crust and mix the filling a few hours ahead, then assemble and bake just before serving. That keeps the shell crisp and saves you from scrambling when guests arrive.
Storage and Reheating
- Refrigerator: Store leftovers covered for up to 3 days. The crust softens a little, but the flavor stays excellent.
- Freezer: This tart doesn’t freeze well once baked because the tomatoes turn watery after thawing. If you need to freeze ahead, freeze the blind-baked crust only.
- Reheating: Warm slices on a baking sheet in a 350°F oven until the center is hot and the crust firms back up. The microwave will make the tomatoes collapse and the crust go limp.
Answers to the Questions Worth Asking
Heirloom Tomato Tart with Cheddar Crust
Ingredients
Equipment
Method
- Combine all-purpose flour and salt in a food processor, then pulse briefly to distribute evenly.
- Add cold cubed unsalted butter and pulse until the mixture looks crumbly and unevenly sized.
- Add sharp cheddar cheese and pulse just until the cheese is evenly mixed throughout the crumbs.
- Drizzle in ice water, pulsing until the dough comes together when pressed.
- Form the dough into a disk, wrap, and chill for 30 minutes to firm it up.
- Preheat oven to 375°F (190°C).
- Roll the chilled dough into a 12-inch circle and fit it into a tart pan, trimming any excess.
- Prick the crust all over with a fork, then bake for 10 minutes to set the base.
- Pat the sliced heirloom tomatoes dry with paper towels to prevent a soggy tart.
- Mix mayonnaise, sharp cheddar cheese, chopped basil, chives, minced garlic, black pepper, and salt until smooth and evenly combined.
- Spread the cheese mixture over the partially baked crust in an even layer.
- Arrange the tomato slices on top in overlapping layers, keeping them snug but not packed.
- Bake for 30–35 minutes, until the tart is golden and the filling is bubbly at the edges.
- Cool for 10 minutes before slicing so the filling sets.
- Garnish with fresh basil and serve.
