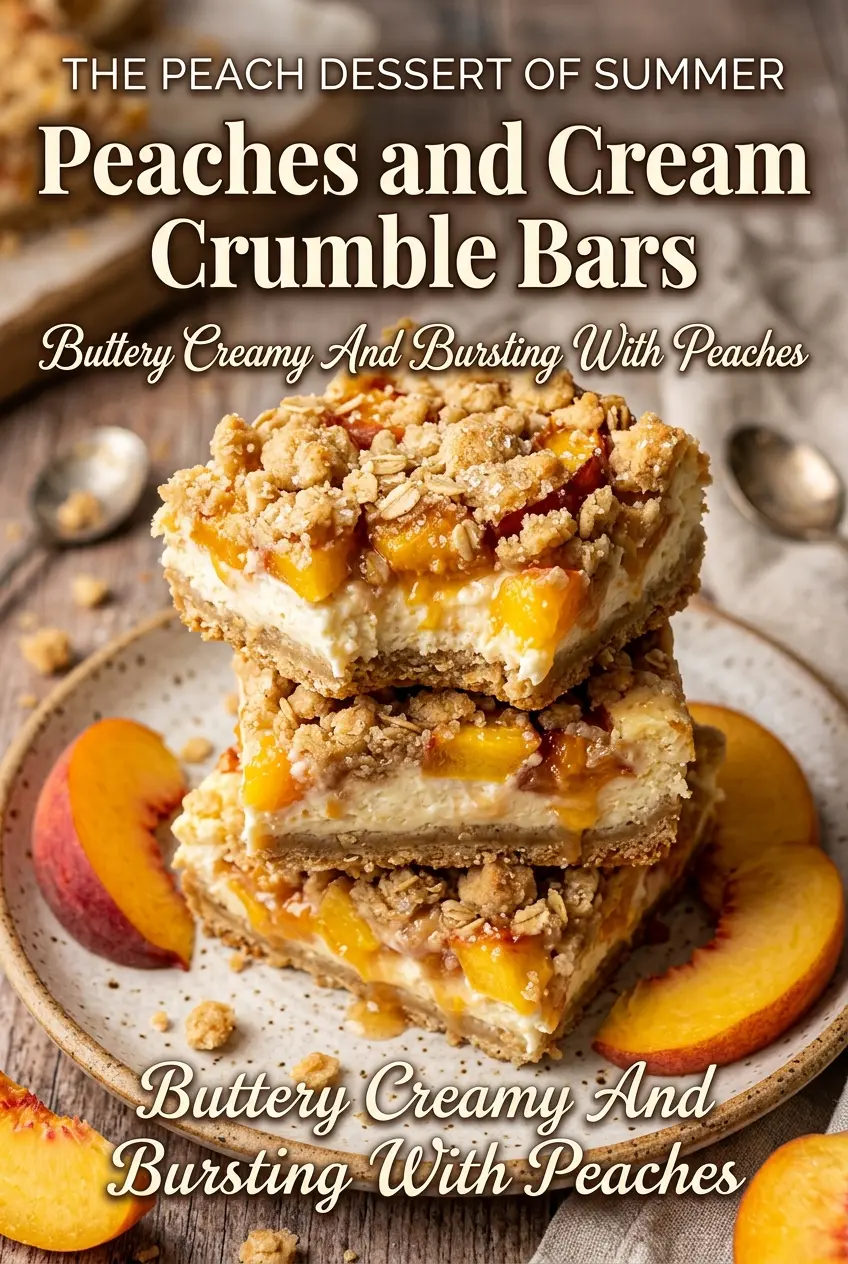
Buttery crumble, juicy peaches, and a tangy cream cheese layer turn these bars into something that lands between peach pie and cheesecake, but with far less fuss. The base bakes up sturdy enough to hold clean slices, while the topping stays crisp at the edges and tender in the middle. When they cool, the filling sets into neat layers instead of sliding apart, which is exactly what you want in a bar cookie.
The key is giving the crust a short head start in the oven before the cream layer goes on. That keeps the bottom from turning soggy once the peaches release their juices. A little cornstarch with the fruit helps thicken the juices as it bakes, and the cream cheese layer brings just enough richness to balance the sweetness without making the bars heavy.
The crust stayed crisp, the peach layer thickened up instead of running everywhere, and the cream cheese filling tasted like cheesecake without being too sweet. I chilled them overnight and they cut into perfect bars the next day.
Save these Peaches and Cream Crumble Bars for the days when you want peach pie flavor with a creamy cheesecake layer and an easy bar-cookie finish.
The Reason These Bars Slice Clean Instead of Collapsing
Bar desserts like this fail when the layers are too warm or too loose. The crust needs that first bake so it can support the filling, and the bars need a full cool-down before slicing or the cream layer will smear and the peach juices will run. The other common mistake is using fruit that is too wet; that gives you a soft center and a crust that never quite sets up underneath.
Two small things matter here. First, press the bottom layer firmly enough that it looks packed, not sandy, so it can stand up to the peach juices. Second, use the crumb topping as a loose blanket, not a solid lid — a few gaps let steam escape and keep the top crisp instead of doughy.
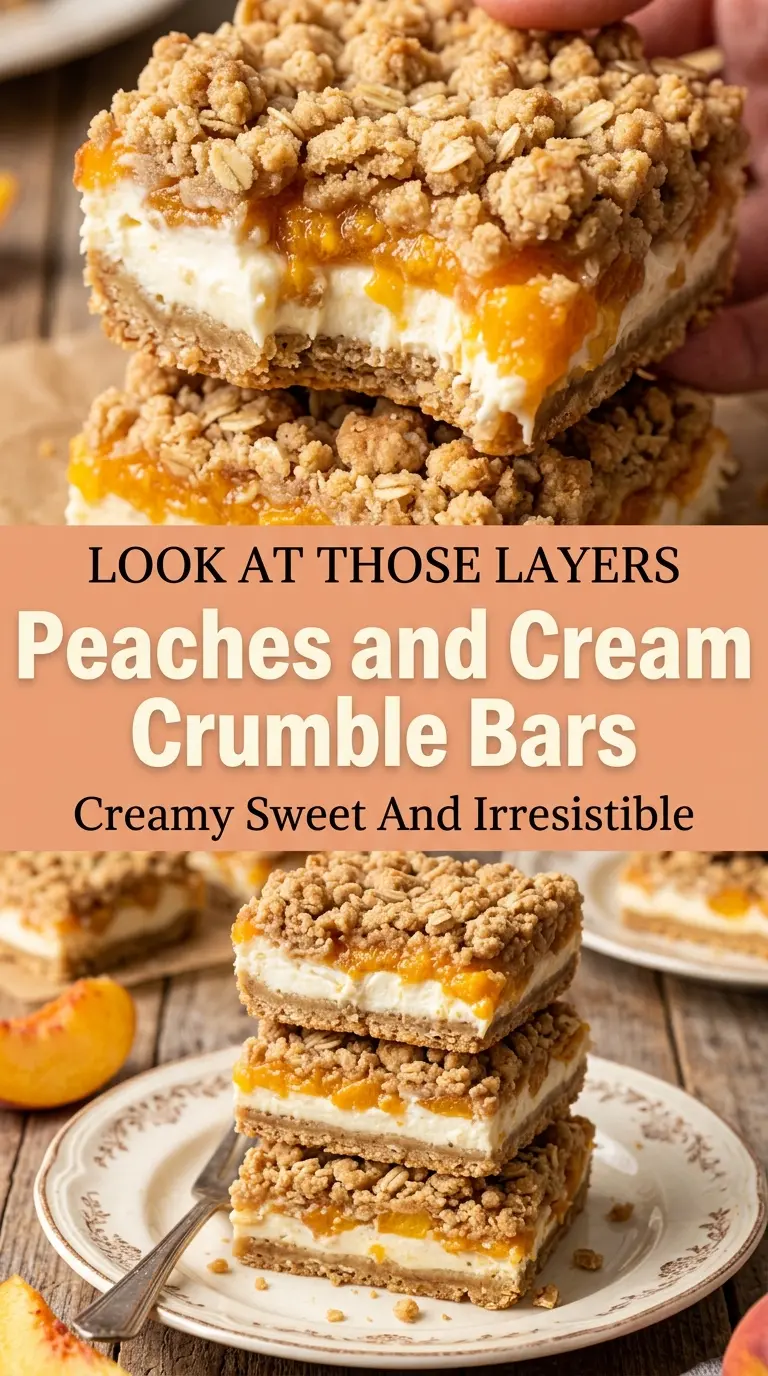
What Each Layer Is Doing in the Pan
- All-purpose flour — This gives the crumble enough structure to bake into a bar that holds together. A 1:1 gluten-free baking blend can work here if it contains xanthan gum, but the texture will be a little more delicate.
- Old-fashioned oats — They bring the crumbly, nubby texture that makes these bars feel like a real crumble dessert. Quick oats turn softer and pastier, so stick with old-fashioned if you want distinct pieces in the topping.
- Brown sugar — It adds caramel notes and helps the crumble brown. Light or dark brown sugar both work; dark brown sugar gives a deeper molasses note.
- Cream cheese — This is the layer that makes the bars taste like peach cheesecake instead of just fruit bars. Full-fat cream cheese gives the cleanest set and the best flavor; reduced-fat versions can bake up softer.
- Fresh peaches — Juicy, ripe peaches are worth using when they’re in season because they bring the best flavor and the least work. If yours are very soft, dice them a little larger so they don’t disappear into the filling.
- Cornstarch — It thickens the peach juices as the bars bake, which keeps the middle from turning watery. Arrowroot can work in place of cornstarch, but it can make the filling a little glossier and softer.
- Lemon juice — A small amount sharpens the peaches and keeps the filling from tasting flat. Fresh lemon is best here because bottled juice can taste blunt in such a simple dessert.
Building the Layers So the Bars Stay Crisp
Mixing the Crumble
Stir the flour, oats, brown sugar, cinnamon, and salt together first so the butter coats everything evenly. Once the melted butter goes in, the mixture should look like damp sand with some larger clumps. If it turns greasy or paste-like, the butter was too hot or the mixture got overmixed. Let it sit for a minute if it feels loose; the oats absorb some of the moisture.
Prebaking the Base
Press two-thirds of the crumble firmly into the parchment-lined pan, then bake it just until the surface looks set and the edges start to deepen in color. You are not trying to fully brown it here. This short bake creates a barrier so the cream layer and peach juices don’t soak straight into the bottom. If you skip this, the bars usually bake up soft underneath and harder to slice cleanly.
Spreading the Cream Layer
Beat the cream cheese, sugar, egg, and vanilla until smooth before spreading it over the warm crust. Warm crust helps the layer settle evenly, but the crust should not be hot enough to melt the filling. If the cream cheese is even a little lumpy before baking, those bits tend to stay lumpy after baking, so soften it fully first.
Finishing with Peaches and Crumble
Toss the diced peaches with sugar, cornstarch, and lemon juice, then spoon them over the cream layer so the juices stay contained. Scatter the remaining crumble over the top without packing it down. Bake until the top is golden and you can see the filling bubbling around the edges. That bubbling tells you the cornstarch has activated and the center will set as it cools.
Three Useful Ways to Adapt These Bars
Make Them Gluten-Free
Use a good 1:1 gluten-free flour blend in place of the all-purpose flour and keep the oats certified gluten-free. The bars will still hold together, but the crumble may be a touch more tender and less snappy when chilled.
Use Frozen Peaches When Fresh Aren’t Great
Frozen peaches work well if you thaw them first and drain off excess liquid before tossing them with the sugar and cornstarch. If you skip that step, the extra water can make the center loose and extend the bake time.
Cut the Dairy Without Losing the Bar Shape
A plant-based cream cheese can stand in for the dairy version if you want a dairy-free bar, but choose one that bakes well rather than a whipped tub style. The filling will be a little softer, so chill the bars longer before slicing.
Storage and Reheating
- Refrigerator: Store in an airtight container for up to 5 days. The crust stays best on days 1–3, then softens a little from the peach filling.
- Freezer: These freeze well. Wrap individual bars tightly and freeze for up to 2 months, then thaw in the refrigerator so the cream layer stays smooth.
- Reheating: Serve chilled or let a bar sit at room temperature for 15 to 20 minutes. Microwaving softens the crumble and can make the filling weep, so it’s better to thaw slowly than rush it.
Answers to the Questions Worth Asking
Peaches and Cream Crumble Bars
Ingredients
Equipment
Method
- Preheat oven to 350°F (175°C). Line a 9×13-inch baking pan with parchment paper for easy lifting.
- In a large bowl, combine all-purpose flour, old-fashioned oats, brown sugar, cinnamon, and salt. Stir until evenly mixed.
- Add melted unsalted butter and mix until the mixture turns crumbly. Make sure no dry patches remain.
- Press two-thirds of the crumble mixture into the bottom of the pan. Pack it firmly for a cohesive base.
- Bake for 10 minutes. Let it sit briefly so it’s ready for the filling.
- In a bowl, beat cream cheese, granulated sugar, egg, and vanilla extract until smooth. Scrape the sides so the filling stays lump-free.
- Spread the cream cheese mixture over the warm crust. Use an even layer so the bars bake uniformly.
- Toss fresh peaches with granulated sugar, cornstarch, and lemon juice. Mix until the peaches are glossy and the cornstarch is fully distributed.
- Spread the peaches evenly over the cream layer. Keep them level so they don’t sink unevenly.
- Sprinkle the remaining crumble mixture over the peaches. Cover the surface lightly for an even golden top.
- Bake for 35–40 minutes until golden brown. Look for bubbling at the edges and set cream in the center.
- Cool completely before slicing into bars. This prevents the bars from breaking or smearing.
- Refrigerate for at least 1 hour for clean slices. Chill until firm before cutting.
