
Pumpkin Spice Rice Krispie Treats hit that sweet spot between nostalgic and new: the bars stay chewy, the marshmallow stays soft, and the pumpkin spice comes through without turning the whole pan heavy. The pumpkin puree gives these a deeper, cozier flavor than a plain marshmallow square, and the extra handful of mini marshmallows folded in at the end keeps every bite a little gooier than expected.
The part that matters most here is cooking the pumpkin puree long enough to drive off some moisture before the marshmallows go in. If you skip that, the bars can turn sticky in the wrong way and lose that clean chew you want from a cereal treat. The spice goes in early too, right after the butter and pumpkin, so it blooms in the fat instead of tasting dusty on the finish.
Below, I’ll walk through the small details that keep these bars soft instead of hard, plus a few swaps that work when you want a dairy-free version or need to use what’s already in the pantry.
The pumpkin flavor came through without making the bars wet, and the little pockets of extra marshmallow were the best part. I pressed them just lightly like you said, and they stayed soft even after sitting on the counter all afternoon.
Save these Pumpkin Spice Rice Krispie Treats for the kind of fall snack that stays chewy, gooey, and full of warm spice.
The Reason These Bars Stay Chewy Instead of Sticky
Pumpkin puree is the ingredient that can make or break this recipe. It adds flavor, but it also adds water, and too much moisture is what turns cereal bars from tender and chewy into dense and damp. Cooking the pumpkin with the butter first gives that moisture a chance to cook off before the marshmallows go in, which is the difference between a clean bite and a soft, gummy one.
The other thing that matters is heat. Marshmallows melt fast, but if the pot is too hot, they seize up and get stiff before they’ve had a chance to coat the cereal evenly. Low heat keeps the mixture smooth, and removing the pot from the burner before adding the cereal keeps the texture light instead of overworked.
What Each Ingredient Is Actually Doing in This Dish
- Unsalted butter — Butter gives the treats their rich, rounded base and helps the pumpkin spices bloom. Unsalted is the better choice here because it keeps the seasoning under control. If salted butter is what you have, use it and reduce the added salt slightly.
- Pumpkin puree — This is the flavor and color source, but it needs a little pre-cooking to behave. Use plain pumpkin puree, not pumpkin pie filling, which already contains sugar and spices and throws the balance off. Canned puree works just as well as homemade here, and honestly gives more consistent results.
- Pumpkin pie spice and cinnamon — Pumpkin pie spice gives the warm, familiar note, while the extra cinnamon sharpens it. If your spice blend is old, the bars will taste flat, so check that it still smells fragrant before you use it. You can substitute an equal mix of cinnamon, nutmeg, ginger, and cloves if that’s what’s in your cabinet.
- Mini marshmallows — The first batch creates the binder, and the reserved handful folded in at the end gives those soft pockets everyone loves. Mini marshmallows melt faster than large ones and keep the mixture smoother. If you only have big marshmallows, cut them up so they melt evenly.
- Crisp rice cereal — This is the structure of the whole bar, so use a fresh box if you can. Stale cereal turns the treats dull and tough instead of crisp and light. If you need a gluten-free version, use a certified gluten-free crisp rice cereal and check the marshmallows too.
How to Keep the Pumpkin From Making the Bars Heavy
Cooking Off the Extra Moisture
Start by melting the butter over medium-low heat, then stir in the pumpkin puree and keep it moving for a couple of minutes. You’re looking for the mixture to loosen slightly and then look thicker, not watery, with no puddle collecting around the edges. If it still looks wet and glossy like soup, keep cooking for another minute or two; that moisture has to leave before the bars can set properly.
Melting the Marshmallows Without Overheating Them
Once the spices go in, add the marshmallows and stir over low heat until they melt into a smooth, stretchy mass. The mixture should look shiny and pull into soft ribbons off the spoon. If the heat is too high, the marshmallow can turn grainy or stiff, and once that happens there’s no fixing it except starting over.
Folding, Not Pressing
Take the pot off the heat before adding the cereal, then fold gently until every piece is coated. After that, stir in the reserved marshmallows while the mixture is still warm so some of them stay intact. When you move the mixture into the pan, press it down just enough to level it; packing it hard is what gives you brick-like treats instead of tender ones.
Dairy-Free Version
Use a plant-based butter that melts cleanly and has a neutral flavor. The texture stays close to the original, though the flavor will be a little less rich and a bit more sweet-forward. Pick a dairy-free marshmallow brand if you need the whole recipe to stay dairy-free.
Extra Pumpkin Spice, Bigger Autumn Flavor
Add another 1/4 teaspoon of pumpkin pie spice if you want the warm spice to stand out more. That pushes the bars farther into spice-cake territory, but keep the extra amount modest or the cloves can take over. The marshmallow still keeps the overall flavor soft and kid-friendly.
Brown Butter for a Toastier Finish
Brown the butter first, then add the pumpkin puree and continue with the recipe as written. The flavor turns deeper and nuttier, which works well with the cinnamon and pumpkin spice. Watch the pan closely, because brown butter can tip into burnt butter in a matter of seconds.
Storage and Reheating
- Refrigerator: Store in an airtight container for up to 3 days. The bars firm up in the fridge, so let them sit at room temperature before serving if you want the softest texture.
- Freezer: These freeze well. Wrap individual squares tightly and freeze for up to 2 months, then thaw at room temperature so the marshmallow doesn’t turn hard and brittle.
- Reheating: These don’t need true reheating, but if they’ve gone stiff, a few seconds at room temperature after unwrapping helps. Don’t microwave them for long, or the cereal will turn leathery and the marshmallow will melt out of the bar.
Answers to the Questions Worth Asking
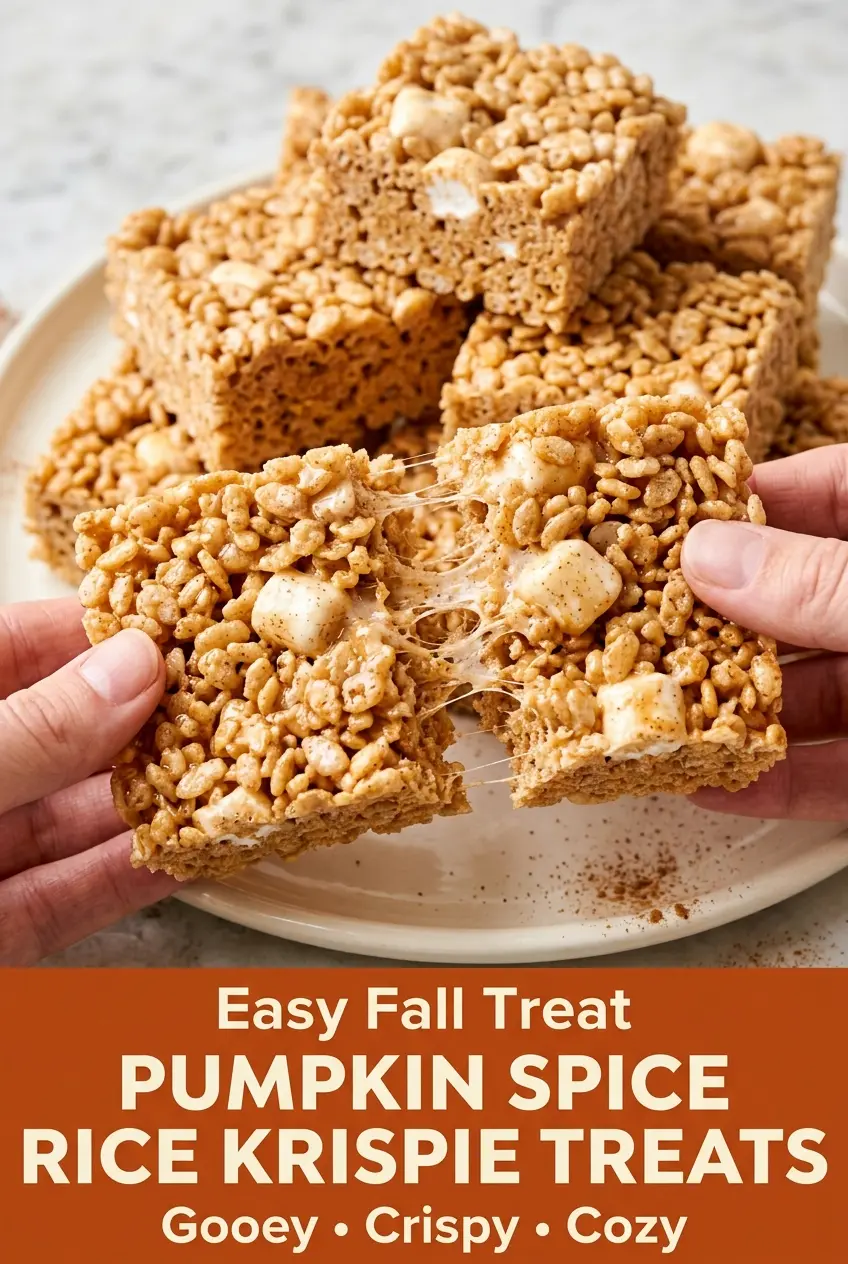
Pumpkin Spice Rice Krispie Treats
Ingredients
Equipment
Method
- Line a 9 × 13-inch baking pan with parchment paper and lightly grease the parchment.
- Melt the unsalted butter in a large pot over medium-low heat, then add pumpkin puree and cook for 2–3 minutes, stirring frequently, until some excess moisture evaporates.
- Stir in pumpkin pie spice, ground cinnamon, vanilla extract, and kosher salt, then cook about 30 seconds until fragrant.
- Add the mini marshmallows and stir over low heat for 2–3 minutes until completely melted and smooth.
- Remove the pot from the heat and immediately add the crisp rice cereal, folding gently until evenly coated.
- Fold in the reserved 1 cup mini marshmallows while the mixture remains warm, leaving some partially intact for extra gooey pockets.
- Transfer the mixture to the prepared pan and press gently into an even layer without compacting it too firmly.
- Cool at room temperature for about 45–60 minutes until set.
- Lift the treats from the pan using the parchment, then cut into 12–16 generous squares and serve.
