
When a fork slips easily into the biggest sweet potato chunk, the filling is ready for the next step; stop short and you’ll find stubborn pieces in every scoop. This sweet potato casserole with marshmallows starts with peeled chunks simmered until tender, then mashed with butter and stirred together with brown sugar, milk, eggs, vanilla, and salt. The filling goes into a 9×13-inch dish before the marshmallows ever come out of the package.
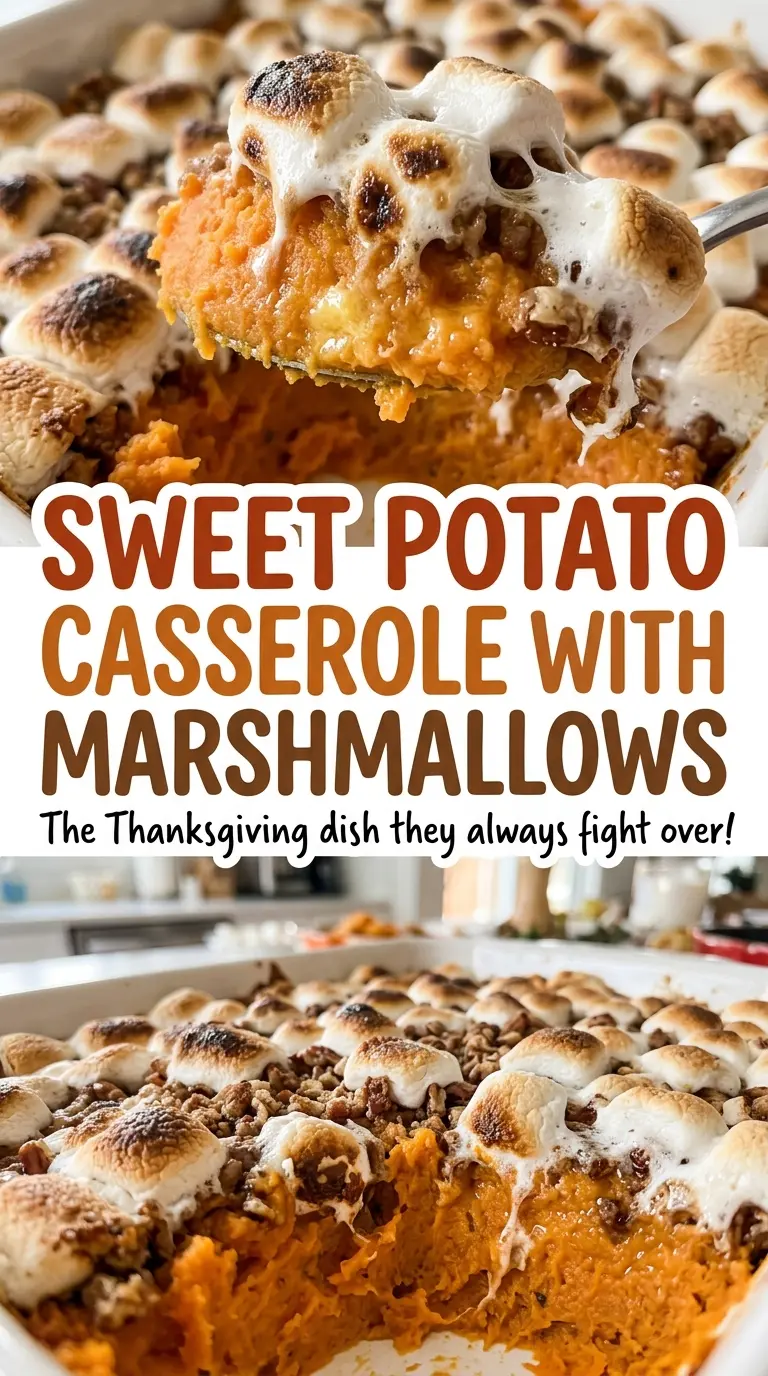
I bake the sweet potato base first and add the mini marshmallows only after the center reaches 160°F. That gives the filling time to set while the topping gets its own short bake, turning puffed and golden instead of sitting in the oven for the entire time. After a 10-minute rest, the casserole is soft enough to scoop and the marshmallow top has a little structure, with browned peaks over the warm, buttery filling.

Kitchen Note
Give the potatoes their full 5-minute cool-down before adding the eggs. The butter melts into the hot mash first, and that brief pause keeps the eggs from scrambling as you stir them in.
Save this sweet potato casserole with marshmallows for its soft, buttery filling and golden mini-marshmallow crown.
Why the Marshmallows Go On After the Sweet Potato Base Sets
The topping and filling need different amounts of oven time. The sweet potato mixture contains eggs, so it needs to bake until the center reaches 160°F; that’s the point where the base has had time to set. Mini marshmallows need far less time to puff and turn golden. If they go on at the beginning, they sit in the oven through the whole bake and can darken before the center is ready.
That’s why I treat this as two short bakes rather than one long one. First, spread the filling evenly and let it bake without a topping. Once the center is at temperature, scatter the marshmallows across the surface and return the dish to the oven until they’re puffed and golden. The contrast is what makes the casserole work: a tender, gently sweet base under a toasted, pillowy top. Watch the color during the topping bake; golden is the cue to pull it, not a deeply browned marshmallow layer.
What Each Ingredient Brings to the Sweet Potato Filling
- Sweet potatoes — Start with firm, fresh sweet potatoes; their natural sweetness and starch give the filling its body. Peel and cut them into evenly sized chunks so they soften at about the same pace. Canned puree isn’t a direct stand-in here because its moisture varies and it skips the boil-and-drain step that helps control the filling’s texture.
- Unsalted butter — Butter rounds out the sweet potatoes and makes the mash rich without adding extra salt. Unsalted is useful because you can control the seasoning; salted butter works in the same amount, but leave out the added kosher salt to avoid an overly salty filling.
- Light brown sugar — The molasses in brown sugar gives the filling a warm sweetness that fits the toasted topping. Dark brown sugar can replace it in the same amount for a more pronounced molasses taste, though the casserole will taste a little less delicate.
- Whole milk — Whole milk loosens the mash while keeping it creamy. Unsweetened oat milk can replace it in the same amount for a dairy-free filling; choose an unflavored version so it doesn’t bring sweetness or another taste into the casserole.
- Eggs — Eggs help the filling hold together after baking, so each serving scoops more cleanly than a loose mash. They’re not an ingredient I’d simply omit if you want the casserole to set; the center would remain softer.
- Vanilla extract — Vanilla gives the sweet potato and brown sugar a rounded, dessert-like aroma without taking over. Vanilla paste can replace the extract in the same amount, while imitation vanilla is fine if that’s what you keep on hand.
- Mini marshmallows — Minis spread into an even layer and puff quickly, which makes them a good fit for the short final bake. If you only have regular-size marshmallows, cut them into smaller pieces so they cover the filling more evenly; keep the total weight the same.
The Two-Stage Bake for a Set Center and Toasted Top
Start with an evenly tender batch of potatoes
Heat the oven to 350°F and lightly coat a 9×13-inch baking dish with nonstick cooking spray. Put the peeled, 1 1/2-inch sweet potato chunks in a 6-quart pot and cover them with cold water by 1 inch. Bring the water to a boil, then lower it to a simmer for 15 to 20 minutes. They’re ready when a fork slides into a chunk easily; drain the pot well.
Mash while the potatoes are still warm
Let the drained potatoes cool for 5 minutes, then mash them with the butter. Stir in the brown sugar, milk, eggs, vanilla, and salt until the mixture is combined. You’re looking for a cohesive filling without large hard pieces; stop once the ingredients are incorporated rather than stirring longer than needed. If the mixture looks uneven, scrape the sides and bottom of the bowl and stir again.
Bake the filling before adding the topping
Spread the sweet potato mixture in the prepared dish, nudging it into the corners so the layer is even. Bake for 25 to 30 minutes, until the center reaches 160°F. Check the middle rather than relying only on the edges, which heat first. An instant-read thermometer gives you a clear answer without guessing from the surface color.
Toast the marshmallows and let the casserole rest
Scatter the mini marshmallows evenly over the baked filling, then return the dish to the oven for 8 to 12 minutes. Pull it when the marshmallows are puffed and golden; they’ll continue to settle as the casserole rests. Let the dish stand for 10 minutes before serving so the filling can firm up enough to scoop. The top will be at its softest and airiest right after this short rest.
Ways to Change the Sweetness and Texture
Make the casserole dairy-free
Use dairy-free butter in place of the unsalted butter and unsweetened oat milk instead of whole milk, keeping the same quantities. The filling will still bake with the eggs, but the butter notes will be a little different and the oat milk may make it taste slightly less rich.
Dial back the sweetness
Use less brown sugar in the filling and reserve some of the mini marshmallows instead of covering the whole surface. You’ll get more of the sweet potato’s earthy taste and a lighter topping, though the marshmallows won’t form as thick a blanket.
Keep a little texture in the mash
For a more rustic casserole, stop mashing while a few small, soft pieces of sweet potato remain instead of working the filling completely smooth. The result feels more like mashed sweet potatoes under the marshmallow layer, with a little more variation from scoop to scoop.
Storage and Reheating
- Refrigerator: Refrigerate leftovers within 2 hours, cover, and keep for up to 4 days. The filling firms as it chills, and the marshmallow topping turns stickier.
- Freezer: Freeze portions in an airtight container for up to 2 months. The filling holds up, but the marshmallows won’t be as airy after thawing.
- Reheating: Cover a portion or baking dish with foil and warm in a 325°F oven until hot throughout. Uncover near the end only if you want to refresh the top, and keep an eye on it so the marshmallows don’t brown before the center warms.
Questions That Come Up While the Casserole Bakes
Sweet Potato Casserole with Marshmallows
Ingredients
Equipment
Method
- Heat the oven to 350°F.
- Lightly coat a 9x13-inch baking dish with nonstick cooking spray.
- Put the sweet potatoes in a 6-quart pot and cover with cold water by 1 inch; bring to a boil, then simmer for 15 to 20 minutes, until fork-tender.
- Drain the sweet potatoes well.
- Let the potatoes cool for 5 minutes.
- Mash the potatoes with the butter.
- Stir in the brown sugar, milk, eggs, vanilla, and salt until combined.
- Spread the sweet potato mixture in the prepared dish and bake for 25 to 30 minutes, until the center reaches 160°F.
- Scatter the marshmallows evenly over the top and bake for 8 to 12 minutes, until puffed and golden.
- Let the casserole rest for 10 minutes before serving.
